Chapter 2 Osmo1 user interface
22
Osmo1® Single-Sample Micro-Osmometer User Guide
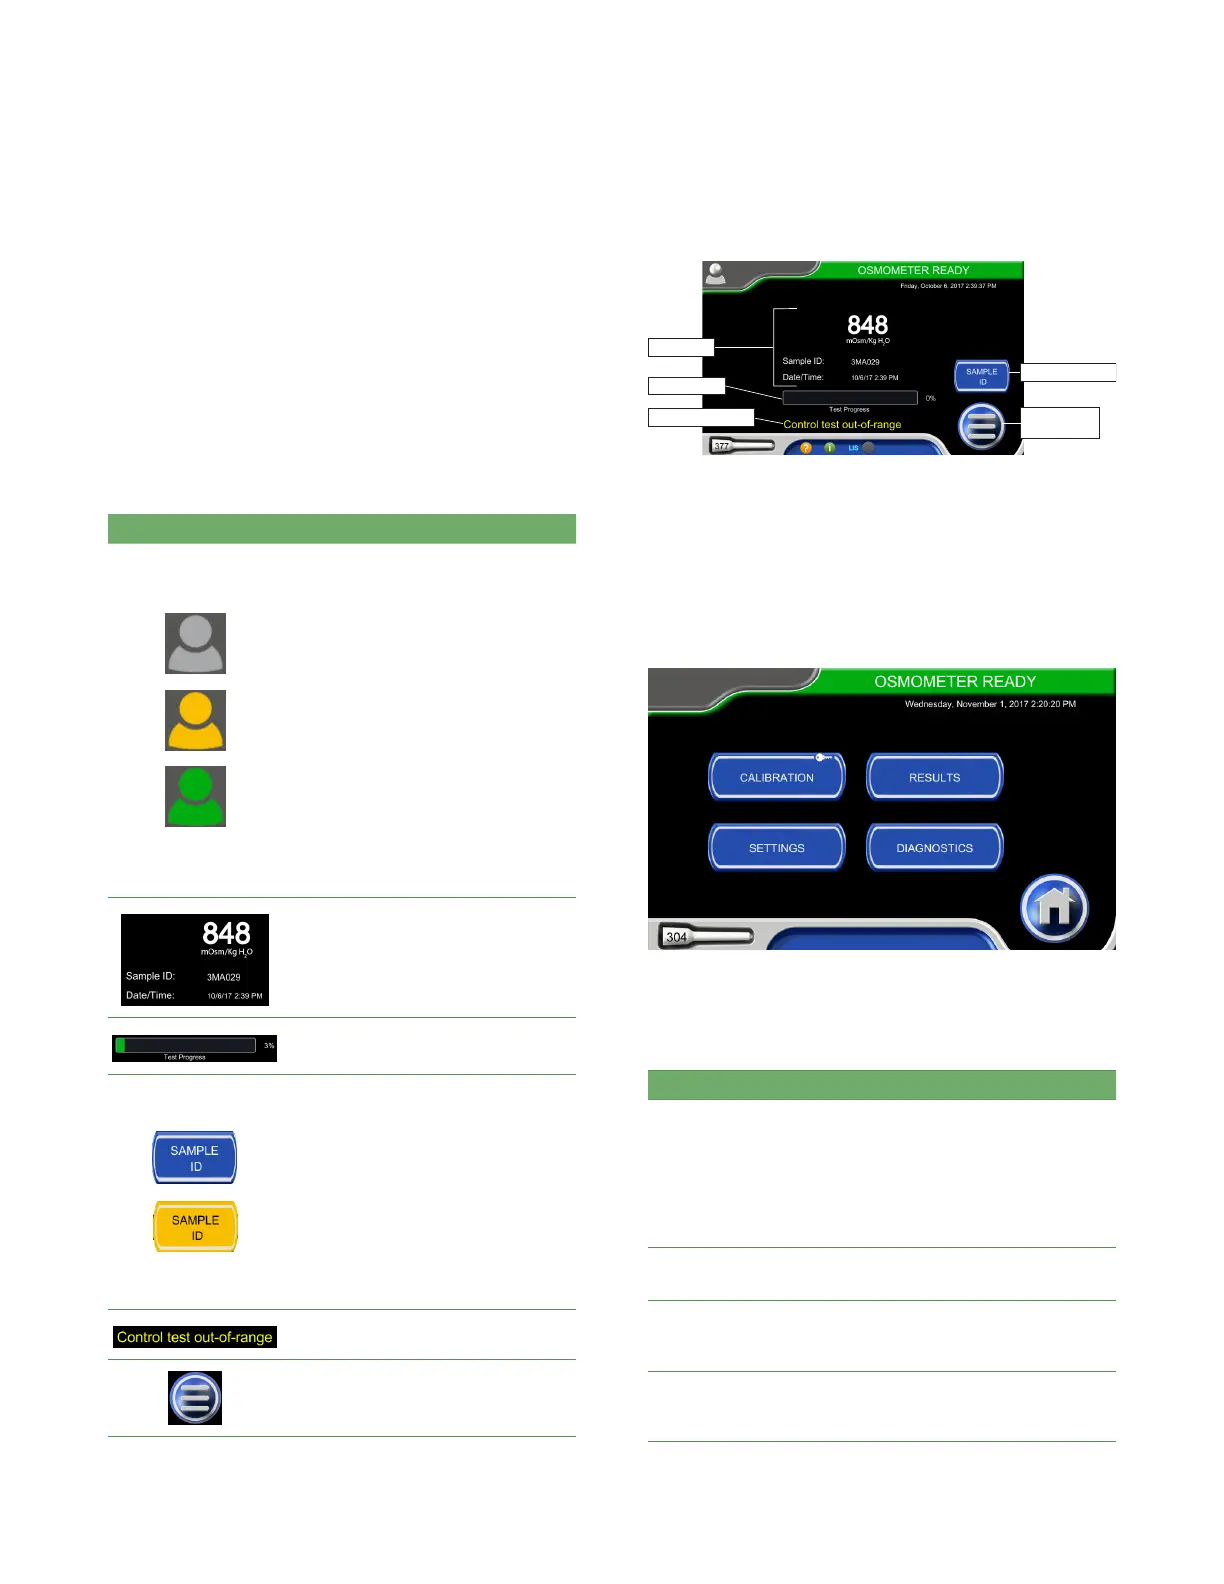
2.3 Home screen
The Home screen is the screen from which you perform
sample testing.
Table 3 lists interface elements that are specific to the
Home screen. Figure 9 shows the location of these
elements on the display.
NOTE: The Home screen goes dim after 10 minutes of
inactivity. If a user was logged in to the Home
screen, the system logs out that user.
Item Description/Use
Login button
NOTE: The color of the Login button
indicates the login status:
• Gray: No one is logged in.
• Orange: No one is logged in; login
is required to begin testing. (See
“Requiring IDs for testing” on
page48.)
• Green: A user is logged in. The
username displays next to the
icon.
To log in: Tap the Login button (gray
or orange) to display the user list.
Then select your username from the
list and enter your password.
To log out: Tap the (green) Login
button.
Latest test sample osmolality
reading, sample ID, date and time of
last test
Test progress bar
Sample ID button
Tap the button to display a keyboard
and activate the barcode scanner;
then use the keyboard or barcode
scanner to enter the sampleID.
NOTE: The color of the button
indicates the Sample ID status:
• Blue: Sample ID is optional.
• Orange: Sample ID is required.
(See “Requiring IDs for testing” on
page48.)
Example of a warning message
Tap to display the Main menu
Table 3: Items on the Home screen
Enter sample ID
Display Main
menu
Progress bar
Warning message
Latest test
Figure 9: Home screen elements
2.4 Main menu
The Main menu (Figure 10) provides a button for each
user interface section: Calibration, Results, Settings, and
Diagnostics.
Figure 10: Osmo1 Main menu
Table 4 provides an overview of each section.
Function Description/Use
Calibration Displays the Calibration screen; see Chapter 4
on page30 for details.
NOTE: The Osmo1 has been calibrated at the
factory. However, you should recalibrate it in
certain circumstances. See “When to
recalibrate” on page30 for more
information.
Results Displays a list of test results; see Chapter 5 on
page33 for details.
Settings Displays the Settings menu for access to
configuration options; see Chapter 6 on
page35 for details.
Diagnostics Displays the Diagnostics menu for access to
system tests and performance data; see
Chapter 7 on page50 for details.
Table 4: Main menu buttons