Chapter 6 Settings
41
Osmo1® Single-Sample Micro-Osmometer User Guide
4. Tap Save to save your changes.
5. Tap Exit to return to the Settings menu.
6.10 Establishing controls
If desired, you can establish control limits to use with the
Osmo1 in your lab environment.
From the Controls screen, you can view a list of control
limits currently stored in your Osmo1, and then add, edit,
or delete controls as needed.
Accessing the Controls screen
1. From the Settings menu, tap Controls.
The system prompts you to log in.
2. Select the appropriate username from the list and
enter the corresponding password.
NOTE: If individual user accounts are not configured,
log in under the Admin account (see “Default
user accounts” on page36).
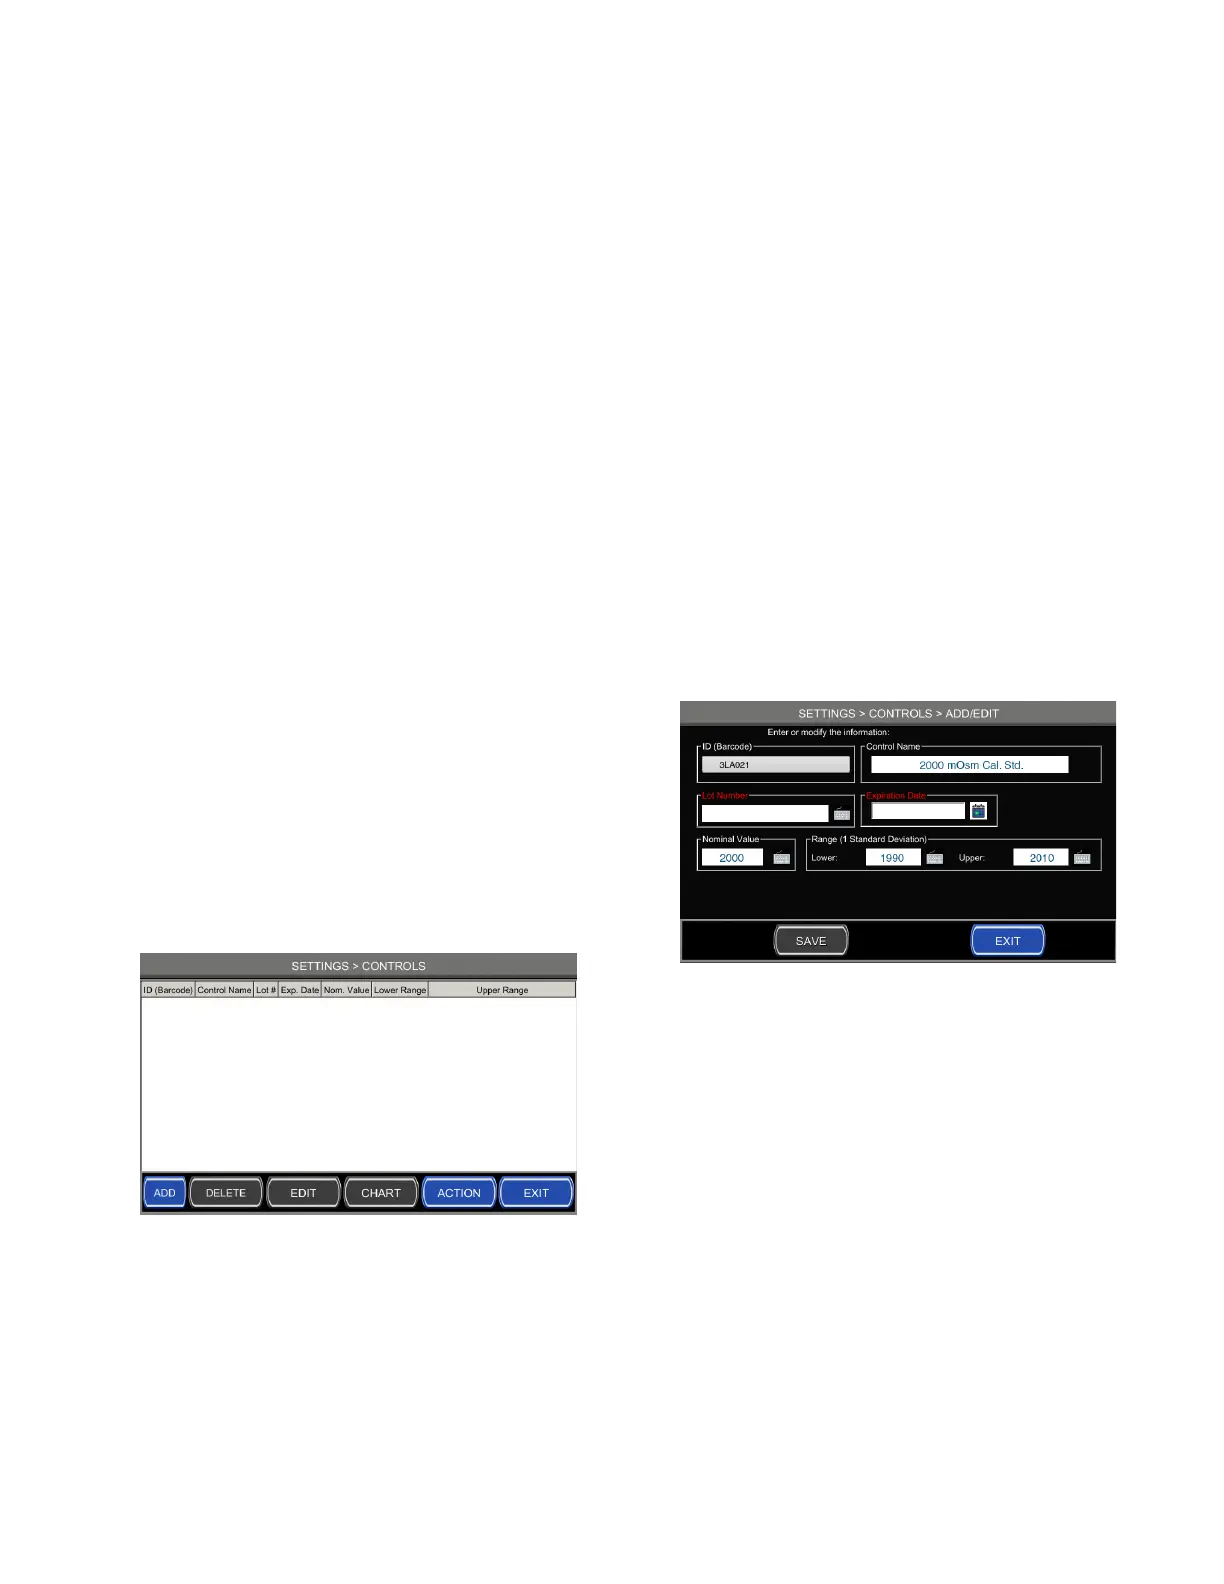
The Controls screen displays (Figure 51).
NOTE: The Controls screen lists any Controls that
have already been defined. Figure 51 shows
the initial view of the Controls screen, before
any Controls have been created.
Figure 51: Controls screen (initial view)
Adding a new control
1. From the Controls screen, tap Add.
The system prompts you to enter an ID for the
control and displays a keyboard.
2. Enter the ID.
NOTE: You can use the keyboard displayed on the
screen, or you can use the barcode scanner on
the front of the Osmo1 (see Figure 1 on
page17).
NOTE: To use the barcode scanner, hold the control
with its label positioned a few inches in front
of the barcode scanner. The scanner reads the
barcode and automatically populates the ID,
and Control Name fields on the Add/Edit
Control screen (Figure 52).
NOTE: If you manually enter the ID of an Advanced
Instruments control, the system populates the
Control Name field automatically. However,
this feature is case-sensitive. For example, the
system populates the name field with
“Clinitrol290” for an entry of 3MA029, but not
for 3ma029.
Figure 52: Add/Edit Control screen after scanning a control barcode
3. Tap the keyboard beside the Lot Number field to
enter the lot number of the control manually.
4. Enter the expiration date for this control.
NOTE: Tap the calendar icon beside the Expiration
Date field to display a calendar; then select
the appropriate date.
NOTE: The expiration dates on Advanced Instruments
controls include only the month and year, but
the software also requires a day. Use the last
day of the month as the expiration day.