35
Osmo1® Single-Sample Micro-Osmometer User Guide
Chapter 6
Settings
The chapter describes how to access and configure the
instrument settings.
6.1 Accessing the Settings menu
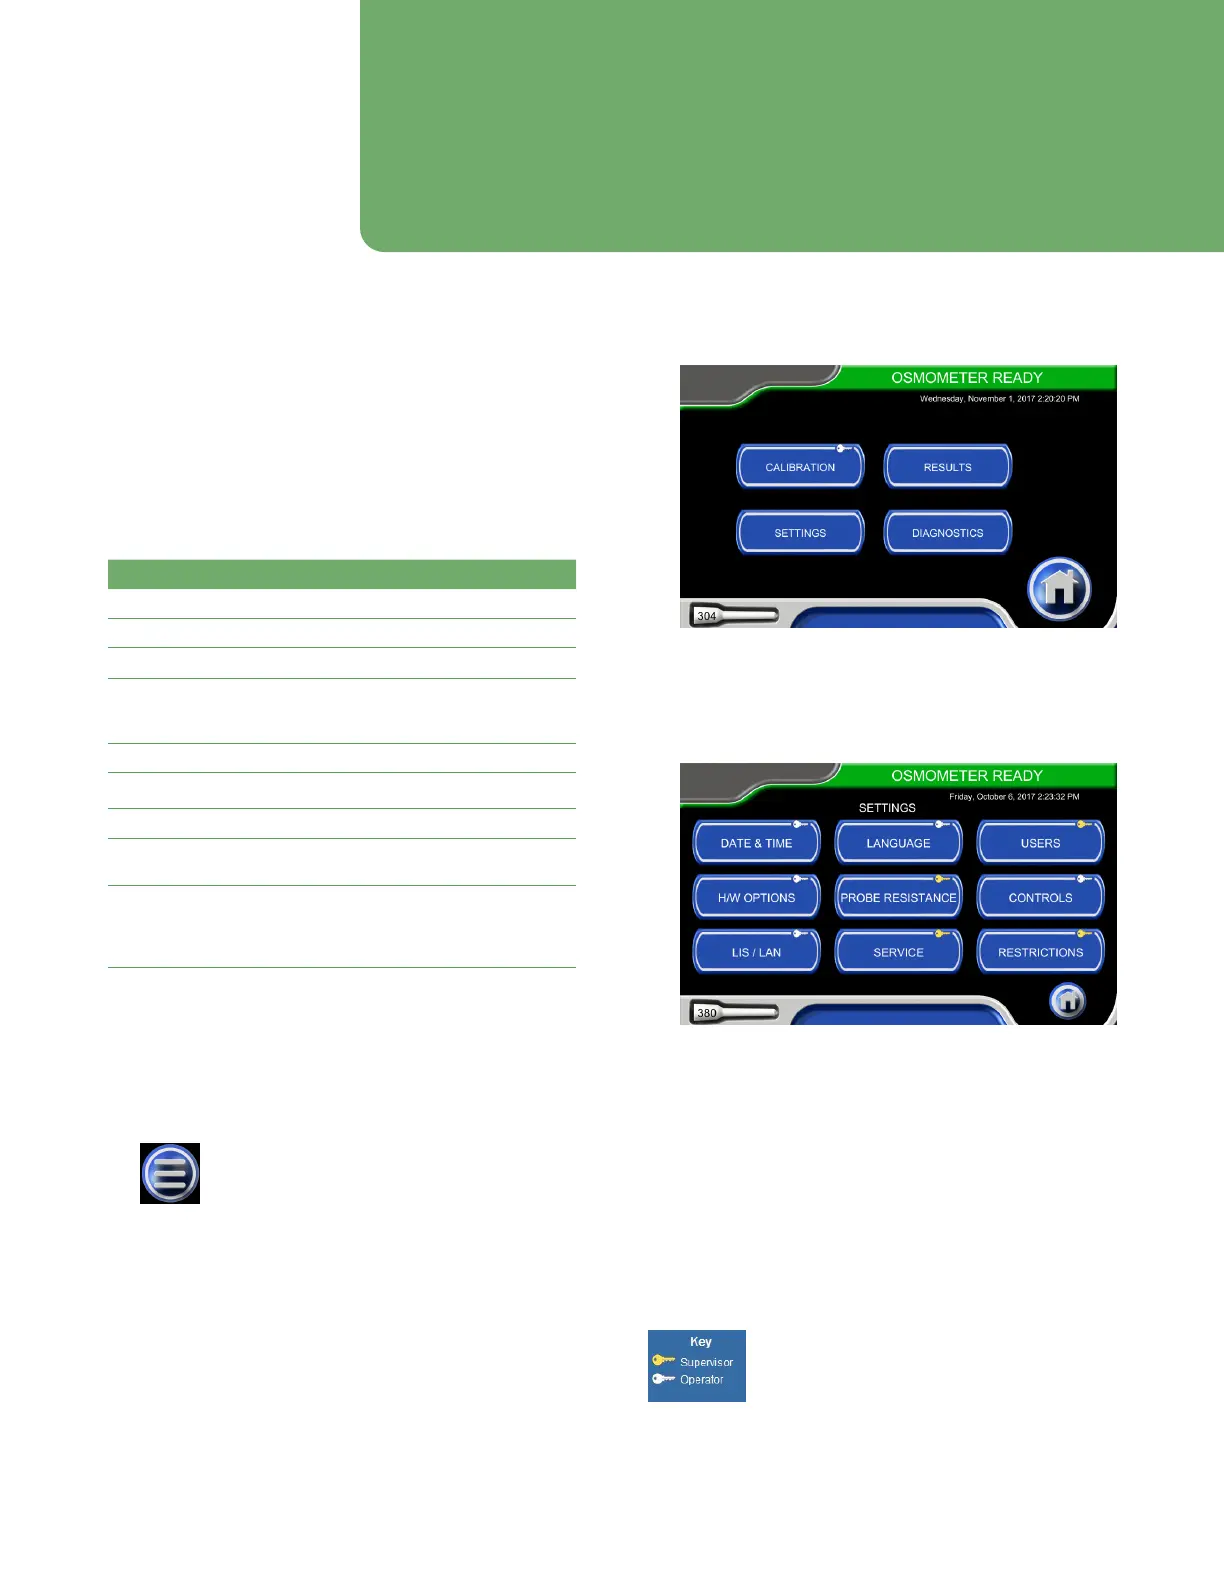
The Settings menu (Figure 38) provides access to the
functions listed in Table 7.
Function Description/Use
Date & Time Set format, date, time
Language Set user interface language
Users Add, edit, delete user accounts
H/W Options Set audio tone and volume; adjust
screen brightness; enable/disable
printer; adjust barcode scanner settings
Probe Resistance Enter/change probe resistance
Controls Add, edit, delete, chart, action
LIS/LAN Configure LIS, enter IP address, ping
Service System update, database management,
system utilities
Restrictions Set operator-level access;
Set password expiration period;
Enable/disable requirement to enter
the User ID and Sample ID for testing
Table 7: Functions available from the Settings menu
To access the Settings menu:
1. From the Home screen, tap the menu icon
(Figure 36).
Figure 36: Menu icon
The Main menu displays (Figure 37).
Figure 37: Osmo1 Main menu
2. From the Main menu, tap Settings.
The Settings menu displays (Figure 38).
Figure 38: Settings menu
From the Settings menu, you can tap a button to select a
particular function, (described in the following sections),
or you can tap the Home button to return to the Home
screen.
NOTE: Access to a function is indicated by key color on
the button surround (Figure 39):
• Gold: Restricted to Supervisor access only
• White: Operator and supervisor access allowed
Figure 39: Key colors