TECHNICAL DESCRIPTION, OPERATING, MAINTENANCE AND REPAIR MANUAL
2.1 Operation outlines
During operation and maintenance of WT-9 Dynamic aeroplane it is very important to
keep instructions stated in the aeroplane accompanying documentation:
- Technical Description, Operating, Maintenance and Repair Manual for aeroplane WT-9
Dynamic
- Flight Manual for aeroplane DYNAMIC WT- 9
- Operator’s Manual for all versions of ROTAX 912 engine
- Operator’s Manual for electric adjustable aircraft propeller SR 2000.
- Additional documents supplied with an aeroplane instruments or equipment.
The airworthiness and operational readiness of the aeroplane depend upon careful
adherence to the recommended procedures and regulations. Climate, aerodrome
conditions, dustiness, manner of hangaring and other factors, such as corrosive effects in
industrial or seaside areas, should be considered by an aeroplane operator.
The procedures given in this Manual suit coverage operational conditions, and more
harsh environments may require more frequent scheduled maintenance.
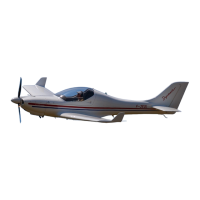
2.2 Aeroplane assembly
2.2.1 Wing
There is described the rigging procedure for the right wing. The procedure for the left
wing is analogous.
2.2.1.1 Necessary tools
( A screwdriver
( An adhesive tape
( Lubricant to preserve the wing suspensions
2.2.1.2 Wing assembly and disassembly procedure
1. Thoroughly clean and lubricate all the wing suspensions before wing assembly.
2. All pins easily lubricate.
3. Fit the spar end of the right wing into the spar end ( fork ) of the wing central panel
and push the wing along longitudinal axis so that a connection slot between the wing
central panel and the wing root is approx. 100 mm. The person holding the wing tip
lower it down at a thorax level.
4. Connect the hoses from the Pitot-static tube ( connect the position lights wires
connector, if lights installed ). They must not be twisted.
5. Full push the wing into the wing central panel. Place fixation pins for connection of
the wing spar end with the wing central panel . The outer pin is inserted through the
room for main legs of the retractable undercarriage ( at model SPEED ) or through the
access hole on the lower wing surface ( at model CLUB and TOW ). The inner pin is
inserted
through the hole in the cockpit below pilot seat ( slightly lift and lower the wing tip to
make easy the pin insertion ). Secure both pins with splint pins.
Date: