FILE VER LAST ISSUE LANG. PAGE
GCM02-MT-ING4 NEW.doc c/02 04/03/2003 ENG Page 56 of 57
3. MAINTENANCE
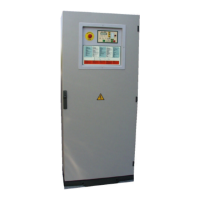
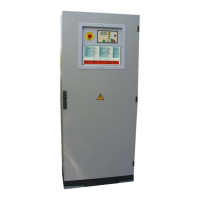
The control panel has been designed to operate without the need for maintenance. The following is to be kept under control nevertheless:
every 30-60 days check the electrolytic level of the battery.
every 30 days check the water, oil and fuel levels
every 30 days. check the motor pre-heating temperature (if installed)
every 30 days. run the unit automatic test
every 6 months check the battery efficiency
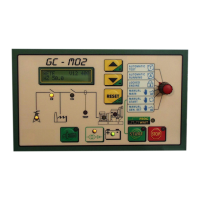
3.1 ELECTRICAL MAINTENANCE
See the relative manual for the maintenance of the GENERATOR. The information provided herewith simply relates to the electrical command
and control parts of the generator.
WARNING !
The control panel is powered by the mains and by the generator. Before accessing it for maintenance purposes disconnect the mains and stop the
generator by setting the programming switch on “LOCKED”
3.2. EFFICIENCY TEST
Efficiency tests of the various automatic functions to be executed with the AUTOMATIC or TEST programs.
The safety devices against min. voltage, min. frequency, low oil pressure and dynamo are enabled when the generator is running at
a steady state and following the programmed tripping of the generator delay that enable the load output. Therefore all simulations
are to be performed following this timing.
3.3. MOTOR SAFETY DEVICES
Disconnect the wire on the motor from the relative reading probe and connect it to earth for roughly 3 seconds. An buzzer alarm will be
triggered the motor will stop and the relative will be displayed.
The functions of each alarm are indicated in the AUTOMATIC RUN MODE section.
3.4 GENERATOR SAFETY DEVICES
Manually operate the lever of the accelerator or actuator to modify the revs. in + or - . Consequently the variation of the Hz frequency will be
displayed. Continue until the safety threshold is triggered with consequent alarm status and locking.
Minimum and maximum voltage.
Manually turn the VOLT trimmer on the electronic voltage regulator inside the generator. First turn + or – then vice versa altering the voltage
output until the safety devices are tripped. Upon completion set the voltage back to the normal value.
3.5 OVERLOAD SAFETY DEVICE 51
Supposing that a load sufficient to exceed the maximum current that may be output is not available it is advisable to modify the calibration of
the overload to a value lower than the load current available (see setting section).
With the generator in automatic mode, disconnect the MAINS and when the CG generator contact maker has closed enable the load. When
the set current is exceeded, following the delay timing, the CG contact maker is opened and the relative LED flashes, the alarm is triggered
and the generator stops following the motor delay timing.
Reset the current calibration ( maximum current of generator in “ALARM THRESHOLDS” section ) after the test has been completed.
3.6 BATTERY EFFICIENCY
The battery is kept efficient by the automatic battery charger, which controls its charge avoiding oxidation and sulphating. It controls possible
rising in voltage caused by the disconnection of internal components and also voltage sagging causes by anomalies in the battery charger.
The storage capacity, or rather the capacity of facing up to the number of starting times sufficient to ensure the running efficiency of the
generator is to be checked once a year in the following manner:
Check with the battery fully charged, with a voltage greater than 13,5V for generators with 12V batteries and a voltage greater than 27V for
generators with 24V batteries.
With the generator in locked mode, disconnect the electromagnet the safety solenoid valve or the actuator or anything else necessary to
prevent the generator from starting. The power supply to the injection pump must be prevented so that upon starting the motor turns without
starting.
Set the programming switch on TEST, count 4 starting attempts at a rotation speed that is more or less the same from the first to the fourth
command.
The same procedure can be performed by setting the programming switch on ENABLE START mode and manually commanding the starting
attempts for 5 seconds with pauses of 10 seconds for at least 5 times one after the other.