Afinia H800+ 3D Printer User’s Manual
16
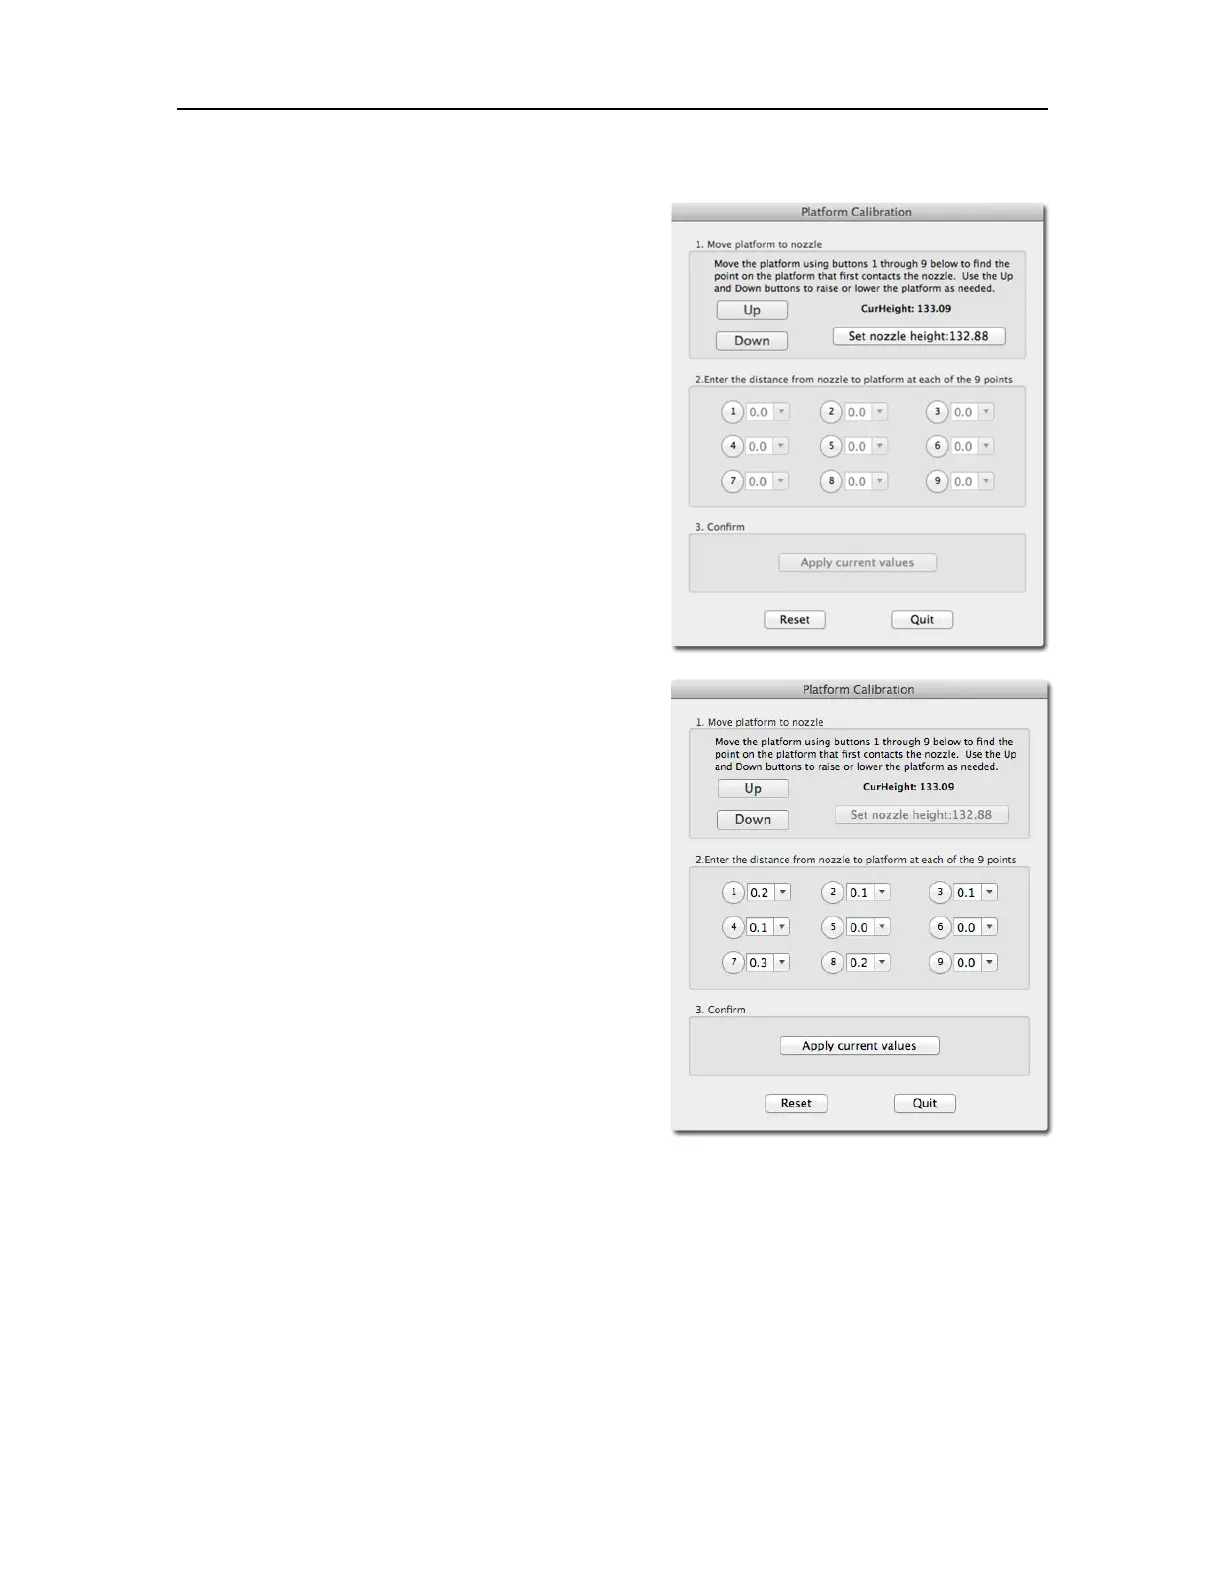
Manual Platform Calibration
Select Platform Calibrate from the 3D Print menu.
Click the button labeled 5 to move the nozzle to the
center of the platform. Use the Up button to raise the
platform.
Hold the button down to move the platform steadily, or
use single clicks to fine-tune the platform height.
If you are using clips to secure the print surface to the
platform, be careful to position the clips so they do not
interfere with the nozzle or wind barrier.
Raise the platform until the print surface is just
touching the nozzle and note the current height.
Click the Down button a few times to lower the
platform and check the other 8 calibration points.
Once you have found the calibration point with the
lowest nozzle height, move to that point and adjust
the platform position so the nozzle is just touching the
print surface.
Click Set nozzle height.
Once the nozzle height is set, select the distances
from the drop-down lists that brings the platform at
the other 8 points into contact with the nozzle.
Once all 9 values have been entered, click Apply
current values.
Reset will clear all calibration values.
Click Quit when you are finished.
In the example above, the print surface is slightly warped with the center higher than both the front
and back edges. The manual leveling process would not be able to account for the warp, but the
Platform Calibration can.