Afinia H800+ 3D Printer User’s Manual
34
Maintenance
Changing the Filament
Changing the filament can be done either in the software or using the control panel.
1. Remove the magnetic Spool Cover.
2. Select Maintenance from the 3D Print menu and click Withdraw.
-or-
Double Press the Filament button.
3. Insert the end of filament into one end of the Filament tube, which is on the upper right
side of the spool holder.
4. Feed the filament through the tube until about 4 inches of filament protrudes from the tube.
5. Put the Filament Spool onto the holder with the end of the filament pointing up from the
back.
6. Feed the filament into the extruder head as far as it can go, about 2 inches.
7. Click Extrude in the Maintenance window
-or-
Long Press the Filament button.
8. If the filament doesn’t start feeding when the printer beeps, gently push in the filament.
9. Replace the magnetic filament cover.
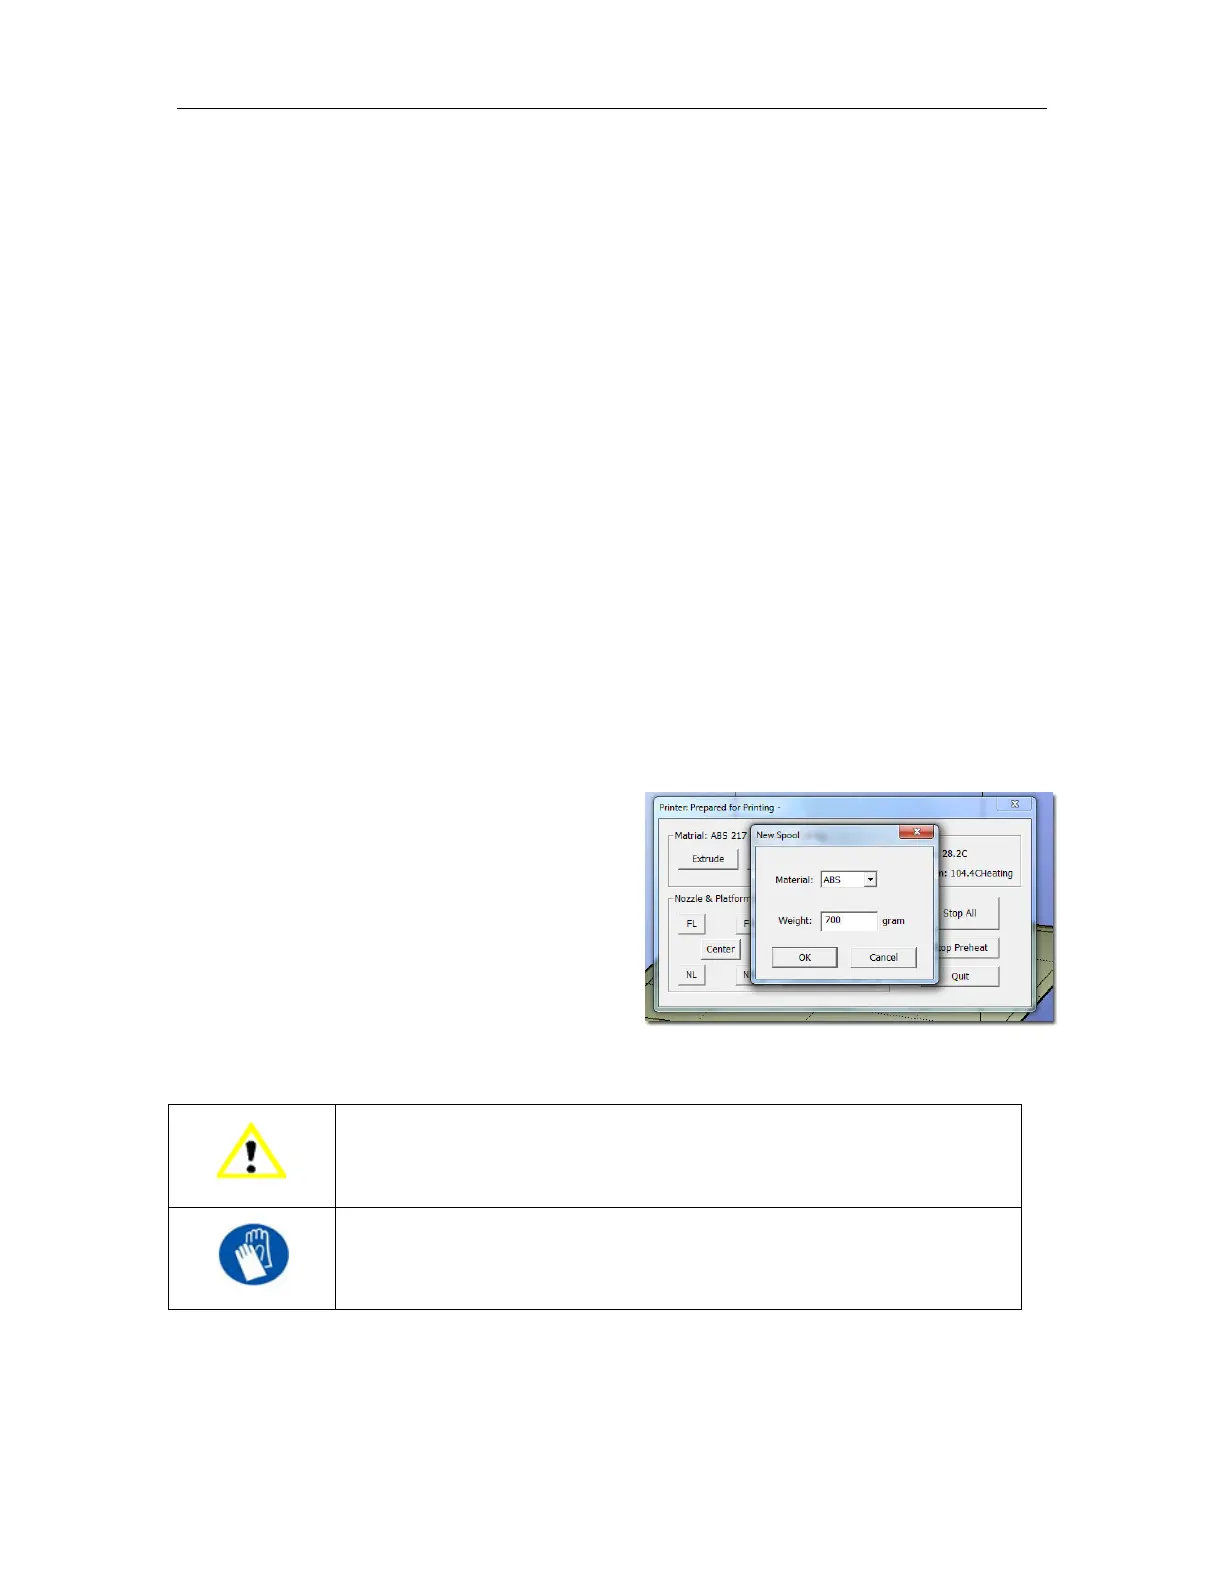
10. If you are changing filament types, click
New Spool in the Maintenance window,
select the filament type and enter the
weight of the new spool.
This must be done in the software, not
from the control panel.
TIP: If you are loading a different color filament than the last spool, run Extrude a few times before
you start printing. This will help remove any left-over filament of the previous color.
CAUTION: If the nozzle is blocked, remove the nozzle and clean it.
GLOVES: The extruder and platform are hot. Use gloves when working in
this area of printer.