7. MAINTENANCE HI ROLLER - BELT CONVEYORS
7.4. IDLER REPLACEMENT - HI LIFE MODELS HI ROLLER, MINI ROLLER, LO ROLLER & HI LIFE
102 P115506 R3
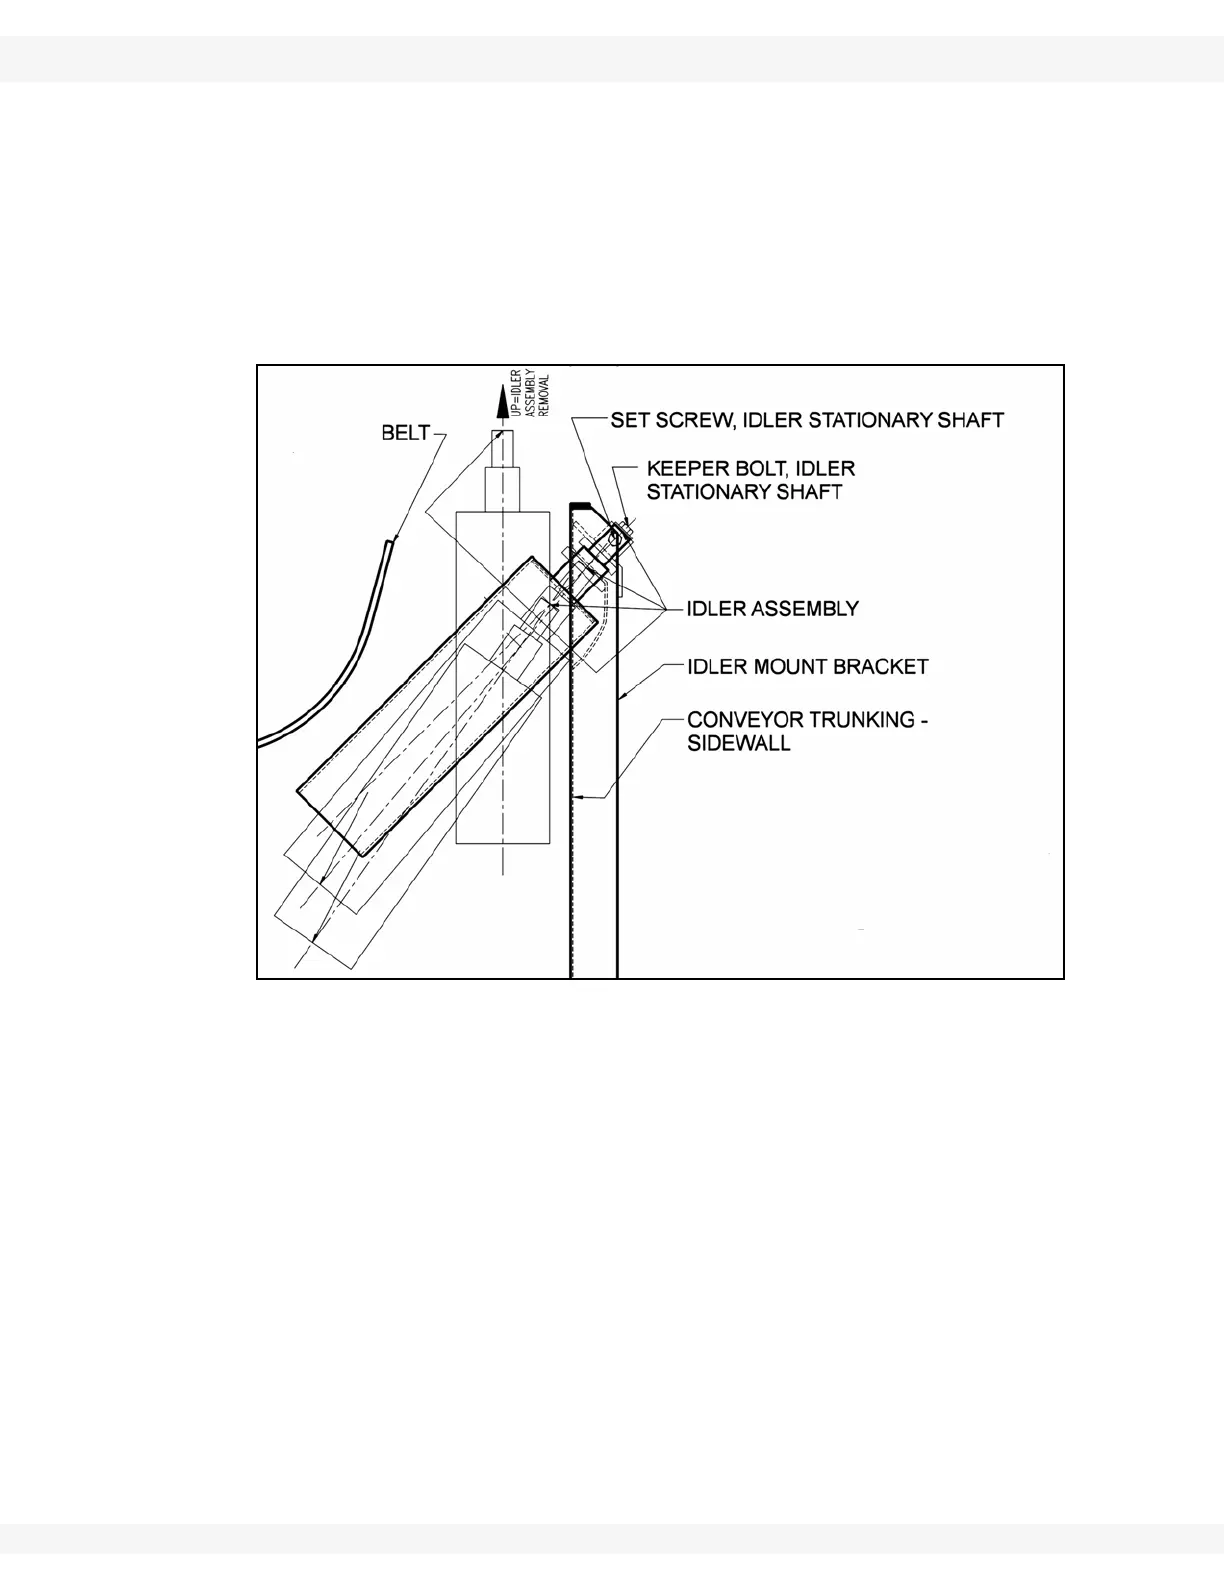
5. Set bolts and idler stationary shaft must first be loosened. Loosen the
locknuts and then turn out the set bolts until the idler stationary shaft is free.
6. The keeper bolt can now be removed completely so the side idler assembly
can be pushed in through the mount collar.
7. The side troughing idler assembly must be pushed in completely through the
dust seals into the conveyor trunking.
8. The side troughing idler assembly can be rotated and removed straight
through the open top of the conveyor trunking.
Figure 7.22
9. The complete assembly can easily be installed through the top of the
conveyor trunking with the cover removed. The steps are just the reverse of
the procedure above to remove the complete idler assembly.