HI ROLLER - BELT CONVEYORS 5. INSTALLATION
HI ROLLER, MINI ROLLER, LO ROLLER & HI LIFE 5.7. COVER INSTALLATION
P115506 R3 55
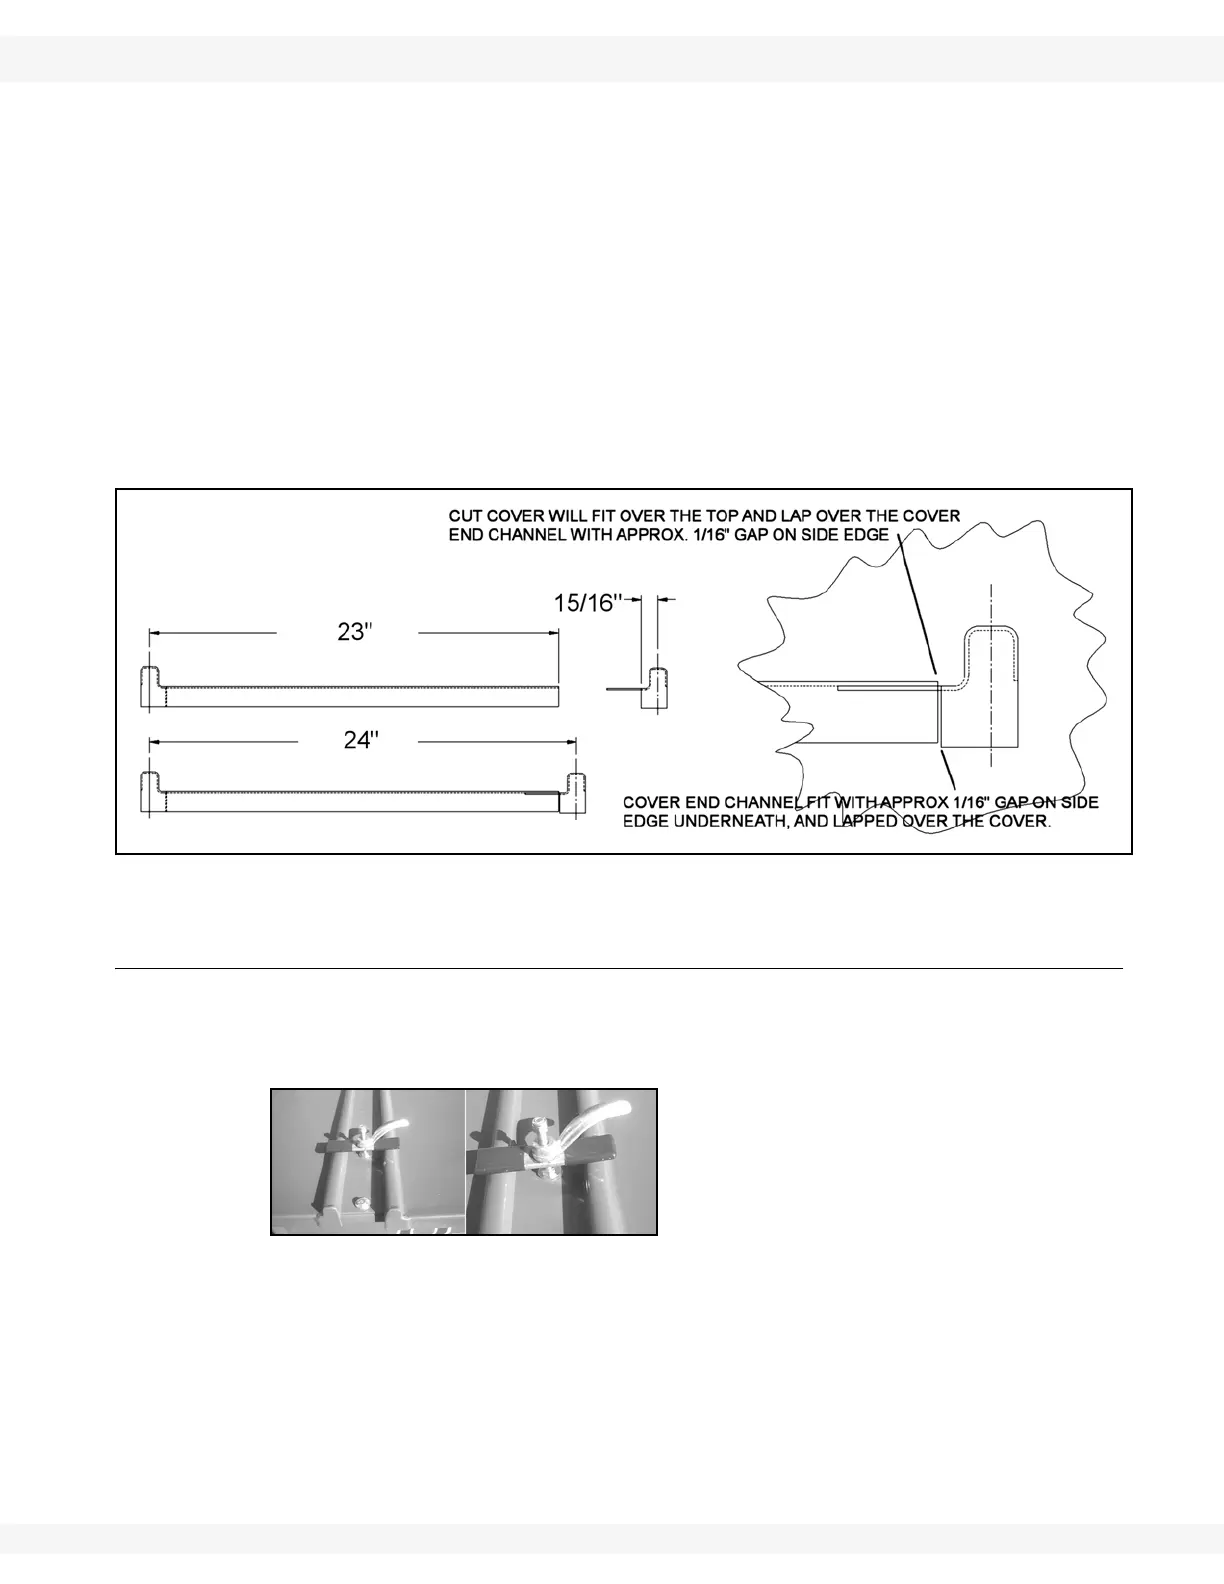
2. Cut the cover 1" shorter than the required finished cover and grind edges
smooth. With a 24” measurement, the cover will be cut to 23", which is 1"
shorter than required for the finished cover.
3. Fit the cover over the cover end channel provided as shown in Figure 5.24.
4. Weld the two pieces of metal together about every 3”- 4" with a short stitch
weld, as well as on the side edges.
5. Grind all welds smooth.
6. Clean the metal and prime all unpainted areas. After the prime has cured,
finish painting all primed areas.
7. After the paint has cured, silicone caulk all seams inside and out so that the
joints are water-tight.
8. Install cover and cover clamps.
Figure 5.27
5.7.3. COVER HARDWARE
For international models, cover hardware is installed and loosened with a
wrench. With North American models (shown below), cover hardware does not
require a wrench.
Figure 5.28