3 Maintain the ATCA Subrack
./clean-disk-before-reuse.sh
4. Press [ Enter ].
When the command is completed the blue LED switches ON.
5. From BSC terminal check the status of the board. Remove the board only
after the status is changed to FAULT. This takes around 15 minutes.
Remove the Board To remove an JBXOMCP board:
1. Identify the board to be replaced. Refer to Board/Area/Slot/SBL Mapping
(Section 1.3) for details.
2. From BSC terminal or OMC-R disable/lock the corresponding JBXOMCP
board.
If the disable/lock operation is finished without success, continue with
the next step.
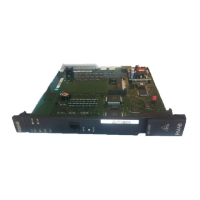
3. Unfasten screws of front plate until board is detached from shelf.
4. Move the ejector handles outwards
5. Remove board from shelf.
3.5.3.2 Insert JBXOMCP
To insert an JBXOMCP board:
1. Ensure that the top and bottom ejector handles are in the outward position.
2. Insert board into the shelf by placing the top and bottom edges of the board
in the card guides of the shelf. Ensure that the guiding module of shelf
and board are aligned properly.
3. Slide the board into the shelf until you feel resistance.
4. Wait until the blue LED is illuminated.
5. Simultaneously move the top and bottom ejector handles to the inward
position.
The blue LED blinks. After some seconds the blue LED is switched OFF.
6. If the disable/lock operation was successful during JBXOMCP board
removal, wait until the blue LED is illuminated again then continue with
next step.
If the disable/lock operation was unsuccessful during JBXOMCP board
removal, continue with next step.
7. Connect the Ethernet cable from the Local PC to the JAXSSW1 port ETH 8
in corresponding ATCA shelf.
8. Open a DOS console window. Connect to the new JBXOMCP board through
SHMC as follows:
Under Windows 2000, the connection is done as follows:
telnet
set term vt100
open 172.17.y.8 450x
Under Windows XP, the connection is done as follows:
telnet 172.17.y.8 450x
where:
y is 3 for ATCA shelf 3
y is 4 for ATCA shelf 4
38 / 90 3BK 21281 AAAA PCZZA Ed.13
 Loading...


