3 Maintain the ATCA Subrack
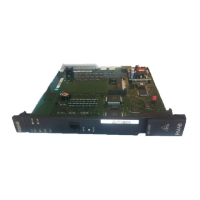
3.6.1.2 Insert JAXPC
To insert the JAXPC:
1. Set the rotary switches according to your needs (JAXPC: Shelf Geographic
Address Rotary Switches (17) ):
S1:
On the shelf 3 (bottom ATCA) set S1 to 3
On the shelf 4 (top ATCA) set S1 to 4.
S2: always set to "0".
Note: Two JAXPC boards in the same shelf must always be set to the same Shelf
Geographic Address (SGA).
Two JAXPC in different shelves must always be set to different SGAs.
2. Back out the two screws until they engage the threads in the front panel.
This makes insertion easier.
3. Set the handle toggle switch to the "Open" position.
4. Insert board into the shelf by placing the top and bottom edges of the board
in the card guides of the shelf. Ensure that the guiding module of shelf
and board are aligned properly.
5. Wait until the blue H/S LED is lit. The red OOS LED is blinking.
6. Set the handle toggle switch to the "Closed" position.
The blue H/S LED starts flashing and then turns OFF.
7. Wait until the blue H/S LED is switched OFF. The switched OFF blue H/S
LED indicates that the board is running. The red OOS LED is blinking.
8. Fasten the two front panel screws.
9. Connect the Ethernet cable to the JAXSSW1 (port ETH8)
10. Open a telnet session on the active JBXOMCP
# telnet 172.17.y.x
where:
y is 3 for ATCA shelf 3
y is 4 for ATCA shelf 4
x is 30 for JBXOMCP1
x is 40 for JBXOMCP2
11. From the active OMCP open a telnet session on the active JAXSMM
# telnet <IP adress of the active JAXSMM>
where the IP adress of the active JAXSMM is:
172.17.y.8 if JAXSMM1 is active
172.18.y.9 if JAXSMM2 is active
y is 3 for ATCA shelf 3
y is 4 for ATCA shelf 4.
3BK 21281 AAAA PCZZA Ed.13
49 / 90
 Loading...


