152 Rockwell Automation Publication 2094-UM001J-EN-P - March 2017
Chapter 6 Configure and Start the Kinetix 6000 Drive System
6. On the Drive/Motor tab, check Drive Enable Input Checking.
When checked (default), means a hard drive-enable input signal is
required. Uncheck to remove that requirement.
7. Click Apply.
8. Click the Motor Feedback tab and verify the Feedback Type shown is
appropriate for your actual hardware configuration.
9. Click the Units tab and edit default values as appropriate for your
application.
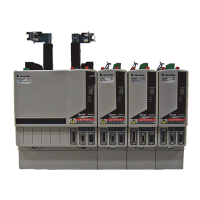
10. Click the Conversion tab and edit default values as appropriate for your
application.
In this example, Rotary is chosen from the Positioning Mode pull-down
menu.
11. Click Apply if you made changes.
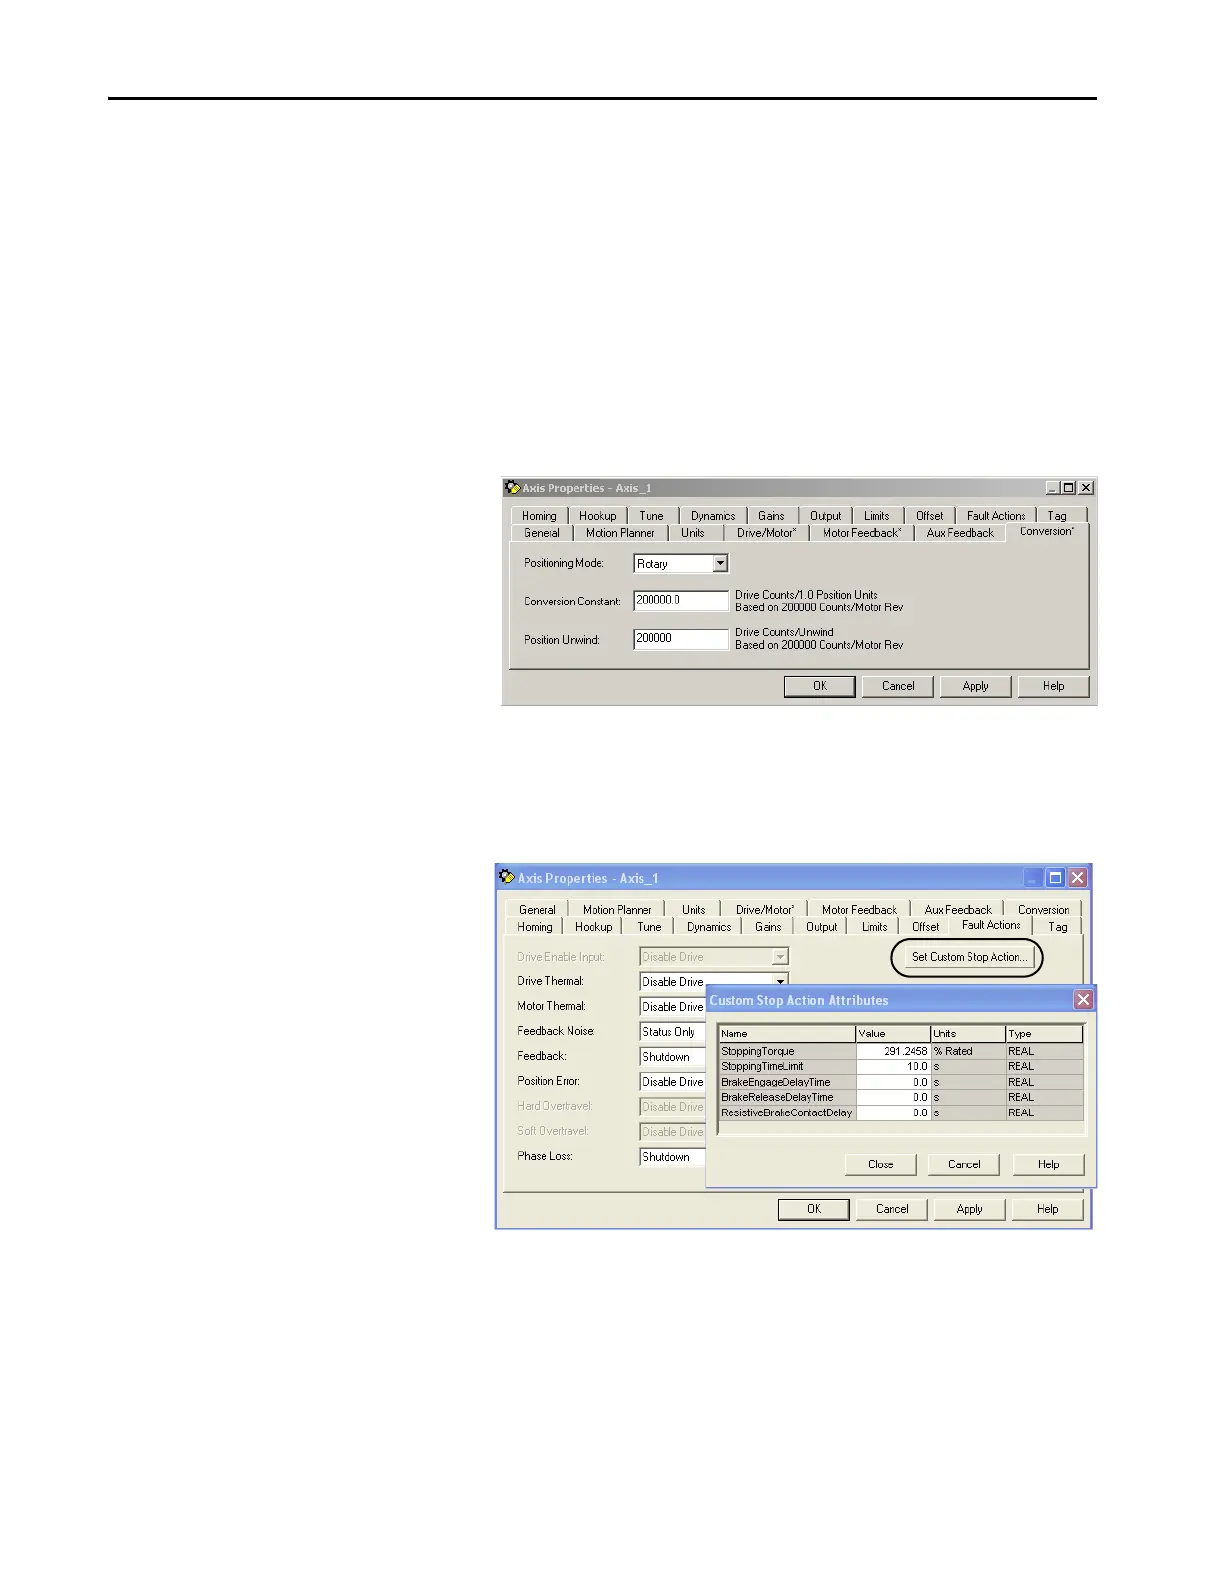
12. Click the Fault Actions tab.
13. Click Set Custom Stop Action.
The Custom Stop Action Attributes dialog box opens and lets you set
delay times for servo motors and RBM modules.
 Loading...