343-3512A (03/13)
12 of 27
Optimize
43-0176K
SIDE 2 OF 6 (11/02)
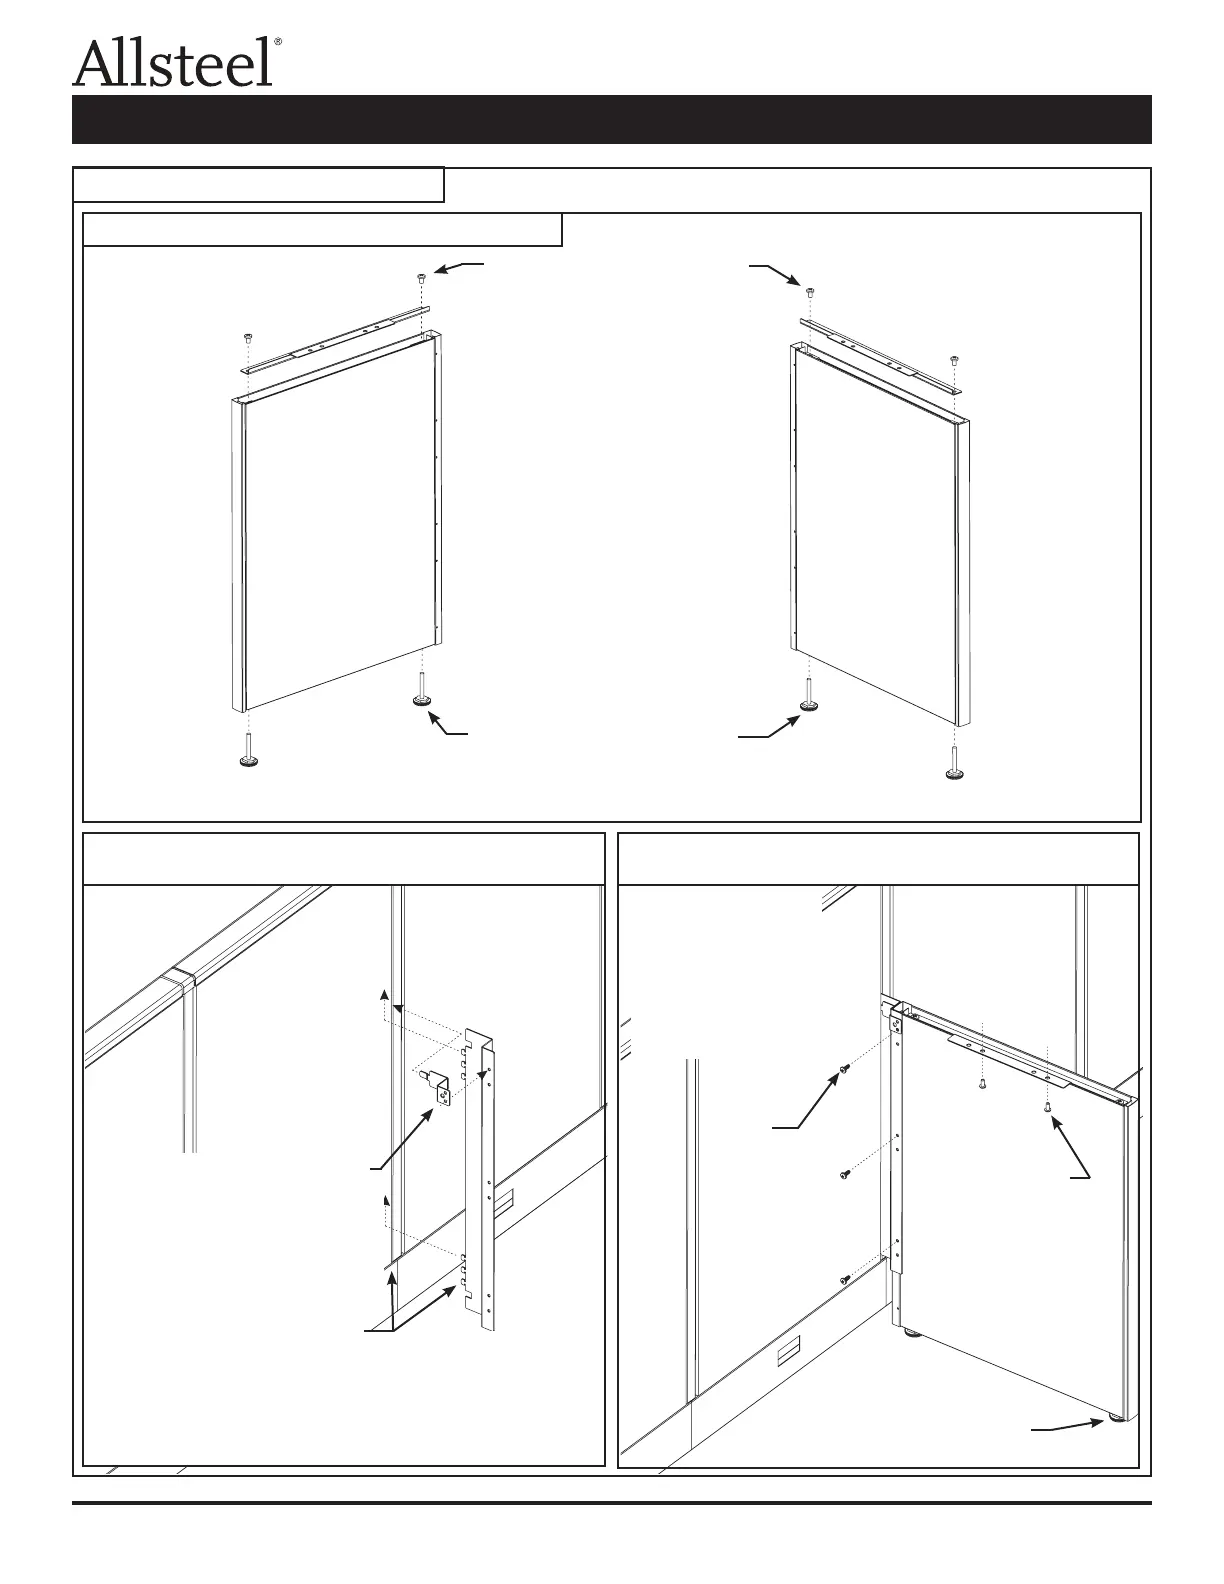
Illustration 2b. Attach Panel Attachment Bracket and Anti-
Dislodgement Bracket to Panel Frame:
noitacilppA dnaH-thgiRnoitacilppA dnaH-tfeL
Step 2. Install glides at bottom end
of end panel.
Step 1. Install machine screws
through worksurface
attachment bracket and
into full end panel.
Step 3. Install two
machine
screws through
worksurface
attachment
bracket and
into inserts in
bottom of
worksurface.
Step 2. Turn leveling glides
until glides are flat
against floor.
Illustration 2b. Attach Full End Panel Support and
Worksurface:
Step 1. Insert panel attachment
bracket tabs into panel slots
and lift bracket, hooking
tabs behind panel frame.
Step 1. Install sheet metal
screws through top
holes of each
pair of panel
attachment bracket
holes and into top
holes of full end
panel support.
Step 2. Insert anti-dislodgement
bracket tab into panel
slot and align bottom
hole of bracket with top
hole of full end panel
support.
Illustration 1: Full End Panel Support
Illustration 1a: Assemble Full End Support Panel
Illustration 1b: Attach Panel Attachment Bracket and Anti-
Dislodgement Bracket to Panel Frame
Illustration 1c: Attach Full End Panel Support and
Worksurface
Step 1 - Install machine screws
through worksurface
attachment bracket
and into full end panel.
Step 2 - Install glides at bottom
end of end panel.
Left-Hand Application
Right-Hand Application
Step 2 - Insert anti-dislodgement
bracket tab into panel
slot and align bottom
hole of bracket with top
hole of full end panel
support.
Step 1 - Insert panel attachment bracket tabs into panel
slots and lift bracket, hooking
tabs behind panel frame.
Step 3 - Install two
wood screws
through
worksurface
attachment
bracket and into
worksurface.
Step 1 - Install sheet
metal screws
through top
holes of each
pair of panel
attachment
bracket holes
and into top
holes of full
end panel
support.
Step 2 - Turn leveling glides until glides
are at against oor.
Worksurface Supports Installation