15
The amount of water in the tank may be checked on the Monitor Panel (photo F-1.4). You may fill
the tank until water overflows out of the fill.
Sewage Hookup
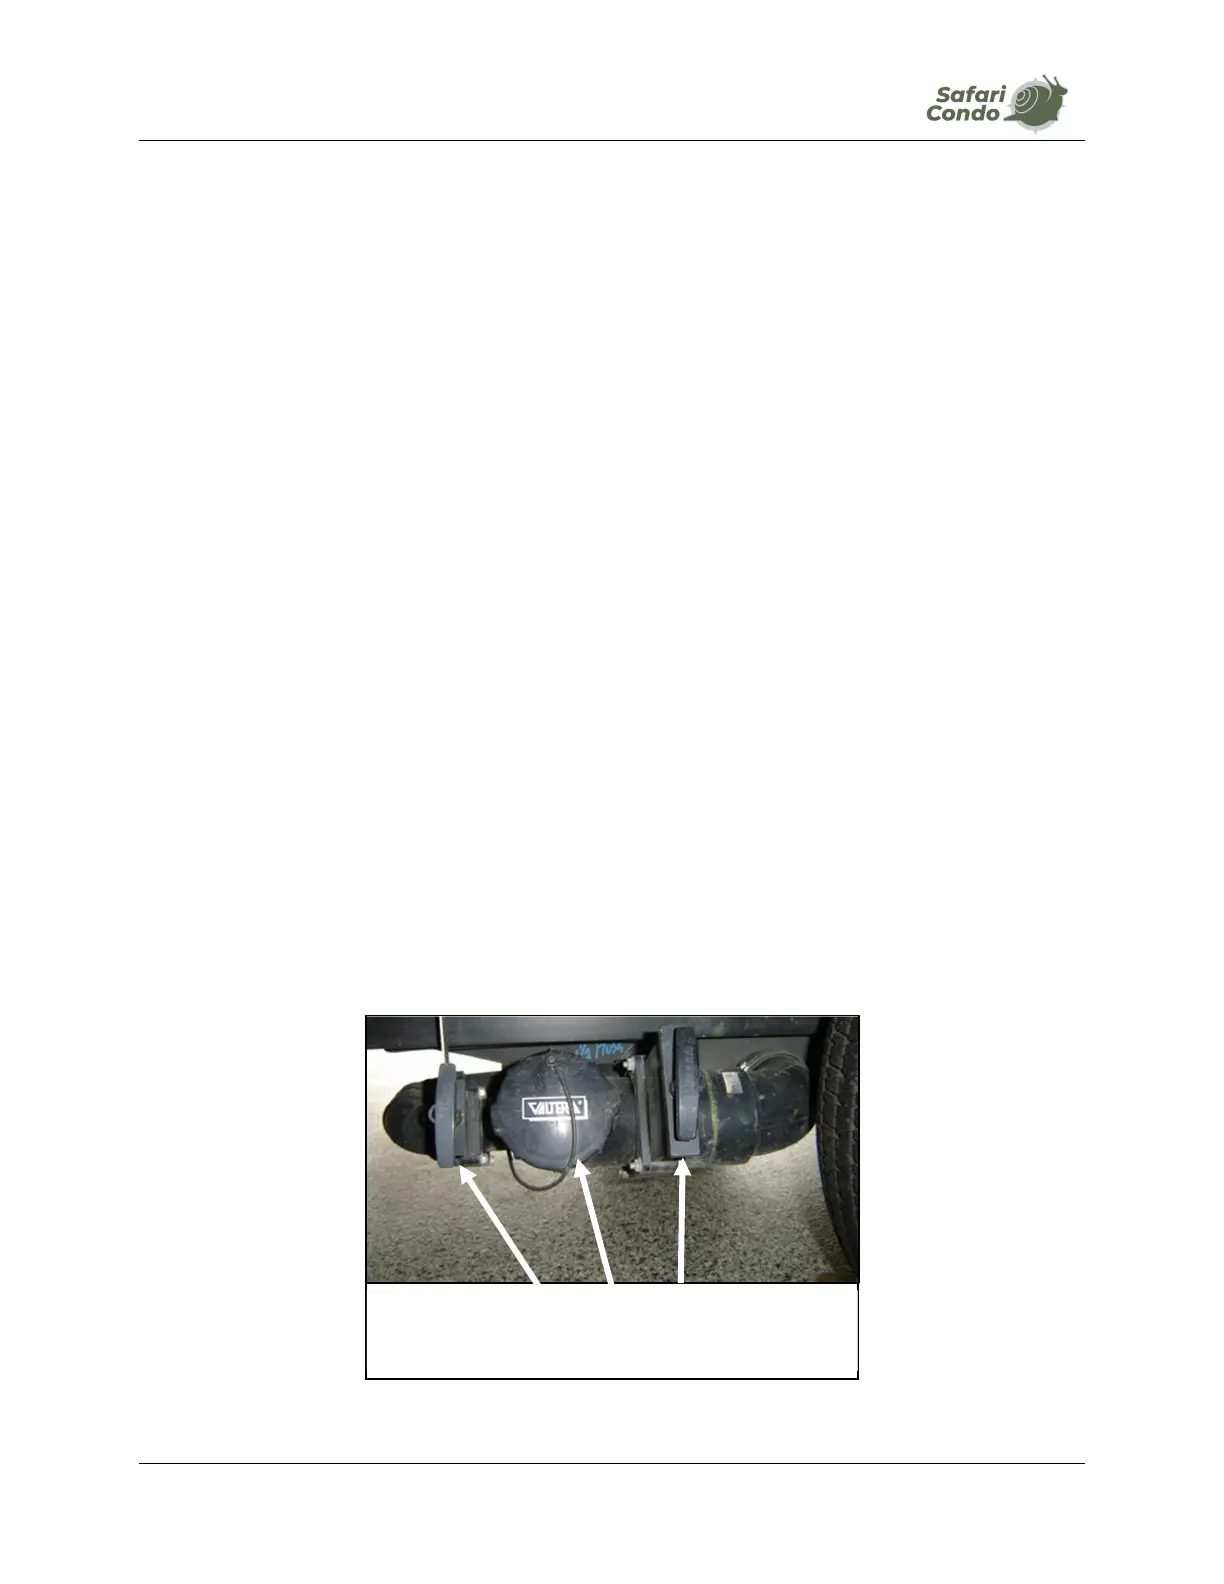
Take the flexible hose located inside the storage tube under the chassis, left side near the valves.
Attach hose to PIVOTING sewage connector, located in front of the wheel on left side (photo C-
4.1). Lock hose tightly by twisting 1/8 of a turn to the right. Make sure it is locked!
Insert the other end of the hose in the campground sewage hook up. You may need an adapter.
Once connected to the sewage system, the grey water valve can be left open (photo C-4.2).
NOTE: The black water connection swivels. When draining, make sure the fitting points
downward. When moving, remember to point the fitting upward to increase ground
clearance.
Black water valve (photo C-4.3) should never be left open. Leaving it open will almost surely clog
it. Instead, it is better to wait for the black water tank to fill until the level monitor displays 90%
full or more (photo F-1.2) (BLACK).
One or two days prior to dumping the black water tank, close the grey water valve. This will let
the grey water accumulate so it can be used to rinse the hose after dumping black water tank.
This will save potable water, which would have been used simply to rinse the hose.
Draining the black water tank:
1. Open black water valve (photo C-4.3) until tank is empty. This may take between 1 and 2
minutes.
2. Close black water valve.
3. Open grey water valve to rinse hose (photo C-4.2).
The grey water valve may then be left open, and the cycle starts all over again.
2 1 3
PHOTO C-4
Grey and black water valves