PARSTAT MC Hardware Manual
PARSTAT MC Hardware Manual 30
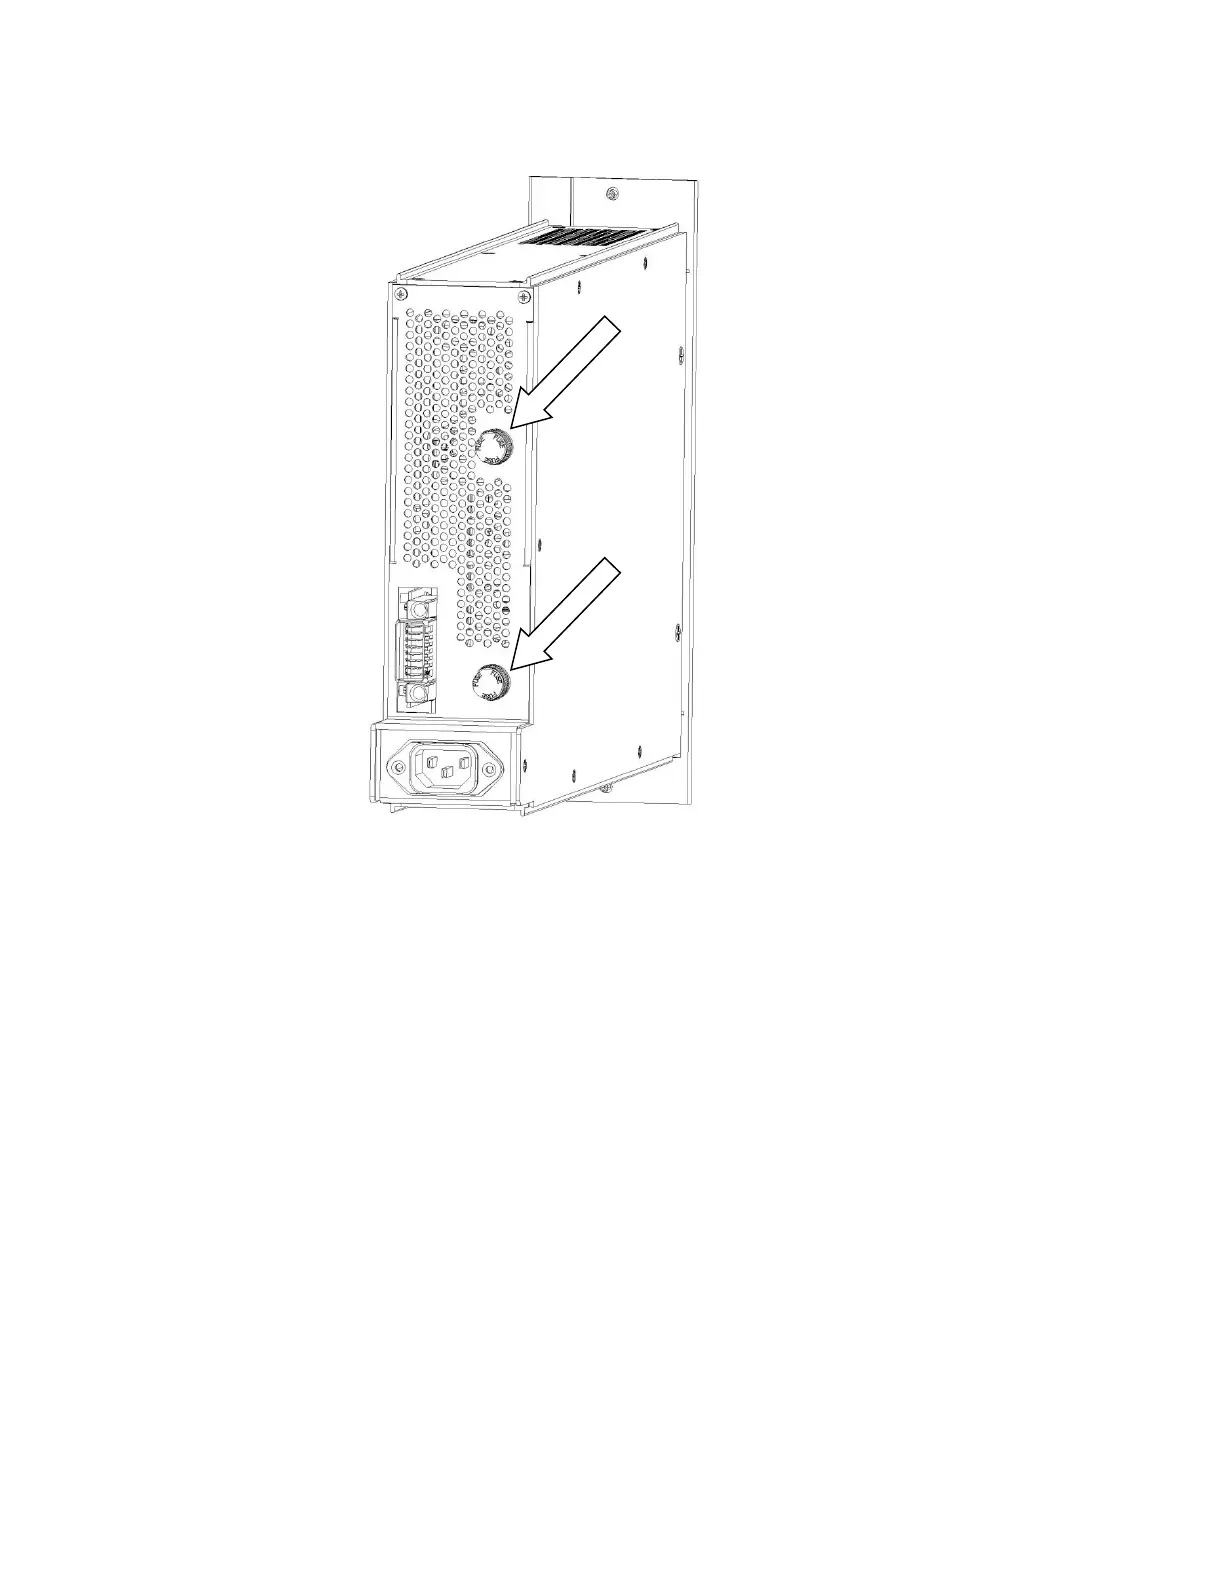
Figure 22. Rear View of the PMC PWR01 with the fuses location identified.
To remove the fuse, grasp the knob at the end of the fuse holder and turn anti-clockwise (toward the left)
until the end of the holder comes loose and the fuse cartridge pulls out of the holder. Replace the fuse with
the model indicated on the label on the power supply module. Return the knob and fuse cartridge to the
holder, and turn clockwise (toward the right) until the fuse is connected to the fuse holder.
Replace the power supply module in the chassis as shown in the section Replacing a power supply
module.
4.3. Installing a New Potentiostat Channel
It is not necessary to turn off power to the instrument to install a new channel. The other channel(s) in the
instrument may continue to operate normally during this procedure.
To install a new potentiostat module, first remove one of the blank modules installed in the instrument. This
example shows a fifth potentiostat being installed into the fifth potentiostat slot, but installing any new
potentiostat into any slot is similar.