PARSTAT MC Hardware Manual
PARSTAT MC Hardware Manual 33
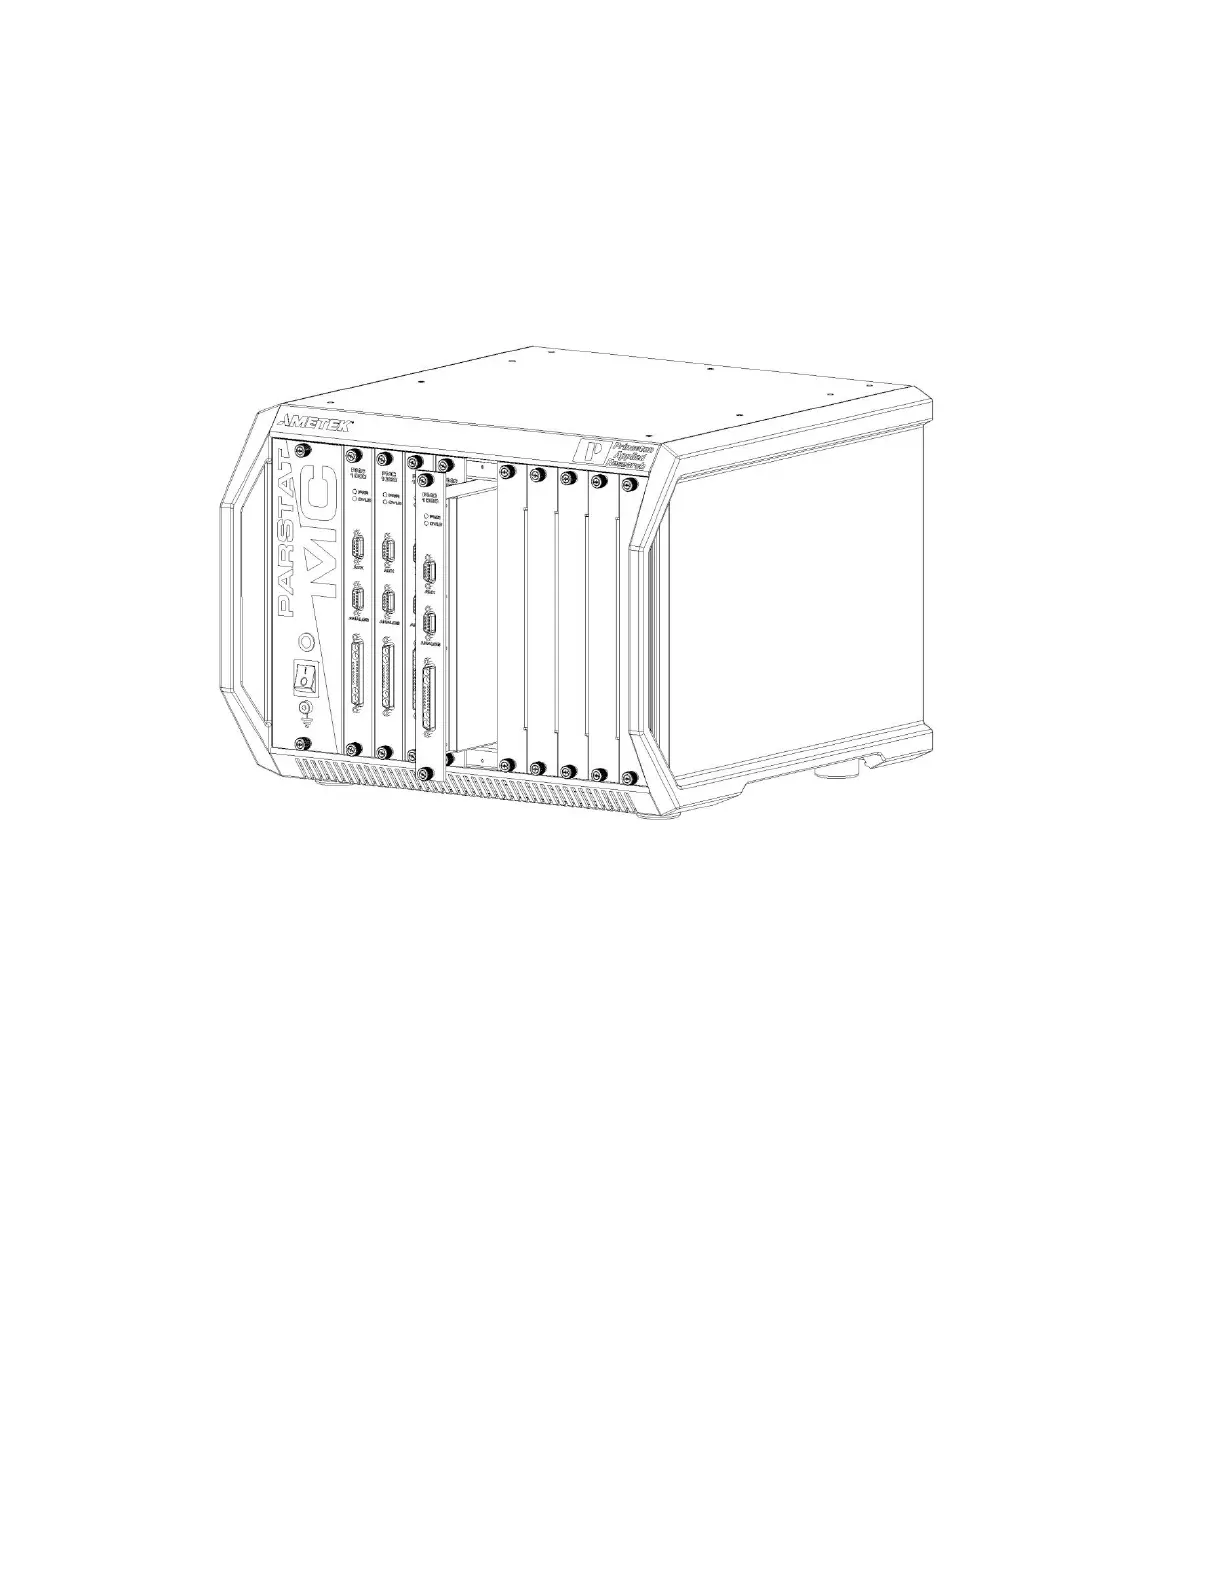
Align the top and bottom PCB edges of the potentiostat module with the top and bottom card guides in the
chassis. Slide the potentiostat module into the chassis until the front panel of the module meets the front
of the chassis.
Figure 26. PARSTAT MC with a PMC-1000 being installed.
Insert the thumbscrews into the threaded holes in the chassis and turn the thumbscrews clockwise (toward
the right) until they are finger tight.
4.4. Replacing an existing potentiostat
It is not necessary to turn off power to the instrument to replace a potentiostat channel. The other channel(s)
in the instrument may continue to operate normally during this procedure.
To replace an existing potentiostat module, first remove the original potentiostat from the instrument. This
example shows a fourth potentiostat being replaced in the fourth potentiostat slot, but replacing any
potentiostat in any slot is similar.