7
3 Mechanical
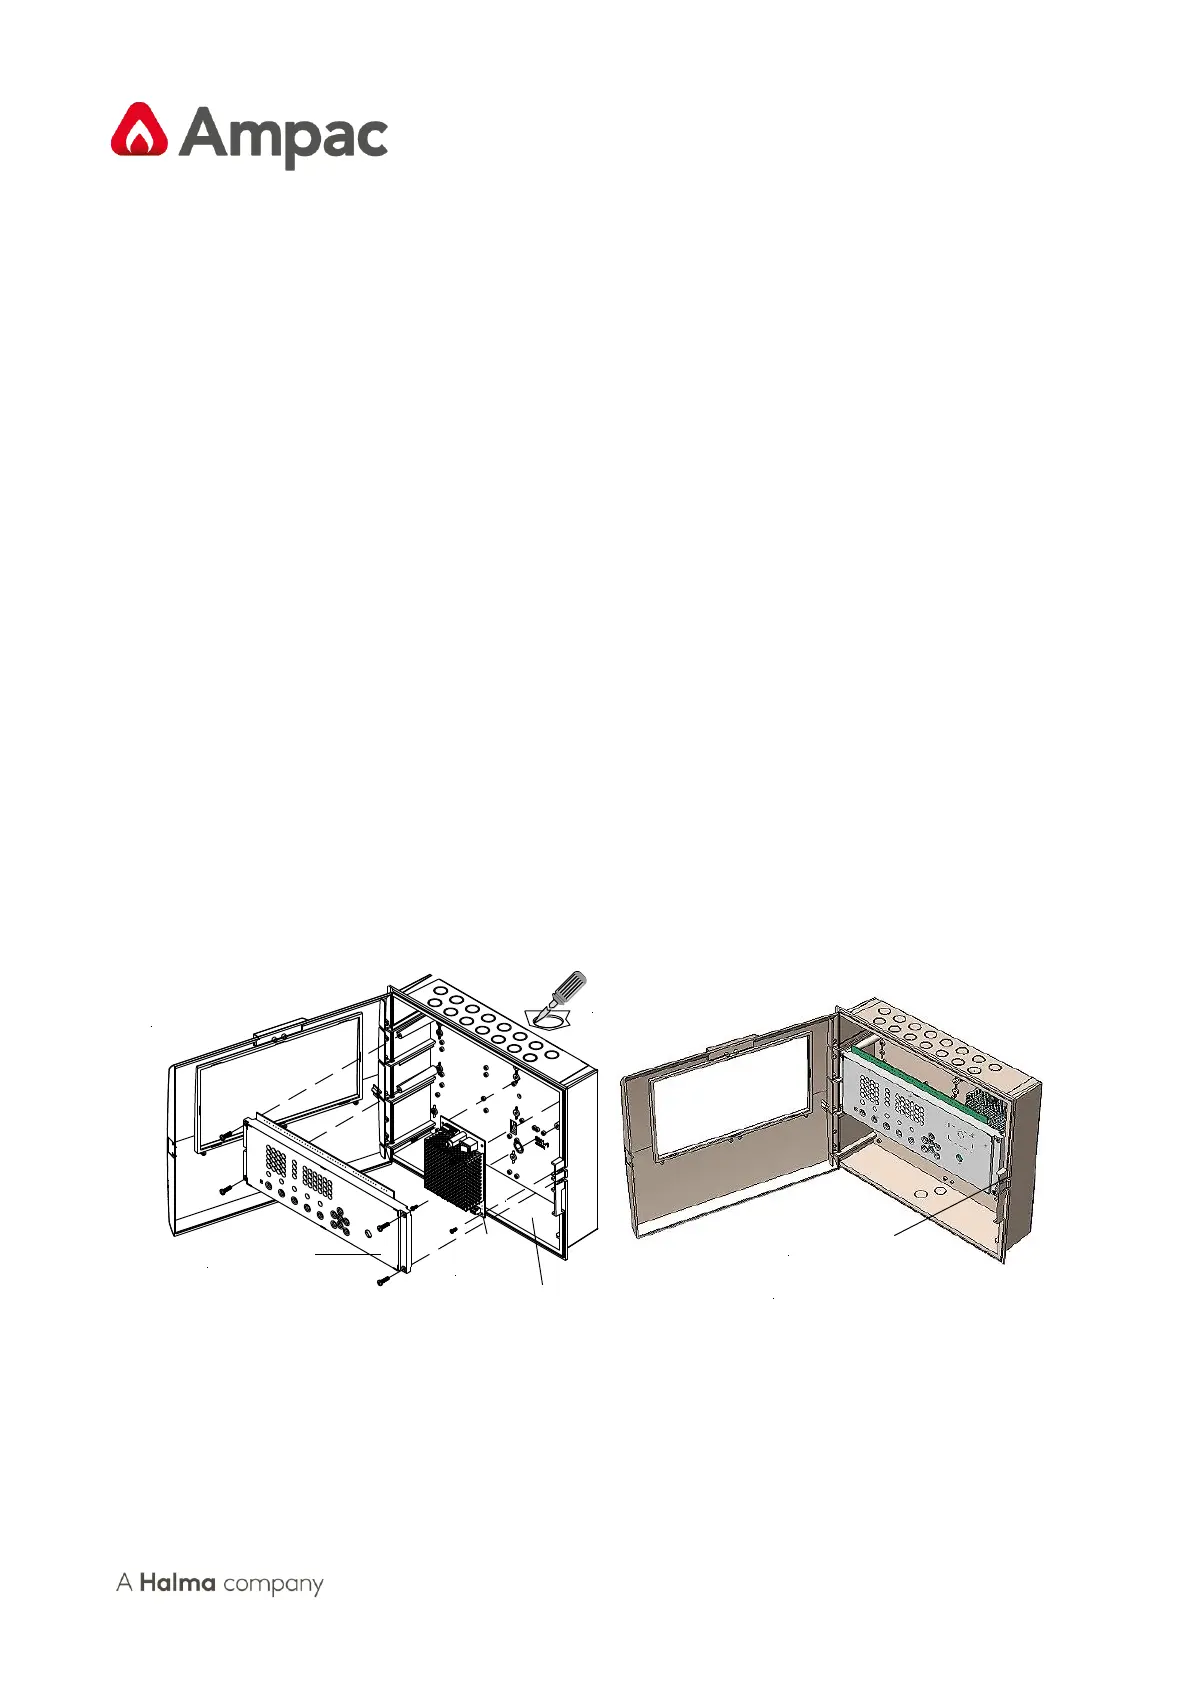
ZoneSense PLUS can be surface or semi-ush mounted. The ABS version is supplied with a detachable
door, a mountable back box. Depending on the conguraon it may be necessary to remove the
baeries to expose the lower mounng keyhole.
All of which are easily removed should it be necessary.
Inside the door is a matrix style label for the recording of the panel conguraon.
3.1 Mounting the Enclosure
The panel MUST be mounted in an area that is NOT subject to condions likely to aect its
performance, e.g. damp, salt-air, water ingress, extremes of temperature, abuse etc. is at an easily
accessible height and such that the indicators are at eye level.
3.1.1 Fixing the Chassis to the Wall
Taking into account the total weight of the panel and baeries securely mount the panel.
The ABS (BX1) uses three keyhole mounng holes
The Metal Cabinet (BX10) uses two keyhole and two standard mounng holes
Use suitably sized screws and plugs for the type of mounng surface.
Mounng is best achieved by posioning the box against the surface it is to be mounted to, marking
the holes, taking the box well away from the surface and then drilling the holes.
Cauon: Any dust or swarf created during the xing process must be kept out of the cabinet and
great care should be taken not to damage any wiring or components.