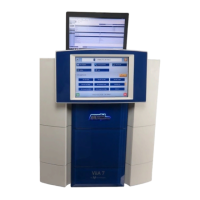
Do you have a question about the Applied Biosystems ViiA 7 Real and is the answer not in the manual?
| Platform | Real-Time PCR System |
|---|---|
| Manufacturer | Applied Biosystems |
| Model | ViiA 7 Real-Time PCR System |
| Number of Channels | 6 |
| Excitation Source | Tungsten-halogen lamp |
| Detection Method | Fluorescence |
| Multiplexing | Up to 6 targets |
| Temperature Range | 4-100°C |
| Temperature Accuracy | ±0.25°C |
| Thermal Uniformity | ±0.5°C |
| Software | Applied Biosystems ViiA 7 Software |
| Connectivity | USB, Ethernet |
| Power Requirements | 100-240V, 50/60 Hz |
| Format | 96-well, 384-well |
| Reaction Volume Range | 10-100 µL |
| Optical System | CCD camera |
| Sample Capacity | 96 or 384 samples per run |
Overview of the system's capabilities using fluorescent-based PCR for quantitative and qualitative analysis.
Lists various types of calibration for the ViiA 7 System, including ROI, background, and uniformity.
Lists necessary materials for calibrating the instrument across different sample block types.
Specific calibration materials required for the Fast 96-well sample block.
Steps to prepare calibration plates or array cards before initiating the calibration process.
Instructions for initiating the calibration process within the ViiA 7 Software.
Guidance on correctly loading the prepared plate or array card into the instrument.
Steps to begin the actual calibration run on the ViiA 7 System.
How to check calibration results and finalize the calibration process.
Lists all necessary materials for performing experiments on the ViiA 7 System.
Outlines the sequence of steps for designing and executing an experiment.
Steps to define experiment name, type, block type, and other properties.
Guidance on choosing appropriate reagents based on the selected experiment type.
Setting up parameters like ramp speed and data collection points.
Specifying targets, samples, and their associated properties for the experiment.
Mapping targets, tasks, and samples to specific wells on the plate/card.
Setting reaction volume, thermal profile, and cycling parameters for the experiment.
Instructions on saving the designed experiment for future use or as a template.
Guidelines for preparing reaction plates, including reagent handling and dilution.
Steps for preparing reaction array cards, including SNP preparation.
Instructions for loading the prepared reaction plate into the instrument.
Detailed steps for applying optical adhesive film to seal the plate for optimal results.
Steps to carefully remove the array card from its packaging.
Instructions on how to load reagents into the array card's fill reservoirs.
Guidance on dispensing fluid into the array card's fill reservoir correctly.
Steps for centrifuging the array card to ensure proper fill and reduce bubbles.
Further instructions on centrifuging the array card for optimal results.
Steps for sealing the prepared array card using a staker/sealer fixture.
Instructions for loading the sealed plate or array card into the instrument.
Analyzing amplification and multicomponent data for insights and comparisons.
Reviewing raw data, QC summaries, and identifying potential well issues.
Analyzing gene expression, genotypes, and specific experiment types.
Validating standard curves and reviewing melt curve data.
Choosing data types, formats, and contents for experiment results export.
Initiating the data export and optionally saving export settings.
Recommended maintenance tasks based on frequency: weekly, monthly, semi-annually.
Lists necessary accessories for maintaining different sample block types.
Procedure to eliminate fluorescent contaminants from the ViiA 7 System sample block.
Lists materials needed for sample block decontamination, including cleaning solutions.
Proper procedures for handling the sample block to prevent damage or contamination.
Step-by-step instructions for safely removing the sample block from the instrument.
Procedure for cleaning contaminated wells within the sample block.
Guidance on correctly reinstalling the sample block into the instrument.
Steps to verify decontamination using ethanol solution and background calibration.
Steps to verify decontamination using bleach solution and background calibration.
Specifies the required order for performing calibrations after instrument part changes.
Instructions for replacing the sample block with a different consumable format.
Steps to install a new sample block, ensuring correct seating.
How to confirm successful installation of a new sample block via software.
Instructions to perform necessary calibrations after changing the sample block.
Steps to open the instrument drawer to access the plate adapter.
Procedure for removing the existing plate adapter from the instrument.
Steps to install a new plate adapter into the instrument's tray arm.
Instructions for safely removing the heated cover from the instrument.
Steps for installing a new heated cover, ensuring correct alignment.
How to confirm successful installation of a new heated cover via software.
Instructions to perform necessary calibrations after changing the heated cover.
How to initiate and complete a self-test on the ViiA 7 System.
Steps to start and complete the instrument's self-test procedure.
Instructions for saving self-test results to a USB drive for analysis.
Navigating back to the main menu after completing instrument operations.



 Loading...