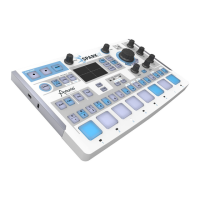
input of this envelope. The [Output] of the envelope needs to be connected to
the [Env] input of the Output modules 1 and 2.
Once these elements are connected, you can start building your instrument.
You will need an audio source. It can be either one or more Oscillators, a
Sampler module or a REX player module. In this case, we have a Sampler
module connected [5]. When you load either the Sampler module or the REX
module, the main connections required for it to work will automatically be
created. Since this is a fully modular environment, you are free to remove those
connections, but if you do so, you may have no sound coming out, we warned
you!
You can add other modules to build the patch you want. Those can be
modulators (envelopes, LFOs, …) or audio processors (filters, mixers, Bode
Shifter [6], …).
To add a new module, select the one you want from the list found in [7] and
drag and drop it in the modular area.
Navigate in the modular editor
Click and drag in an empty area of the modular editor to move around the
interface. Use the scroll wheel to zoom.
Connecting modules
To connect your modules together, you need to create cable connections [8]. To
do that, click and hold from one of the output of a module, and drag your cable
to one of the appropriate input of another module. When a connection is
possible, you will notice that your cable has a “sticky” behavior; it will
automatically place itself on the connector when you get close to it. Not all
connections are possible.
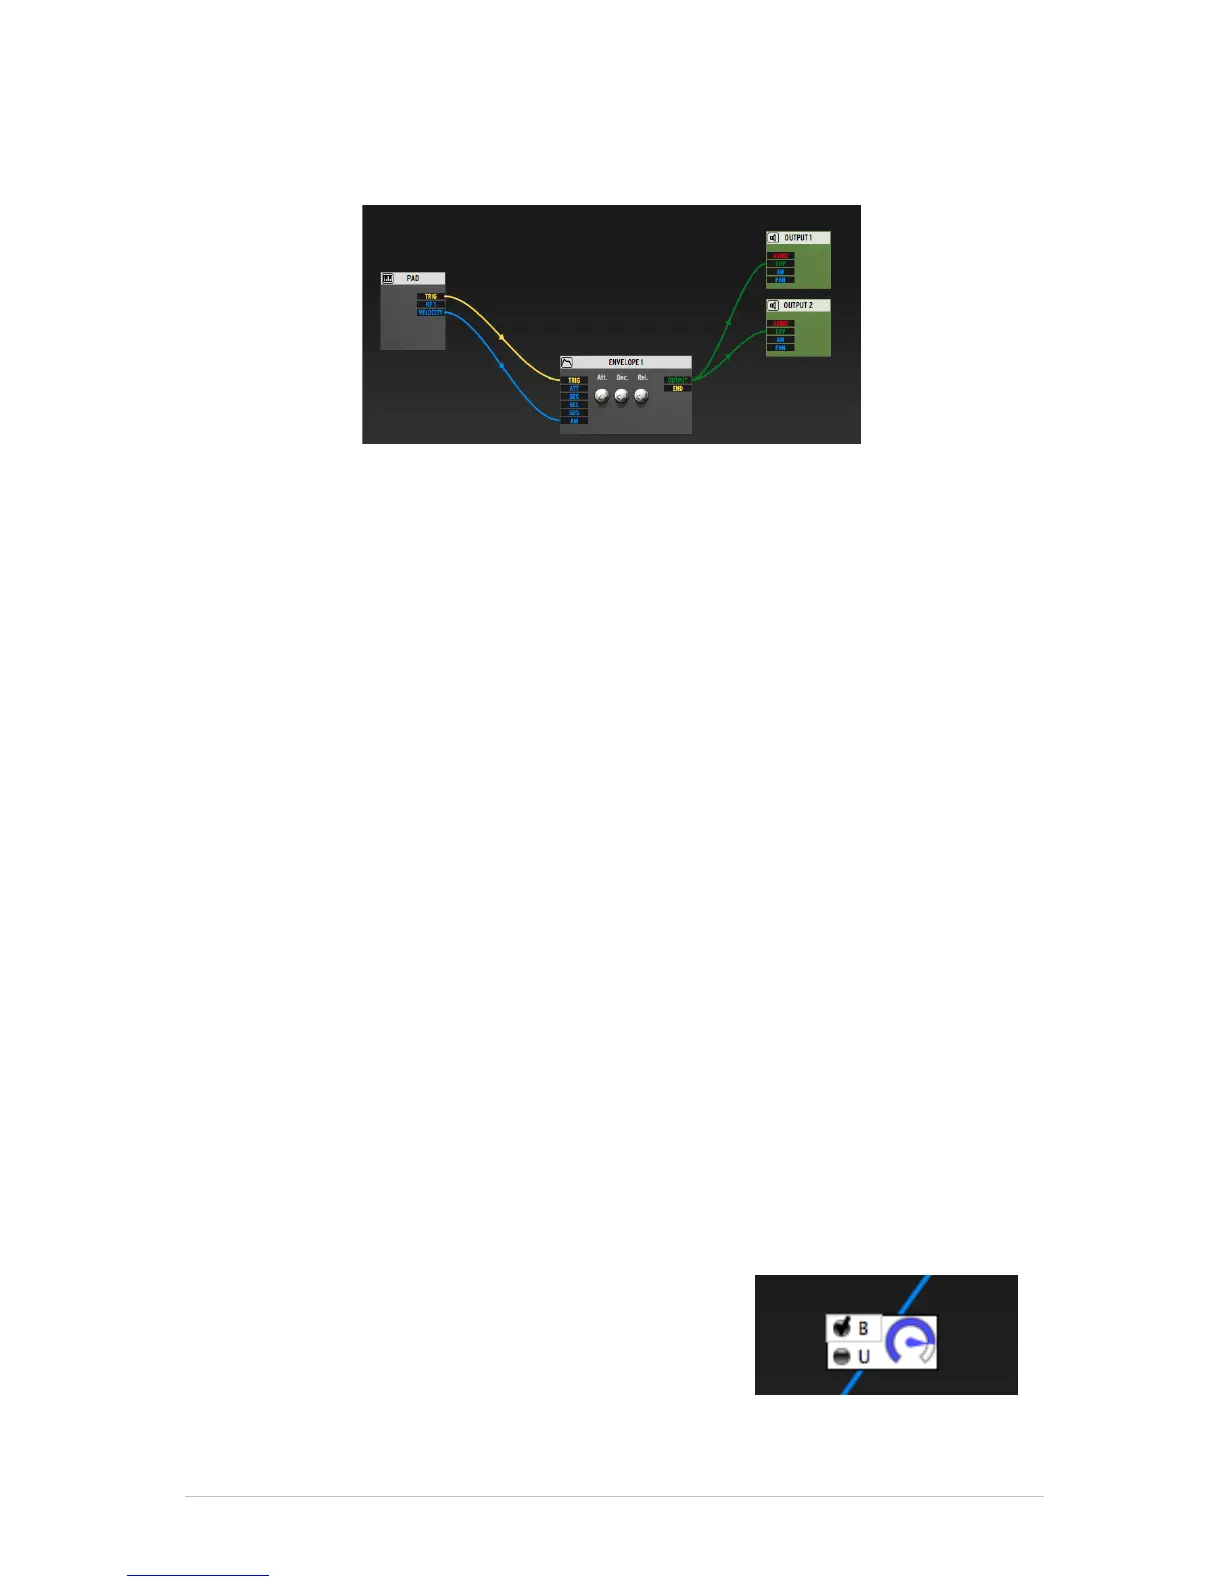
Depending on the type of connection, you will be able to edit the amount of
modulation defined by this cable. To do that, you
must double click on the cable. A small window will
appear at the middle of the knob. From there, you
will be able to set the amount of modulation (gain
knob) and the type of modulation (unipolar: only
positive modulation – or bipolar: both positive and
negative modulation)