15
Main Menu will appear. You are now ready to enter any object from the Object Menu or go to the Setup Menu to make
changes, as needed.
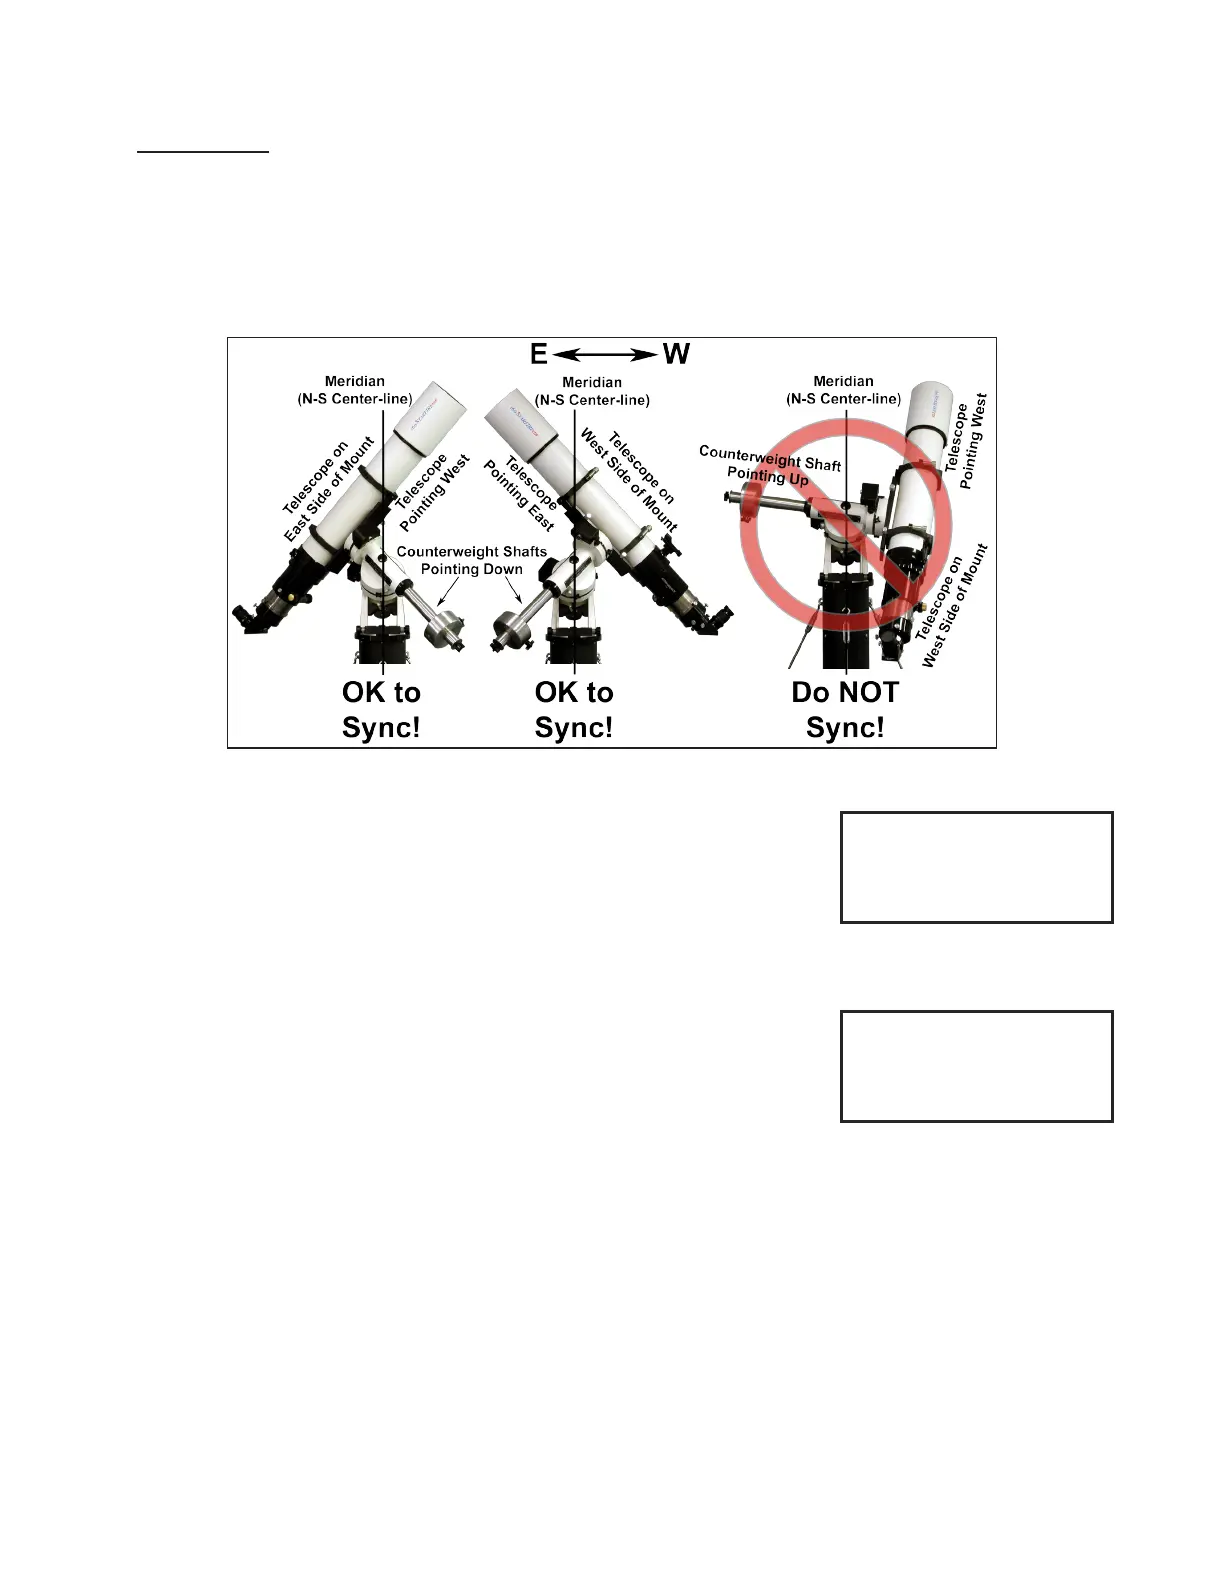
Very Important: You must point to stars in the west when your telescope is on the east side of the mount and stars in the
east when your scope is on the west side. When the stars are high and close to the zenith, this can be tricky. However,
you can tell which side the star is on by looking at the “z” number (also called the LST) in the upper right corner of the
Choose Star screen, then comparing that number with the R.A. number of the star you choose. If the R.A. number is
larger, the star is in the east; if the R.A. is smaller, the star is in the west. If your scope is not on the correct side when you
sync, the mount will not slew properly and the telescope could strike the pier/tripod. Another way to tell is by looking at
your counterweight shaft. If your mount is situated correctly, the shaft will point down and away from the mount. Please
read the Advanced Features section of this manual for a complete discussion of the Sync command.
Resume Last Position
Choose “ResumeLastPosition” if you have previously parked the telescope after
an observing session and have not moved the scope on the axes. The screen will
advance to Main Menu and you are ready to enter objects or make changes in the
Setup Menu.
New Setup → New Setup Start From Park Position (press 1, 2, 3, or 4)
For this start position you will need to have a bubble level (or at least a good eye).
Physically move your mount to your chosen park position by setting both axes to be
properly oriented for your positional choice. When the mount is in position, select this
menu option. The Main Menu will display on the Keypad so that you can proceed with
your session. This option is particularly useful when using the Polar Aligning in the
Daytime procedure described in the next section.
Helpful Hints
● “ResumeLastPosition” is used when you parked the mount at the end of the previous session and wish to begin a new
night of observing. Selecting it will initialize the mount and you’ll be ready to go to your rst object.
● “New Setup” is only used when you are setting up the mount for the rst time or if you have readjusted scope position
via the clutches and wish to restart from a “Reference Position”.
● When resuming from a “Reference Position”, be sure that the mount is actually in the position that you wish to start in;
otherwise, the misinformation will cause the mount to be lost and it could slew into the pier.
● If you are in a permanent setup, then you should set the Keypad to “AutoConnect: YES” so that when you power up
the mount, it will automatically be initialized and ready to go to your rst object. This is the most automated of the
setups using the Keypad.
1=Star-Sync
2=Polar Alignment
3=ResumeLastPosition
4=New Setup
Sync, Align, Resume, New Setup
New Setup
Start From
Park Position:
Press: 1, 2, 3, 4
New Setup Menu