26
GTO Quick Star Drift Method of Polar Alignment
(Using the Meridian Delay Feature and a Finderscope)
Note the selection of suggested stars for this procedure in Appendix I
We suggest that you use these detailed instructions the rst couple times you perform this method. After you are
comfortable with the procedure, a single-page Quick Reference Sheet is also provided for convenience.
The star-drift method is the favorite way that astro-photographers align their mounts. After all, they would like the least
amount of drift possible during their long time exposures. An Astro-Physics GoTo mount makes it possible to simulate this
method without spending a long time waiting for drift to show up. It is also easy because it separates the two adjustments
of altitude and azimuth into separate operations.
This method is easiest to perform using a nder scope with a cross-hair eyepiece. There are a couple good reasons
for this: First, it is easy to adjust a nder scope to make it perfectly orthogonal to the mount. Orthogonality is not a
requirement for this method, but it does make the process much easier. Second, the wider eld of a nder makes the
rst iteration or two much easier since you are very likely to already have the star of choice in the eld of view. This is
especially true if you would otherwise be using a long focal length telescope or a very short focal length reticle eyepiece.
See the hints in #8 below.
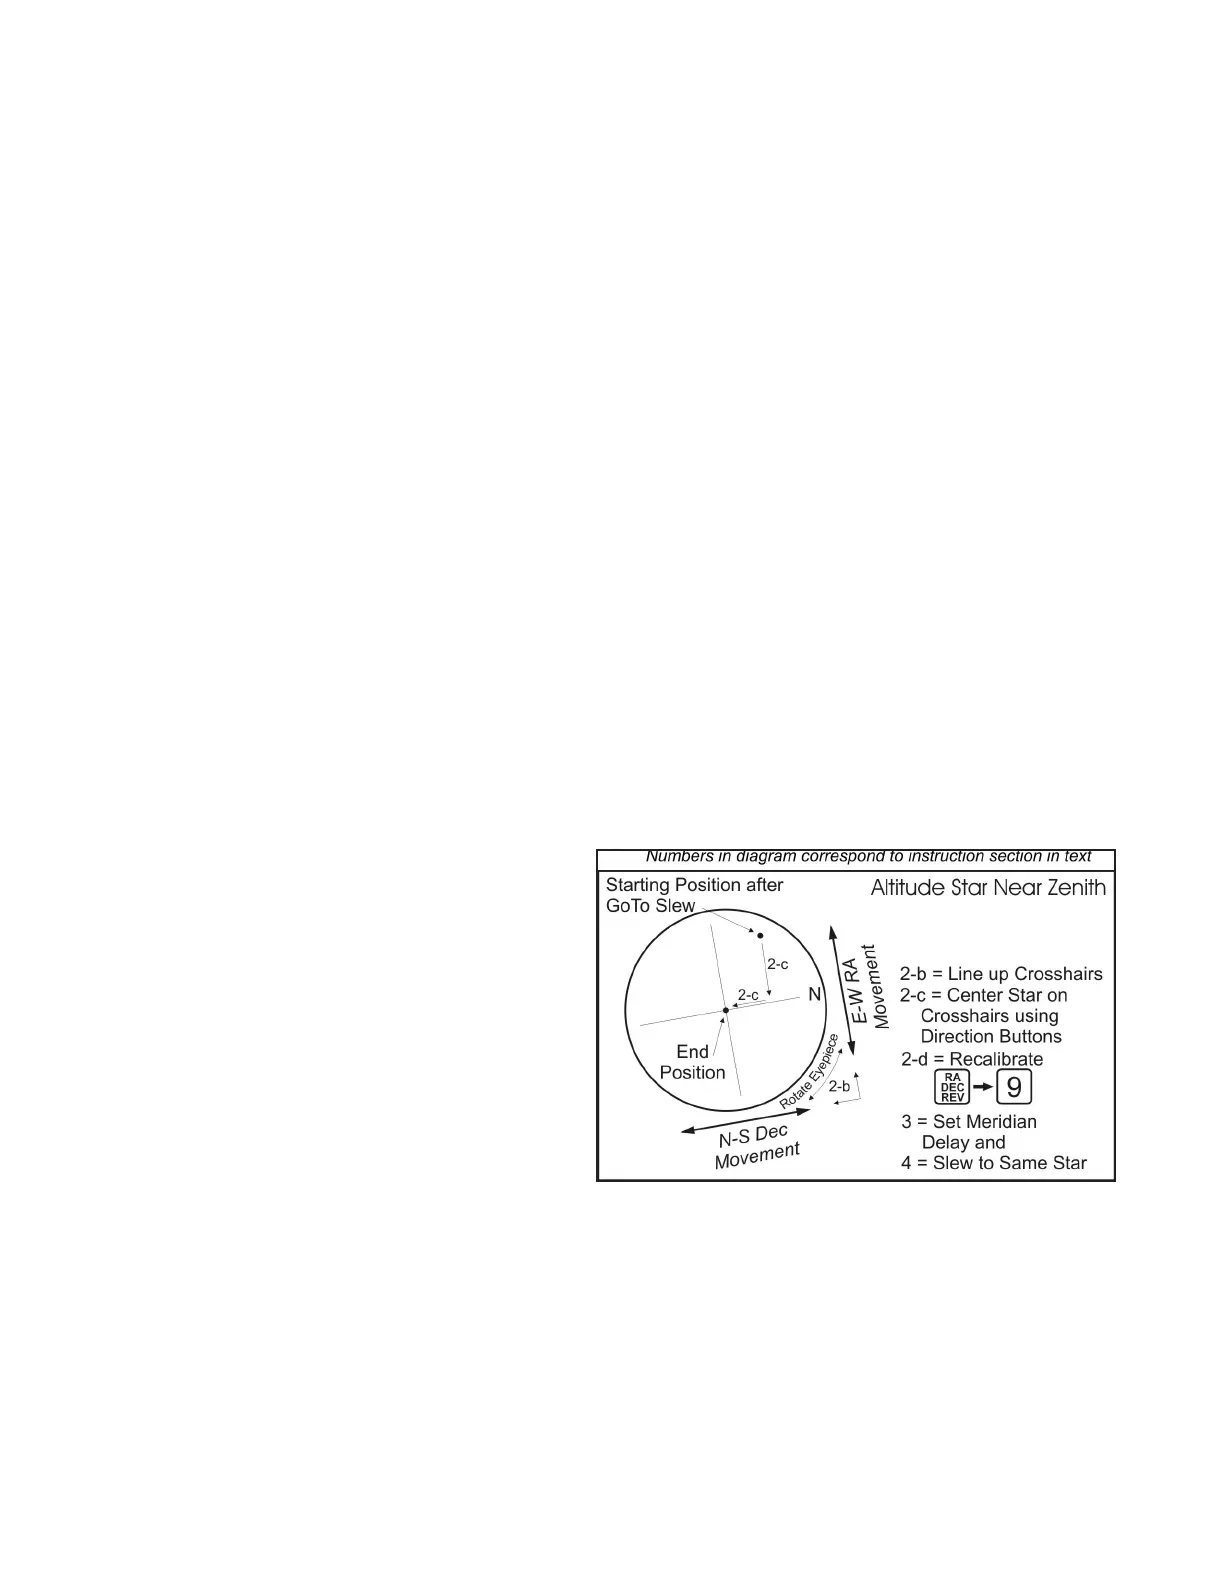
NOTE: The diagrams below portray a hypothetical example to illustrate the concept. What you actually see in your
nder’s reticle eyepiece will almost certainly be considerably different. In particular, your starting point will depend on
whether you are east or west of the pole in azimuth, and whether you are above or below the pole in altitude. Also note
that the number references in each diagram (i.e. 2-b or 5-c) refer to the corresponding instruction section in the text.
1. Follow one of the start-up alignment procedures from earlier in the manual (one complete cycle) to get close.
We have found this method particularly effective following the Daytime Polar Alignment Routine, for aligning without
a polar scope. This is especially useful: 1.) in the southern hemisphere, 2.) with the 3600GTO, or 3.) in a situation
where the pole is not visible. You will be at the Main Menu when you nish your start-up routine.
2. Slew to a bright star that is within 1 hour of the meridian, either east or west, and as close to straight overhead
in the N-S direction as possible. The stars listed in the table in Appendix I will provide some good possibilities. See
the instructions that accompany the table on how to select stars from the lists for more details.
a) Be sure that your telescope is on the west side of the mount when pointing to a star in the east and vice
versa. Choose a bright star that is right at
or just south of your zenith if you are in the
northern hemisphere, and right at or just north
of your zenith if you are down under. This is
to protect your instrument from hitting the pier
when you ip sides.
b) Use the direction buttons to line up the
reticles of your nderscope’s eyepiece with
the movement of the axes by turning the
nderscope’s eyepiece until N-S movements
parallel one hair and E-W movements paral-
lel the cross hair.
c) Center the star on the reticles using the N-S-
E-W buttons
d) Press the RA/DEC REV button; then select the “9=Re-calibrate” option (from the RA/DEC REV menu). You
will hear a beep letting you know you successfully re-calibrated.
3. In the RA/DEC REV menu look at the Meridian Delay selection. If the star is in the west, advance the meridian by
1 hour so that the display shows Meridian<1W>. Use the <PREV and NEXT> buttons to advance the hour and also
change the direction to either W or E (pressing <PREV multiple times will display the hours in the east). If the star is
in the east, enter <1E>. (You can verify if the star is in the east by comparing its R.A. value to the current “z” or LST
value. A larger R.A. value indicates it is in the east; a smaller R.A. value indicates it is in the west.) Press MENU a
couple times to return all the way back to the Objects Menu. (Don’t stop at your star. Go all the way to the Objects
Menu.)
4. Choose the same star again, beginning from the Objects menu, and press GoTo. Now the telescope will swap
sides. The star will (hopefully) appear again in the nderscope eyepiece, but may be displaced both in R.A. and Dec.
on the reticles.