45
PARK OPTIONS
Park Your Telescope
The Keypad allows you to park the telescope at the end of your observing
session. You can then turn off the power and the mount will retain this
position for the next session. When the park command is cancelled, you
are ready to resume without going through the calibration routine. Once the
telescope is parked, it cannot be moved by hand or the calibration will be lost
and you will have to repeat the startup sequence at the beginning of your
next observing session.
In January 2016, Astro-Physics added new park positions to the Keypad:
Park 4 and Park 0. These are now offered in addition to Park 1, 2 and 3.
Please read the descriptions of each below and determine which best suits
your needs.
It is important to understand that parking is a state of being. When the
mount is next powered up, it will not begin tracking until it is told to do so.
This is a very safe state.
Park 0 (“Park in Place”) was created to allow the Keypad to park the mount in
its current position, wherever that might be, and to remain parked when next
powered up. This is an important distinction from simply powering off the
mount as described below.
There are six options to parking. You may choose one of four pre-determined
park positions, plus the “Park in Place”, or you may simply remove the power
and the drive electronics will store the information regarding the last position
in its memory (though it will immediately begin tracking when next powered
up).
Park – 5 Positions
1. Go to Mount Menu. Main Menu → “2=Setup” → “4=Park / Mount Opt”.
2. Choose either 0, 1, 2, 3 or 4 with the buttons. Depending on which
number you choose, the scope will slew to one of the park positions
shown in the photos (Park 0 will park at the current location). The screen
will state, “Pls wait till scope reaches park point before power off”. If you
press MENU, the mount will unpark and start tracking.
3. Remove the power to avoid
potential damage by lightning.
Disconnect the power supply from the
wall for optimal protection.
4. Turn the power on when you are
ready to begin your next observing
session.
a) If Auto-connect is set to “YES”, the
mount will initialize and begin tracking
in R.A. when you apply power.
b) If Auto-connect is set to “NO”, the
mount will not begin tracking in R.A.
until you choose your location from the
Site Menu, then select “ResumeLast-
Position”.
c) If Auto-connect is set to “EXT”, the mount will not begin tracking in
R.A. until it receives location and time data from an external computer.
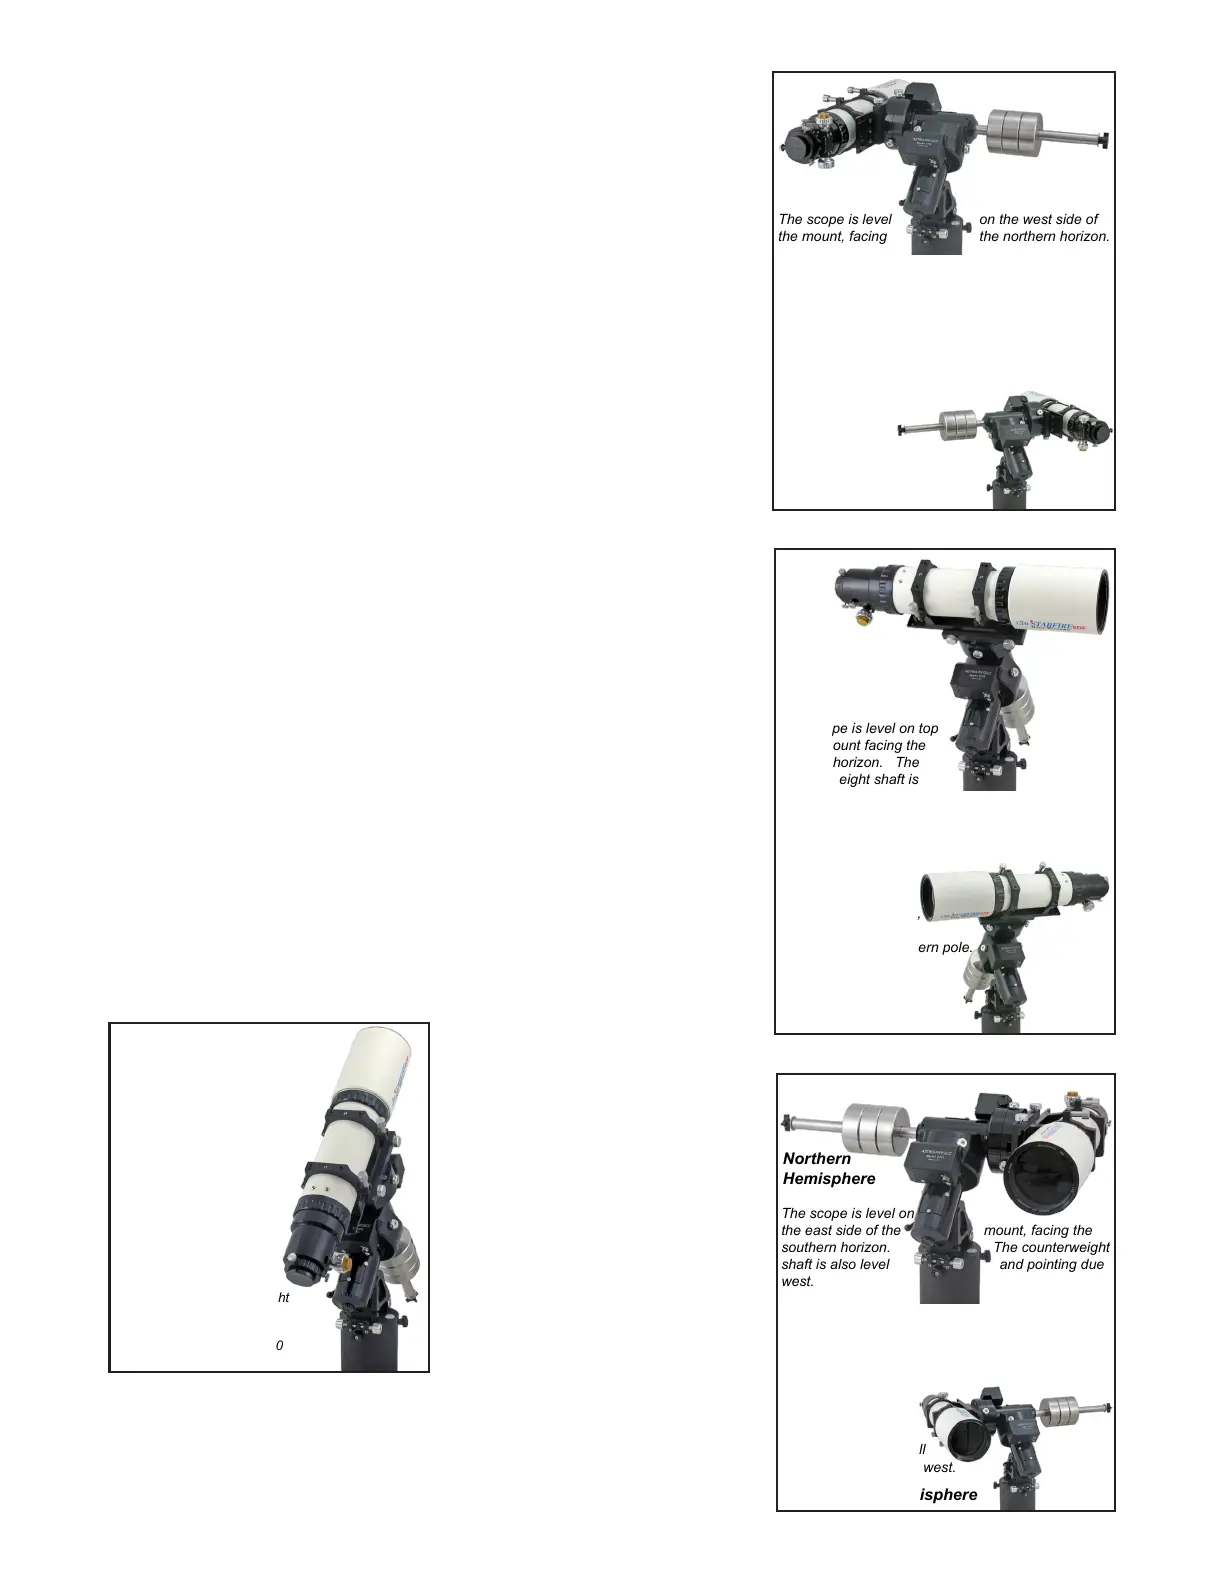
The scope is level on the west side of
the mount, facing
The counterweight shaft is also level
and pointing due east.
Both Hemispheres: RA is horizontal,
North: Dec = (90-Latitude) South: Dec = (-90-Latitude)
The southern hemisphere is mirror reversed. The
scope is still level on the west side of the mount, but
is facing the southern horizon.
The counterweight
shaft is also still
level and pointing due east.
PARK 1
Northern
Hemisphere
Southern Hemisphere
The scope is level on top
of the mount facing the
eastern horizon. The
counterweight shaft is
pointing down.
Both Hemispheres: RA axis is vertical, Dec = 0
The southern hemisphere
is mirror reversed.
The scope still points
to the eastern horizon,
but east is to the left
when facing the southern pole.
PARK 2
Northern
Hemisphere
Southern
Hemisphere
The scope is pointing to
the pole. The counterweight
shaft is pointing down.
RA axis is vertical, Dec = 90
PARK 3
Northern
Hemisphere
&
Southern
Hemisphere
PARK 4
Northern
Hemisphere
Southern Hemisphere
The scope is level on
the east side of the mount, facing the
southern horizon. The counterweight
shaft is also level and pointing due
west.
Both Hemispheres: RA is horizontal,
North: Dec = (-90+Latitude) South: Dec = (90+Latitude)
The southern hemisphere is mirror reversed. The
scope is still level on the east
side of the mount, but
is facing the northern
horizon. The counter-
weight shaft is also still
level and pointing due west.