EasyManuals Logo

Asus RS700A-E9-RS12 User Manual

Asus RS700A-E9-RS12
144 pages
To Next Page IconTo Next Page
To Previous Page IconTo Previous Page
Page #49 background imageLoading...
Page #49 background image
2-23
ASUS RS700A-E9 Series
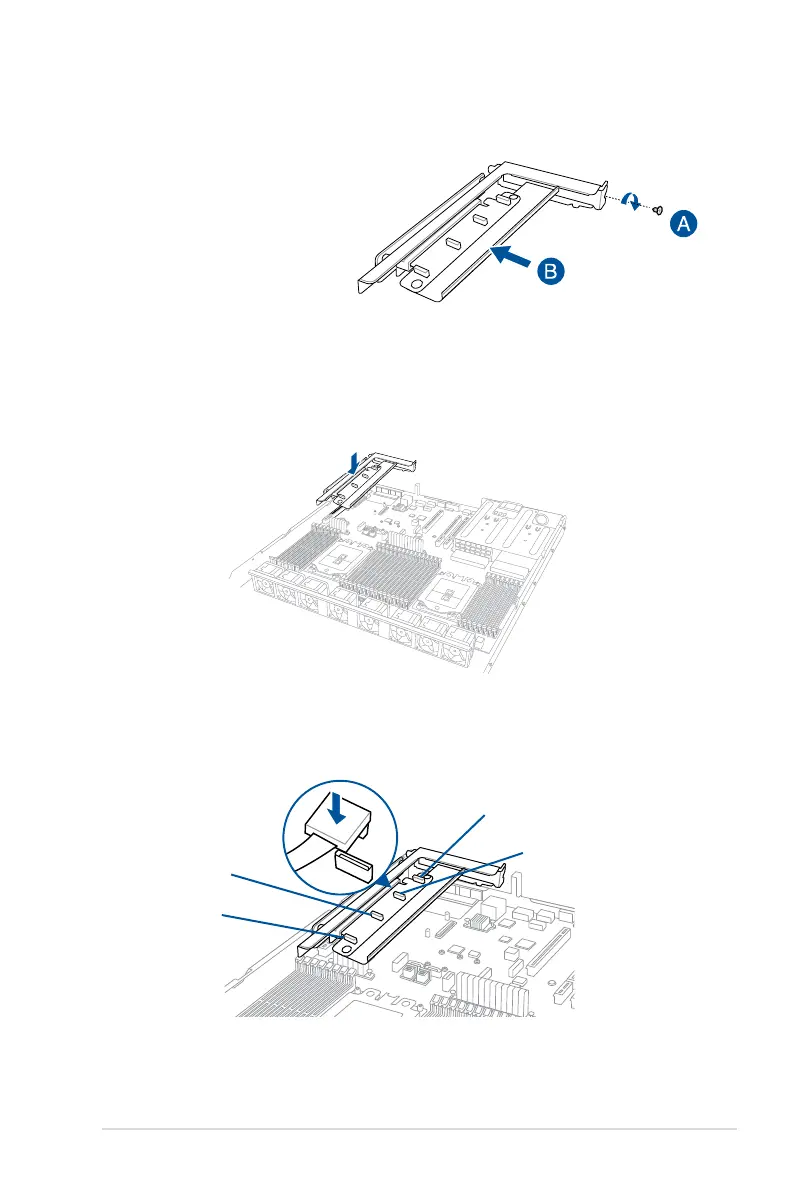
4. PreparethereplacementASUSPCIE-NVME4-OCuLinkcard.
5. InstallthereplacementASUSPCIE-
NVME4-OCuLinkcardintotheriser
cardbracket(A),thensecureitwiththe
screw (B).
6. InstalltherisercardbracketandASUSPCIE-NVME4-OCuLinkcardassemblyintothe
PCIE connector on the motherboard. Ensure that the golden connectors of the riser
cardbracketisrmlyseatedinplace.
7. Reconnect the OCuLink cables to its corresponding slots.
OCuLink port 4
OCuLink port 3
OCuLink port 2
OCuLink port 1

Table of Contents

Questions and Answers:

Question and Answer IconNeed help?

Do you have a question about the Asus RS700A-E9-RS12 and is the answer not in the manual?

Asus RS700A-E9-RS12 Specifications

General IconGeneral
BrandAsus
ModelRS700A-E9-RS12
CategoryServer
LanguageEnglish

Related product manuals