Chapter 2: Hardware Information
2-38
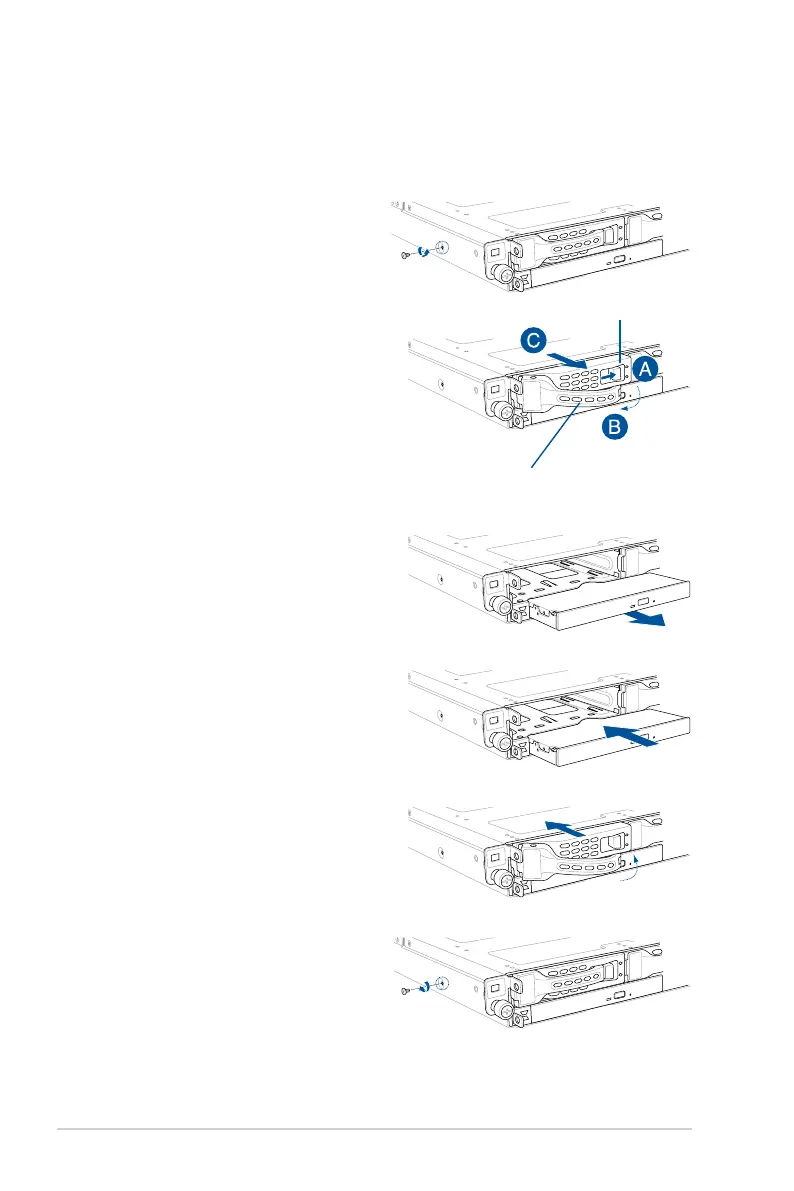
2.8.3 Replacing optical drive (optional for RS700A-E9-RS4)
This server system supports a slim-type optical disk drive.
To replace the optical disk drive:
1. Remove the screw that secures the
optical drive and set it aside.
6. Carefully insert the storage device
tray and push it all the way to the
depth of the bay until just a small
fraction of the tray edge protrudes.
7. Pushthetrayleveruntilitclicks,
and secure the storage device tray
in place. The storage device tray is
correctly placed when its front edge
aligns with the bay edge.
8. Secure the optical drive with the screw
that you removed in step 1.
5. Carefully insert the replacement
optical disk drive module into the drive
bay until it is securely seated in place.
4. Pull the optical drive module out of the
drive bay.
3. Hold the tray lever and pull the
storage device tray out of the bay.
2. Push the spring lock to the right (A) to
removetheSATA/SASstoragedevice
tray,thenpullthetrayleveroutward
(B).
The storage device tray ejects slightly
after you pull out the lever (C).
Spring lock
Tray lever

 Loading...