Chapter 2: Hardware Information
2-20
5. InstalltheASUSPIKEIIcardandthemetalcoverassemblytotherisercardbracketor
butteryrisercardbracket.Ensurethatthemetalcoverisinsertedandrmlyseatedin
place.
Refer to section
2.5.1 Installing an expansion card to the riser card bracket
or
2.5.2
Installing an expansion card to the butterfly riser card bracket
for the steps on
installinganexpansioncardtotherisercardbracketorbutteryrisercardbracket.
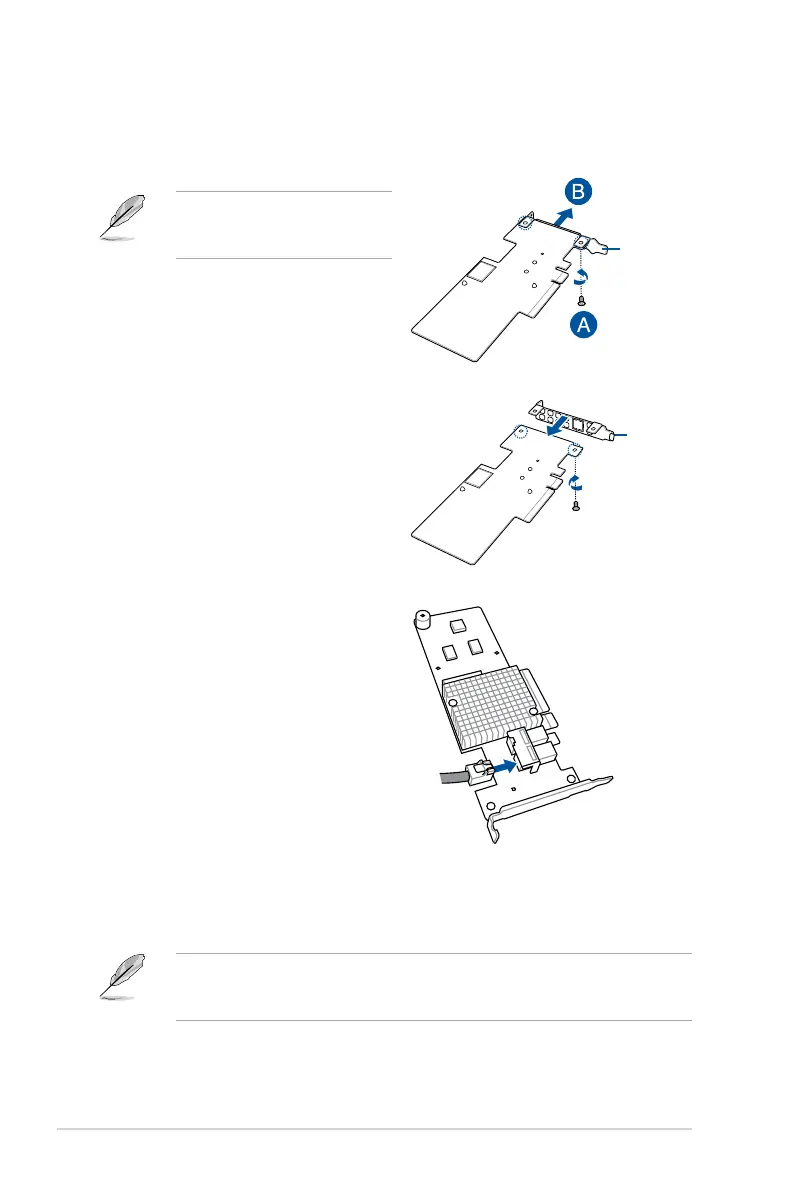
2.5.3 Installing an ASUS PIKE II card
1. PreparetheASUSPIKEIIcard.
2. RemovethetwoscrewsontheASUS
PIKEIIcard(A),thenremovethecard
bracket (B).
If your expansion card is pre-installed
withaproprietarycardbracket,
proceed to step 4.
Metal cover
Card bracket
3. SecuretheASUSPIKEIIcardandthe
metal cover (proprietary card bracket)
with the two screws.
4. Connect the mini-SAS HD cable to the
ASUSPIKEIIcard.

 Loading...