EasyManuals Logo

Asus RS700A-E9-RS12 User Manual

Asus RS700A-E9-RS12
144 pages
To Next Page IconTo Next Page
To Previous Page IconTo Previous Page
Page #58 background imageLoading...
Page #58 background image
Chapter 2: Hardware Information
2-32
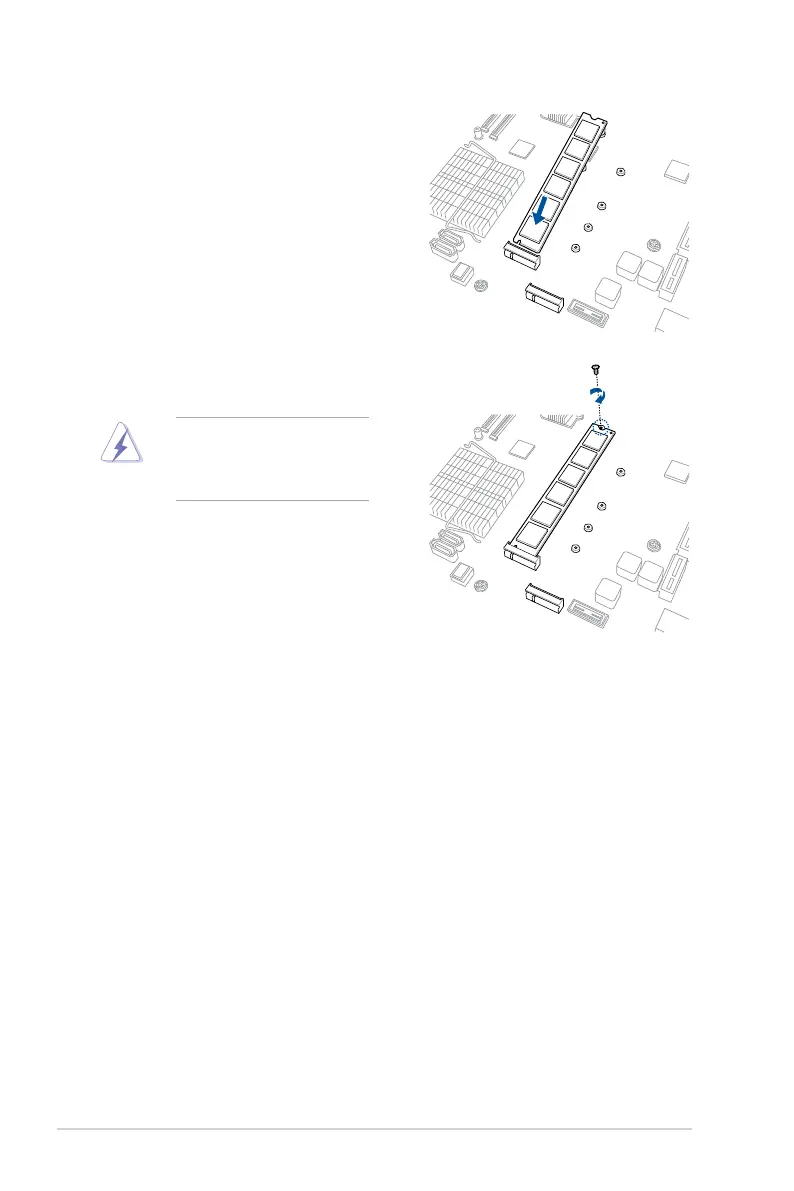
Ensure that the M.2 card is
positioned between the top screw
and the stand screw before
securing it.
4. Prepare the M.2 card.
5. Align and insert the M.2 card into the
M.2 connector on the motherboard.
Ensure that the golden connector
oftheM.2cardisinsertedrmlyin
place and that the screw hole on the
M.2 card matches the stand screw
on the motherboard.
6. Secure the M.2 card with the top
screw.

Table of Contents

Questions and Answers:

Question and Answer IconNeed help?

Do you have a question about the Asus RS700A-E9-RS12 and is the answer not in the manual?

Asus RS700A-E9-RS12 Specifications

General IconGeneral
BrandAsus
ModelRS700A-E9-RS12
CategoryServer
LanguageEnglish

Related product manuals