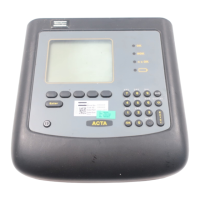
ACTA 4000 User Guide Calibrating tools and equipment
9836 4171 01 2008-12 95 (136)
3. Select transducer calibration by selecting Conf>Calibration>Deadweight. Press ENTER.
4. Confirm the settings in the dialog box by selecting
OK on the keypad or highlighting the OK menu
block and then pressing
ENTER.
A
Deadweight calibration window appears with the following text:
Number of load points
This is your current status of the
number of full measurements for
your calibration.
No load on transducer
Gives the required torque status
of the transducer
Measured value (mV/V)
This refers to the numeric value
below and represents your
measured mV/V value under the
current load on the transducer.
(Numeric value)
Below this window, three new menu blocks appear with functionality specific for the calibration process:
Store Lin.ch Cancel
7.2.1 Calibration
You will now measure and record the mV/V value of the transducer at least three consecutive times. Three
measurements is the minimum recommended number of reference points.
Each measurement includes a mV/V checkpoint without any torque applied over the transducer and one
checkpoint when a specific torque level is applied over the transducer using the deadweight equipment.
These measurement results or calibration checkpoints serve as the basis on which ACTA calculates a
calibration value, which is then compared with the transducer’s current calibration value.
1. In the
Deadweight calibration window press the Store menu block to save the first checkpoint (mV/V
value) with no load on the transducer.
The first checkpoint without load is saved and you can see that row number 2 in the
Deadweight calibration
window
changes and now reads: Load on transducer.
2. Apply torque to the transducer using the deadweight equipment. As you apply torque you can see that
the mV/V value changes – it increases.
3. When the load is stable, press the
Store menu block again.
4. A small pop-up window appears asking you to enter the torque value from the previous step manually.
Press
ENTER.

 Loading...