How to enter camera control mode on NINJA V+ to control a Z CAM camera:
1. Use an HDMI cable that supports 4Kp60 to connect the output of the Z CAM to the
HDMI input of your NINJA V+.
2. Connect the 3.5mm end of an ATOMOS USB-C to Serial LANC cable to the
Remote/Calibration Port on your NINJA V+, and the USB-C end of the cable to the
USB Type-C port on the Z CAM.
3. Power on your Z CAM and navigate to RAW over HDMI in the Record menu, to ensure
that it is turned off.
RAW over HDMI must be disabled for camera menu control to work.
4. Power on your NINJA V+ and select Compatibility Mode in the Input menu at HDMI
Standard. Remove the HDMI cable from the Z CAM and re-attach it to ensure that the
signal is locked correctly.
5. Tap on Remote Mode on the Input page to select Camera Controls, then tap on the
blue Camera icon on the bottom of the screen to enter camera control mode.
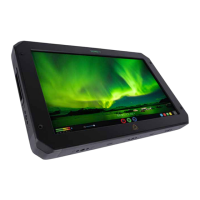
6. Your NINJA V+ will display the Z CAM camera settings and a camera battery status
icon across the top of the screen, with audio meters and a Menu icon on the right
hand side. The information that is normally displayed across the top of the screen like
video input, media, timecode and battery status will now be displayed on the bottom
of the screen.