17
7. Using the Ninja V
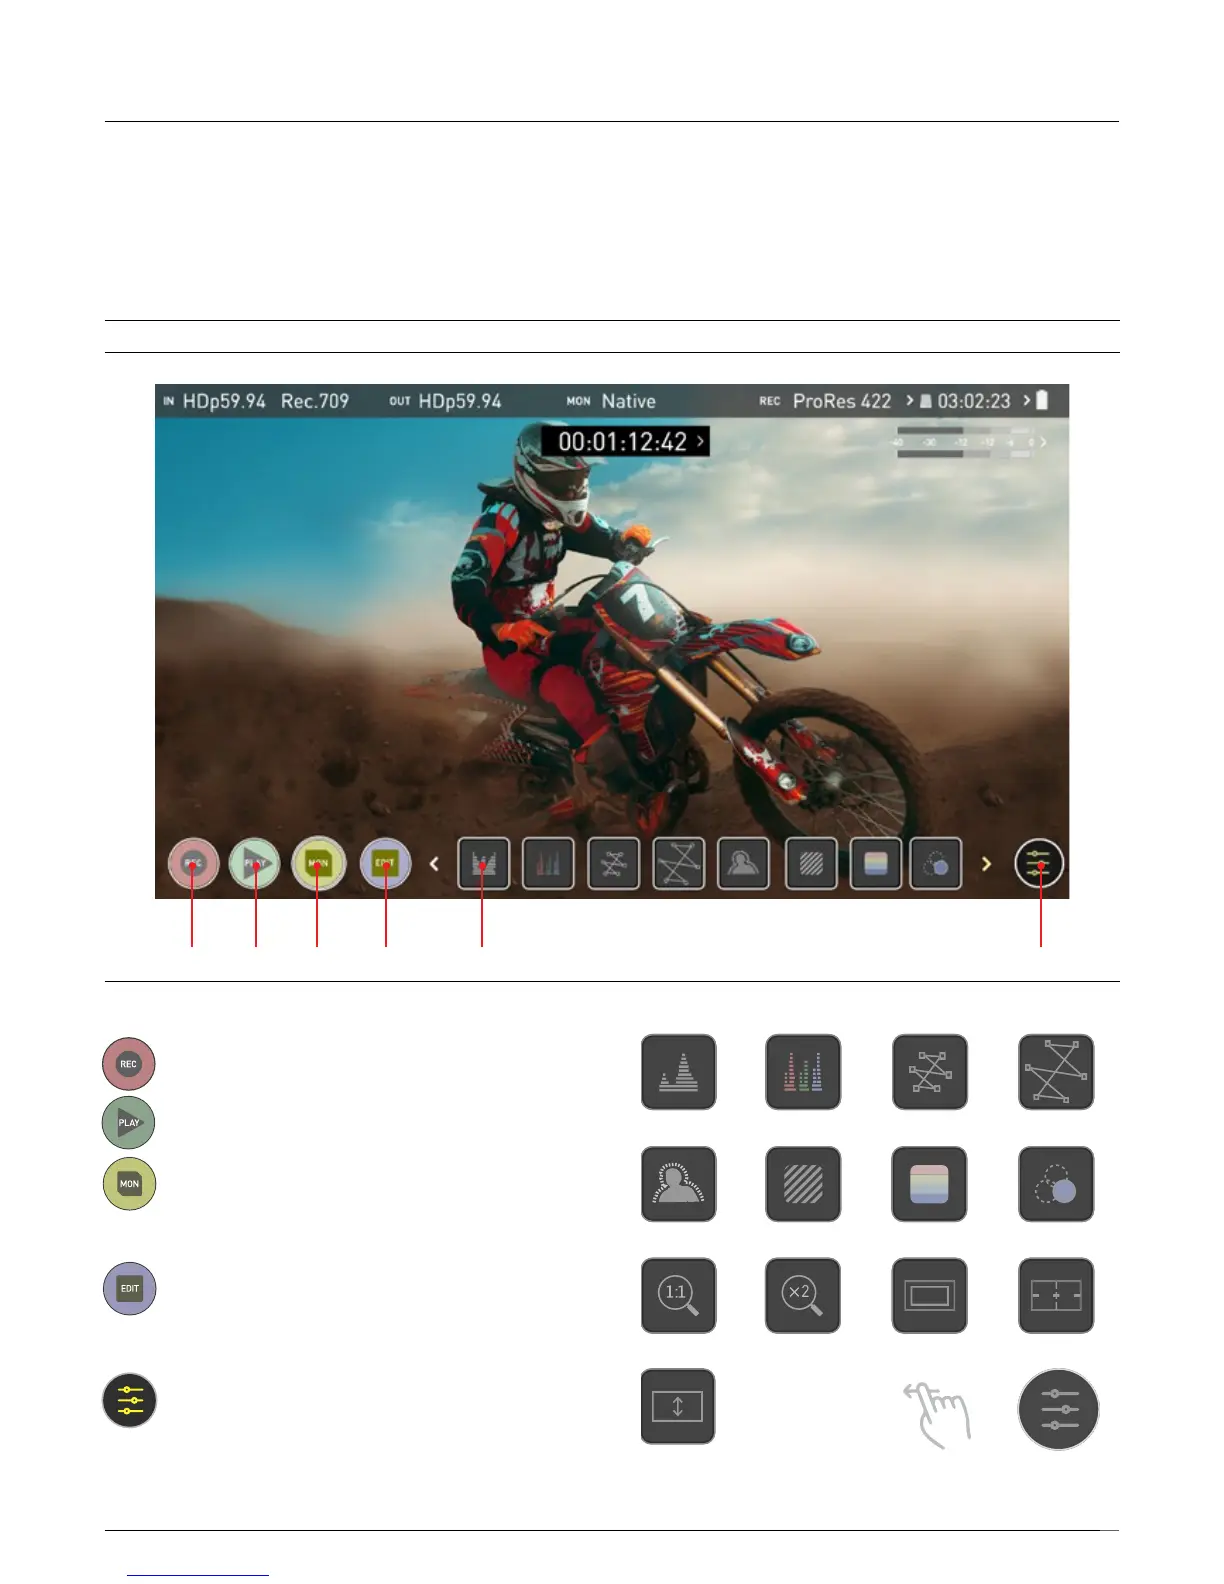
The Main Screen - Monitoring Features
At the bottom of the Monitoring screen are the Monitoring Features,
accessible by toggling the MON icon. Monitoring Features do not affect your
recordedleandcanbeturnedonandoff,oradjustedwhilstrecording
(unlessyouchoosetoburnaLUTleintoyourfootage).NotallMonitoring
featuresareavailableatrstglance–torevealallMonitoringfeatures,swipe
monitoring icons to the left. The icons will behave in a carousel like manner
and you can swipe left and right to access any of the features. At the bottom right
is the Settings button. Press Settings to adjust behaviours of Monitoring Tools.
Monitor Mode / Features
REC PLAY MON EDIT MONITORING FEATURE ACTIVATION ICONS SETTINGS
Main Controls
REC (Record):
Presstobeginrecording.JumptoRecordHomeScreen.
PLAY:
Jumptothemostrecentlyrecordedclip/PlaybackHomeScreen.
MON (Monitor):
At this screen, press once to revert to home screen view.
For Monitor settings press the Settings button. Any Monitoring
functions you have enabled will remain active until deactivated.
EDIT:
Press to show Editing Features and Information Bar.
Press again to return to home. Any Monitoring functions you have
activated will remain active until they are turned off.
SETTINGS (yellow):
Touch to access Monitoring Feature Settings. Set histogram sizes,
adjust transparency, LUTs, Focus Peaking and more.
MONITORING FEATURE ACTIVATION ICONS:
Luma Waveform RGB Parade Vectorscope Vectorscope Zoom
Focus Peaking Zebra False Color Blue Only
Zoom In Zoom X 2 Safe area Guides
Desqueeze Settings
Swipe left to reveal