19
Video Input Gamut Video Output Monitoring Gamma Codec MediaMeters Battery
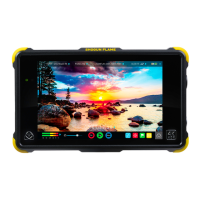
Video Input
Simply tap the source input menu to the top left of the
screen to bring up the input control panel. This panel is
a command center for all devices connected to the Ninja
V and will assist you with connectivity by indicating if the
signal is active or if attention is required.
SOURCE
The current input resolution and framerate of the
selected input source is displayed.
DEVICE
HDMI Devices will display an EDID Device name if the
information is available from the HDMI device
connected. Not all cameras carry an EDID device
name. For cameras such as the Panasonic Lumix GH5
this will display as ‘Unknown’.
A green tick on Source indicates the Ninja V has locked
signal on this input, a red cross indicates a signal or
lock issue with the attached device, double check your
cable and camera output settings.
TRIGGER
The Ninja V can be remotely triggered to record from
your camera. Select the correct triggering option for your
camera and set Enable Trigger to ON.
CAMERA OUTPUT
For the best image processing results it is essential to
match the Ninja V settings to the camera/input settings.
Choose to use Log/HDR, camera type, Gamma, Gamut
or enable HDMI HDR auto if required. Your Ninja V will
recognise most cameras when correctly attached via a
compatible HDMI cable.
Log/HDR: Turn on to enable HDR image processing
inside the Ninja V. Bring the control of post into your
shoot - record, preview and review using HDR.
Camera: Tap to scroll through to the manufacturer of
thecameraprovidingtheinput.Sony,Fujilm,Canon,
Panasonic,ARRI,REDandJVC.
Log Gamma Format: For each manufacturer there may
be a number of different Log curves available and you
can scroll through to the correct selection by tapping
the Gamma icon.
Gamut: Select the Color Gamut of the input. This is
not applicable to all cameras but again ensure that
this matches the input of the camera to ensure
accurate monitoring.
HDMI HDR Auto
HDR is detected when there is a compatible input signal.
It is important that this is OFF if the camera is not
outputting HLG or PQ. It should not be used for regular Log.
About Log/HDR
A better understanding of Log and HDR will enhance
yourworkowandultimatelyallowyoutocapture
maximum amount of detail during recording, and save
you time in post production. To understand more about
the importance of this function please see page 32.
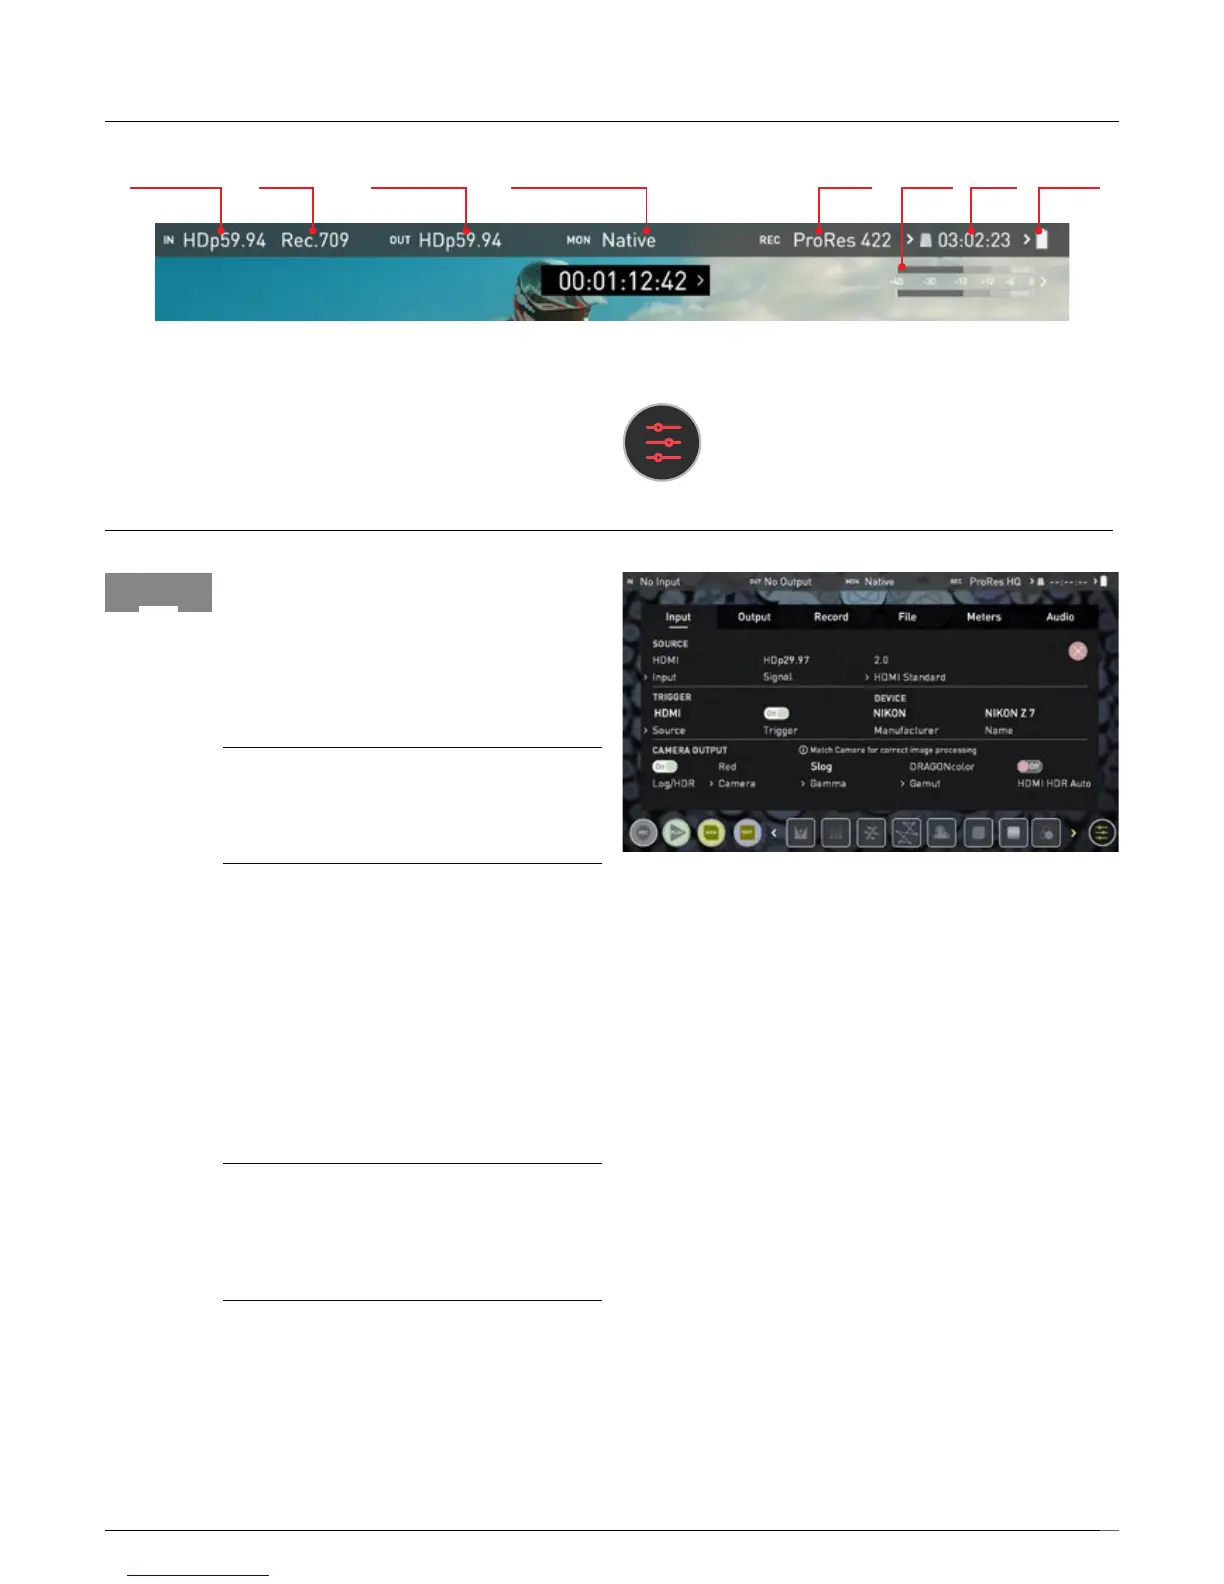
Input
Information Bar - Adjust your settings
The Information Bar of your Ninja V displays the settings of your input
device/camera, current settings of your Ninja V, media, audio, disk
capacity and more. Touching any of these areas will take you to the
relevant menu and allow you to make changes to your setup.
Alternatively you can access these setting by tapping the
Record Settings icon. Tapping the Settings button will open
the Record Settings menu, from where you will be able to
navigate to the required tab. Swipe left to see more tabs.
7. Using the Ninja V