41
Connect
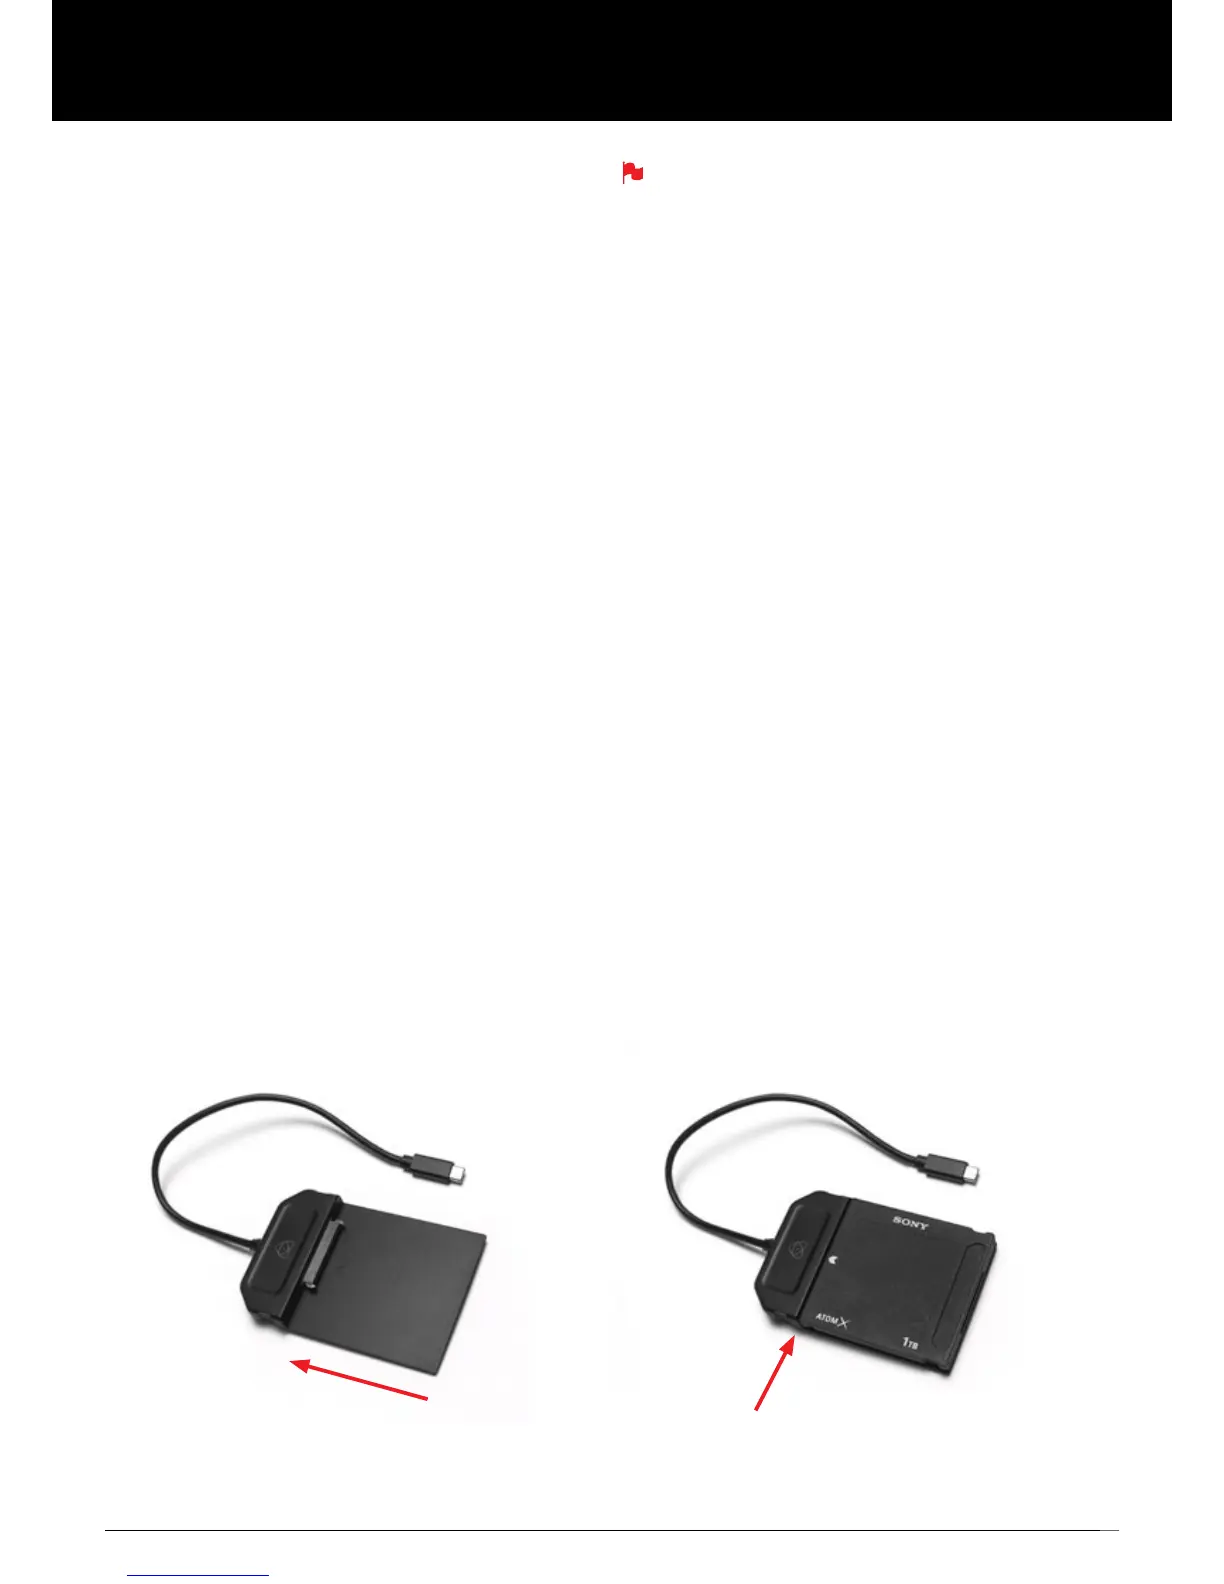
To access and edit your recorded material, connect the Master Caddy
Docking Station to a Mac
®
or Windows
®
editing workstation via USB 2.0,
USB 3.0 or UBS-C 3.1.
Eject the Master Caddy or SSD mini from your Ninja V and insert it into
the Docking Station. After a short wait, the recorded video will be
accessibletothetargetcomputerviaastandarddisk(exFAT)lesystem.
NLE supported
We have chosen the Apple ProRes
®
, Avid DNxHD
®
and Avid DNxHR+
codecs as they are both not only visually lossless, but also edit-ready
formats. All major NLEs support ProRes and DNxHD/DNxHR.
• Final Cut Pro (version 7)
• Final Cut X
• Davinci Resolve 8.0 +
• Adobe CS5 (with 5.51 update or later)
• EDIUS 6
• Vegas 10
• Lightworks
• Avid Media Composer 6 (version 8.3 or later for DNxHR)
• Autodesk Smoke
Avid DNxHD / DNxHR support requires online activation.
ExFAT compatibility
TheNinjaVformatsyourdiskasexFAT.Wehavechosenthislesystem
toovercomethe4GBlelimitationofFAT32andkeepcompatibilityon
both Windows and MAC OS.
The Operating Systems that support exFAT are:
• Windows 10
• Snow Leopard 10.6.5 or higher
• Lion 10.7
• Mountain Lion 10.8
• Mavericks 10.9 and above
The Master Caddy Docking Station is a sophisticated device
supporting two different data interfaces: USB 2 and USB 3. When
using the Master Caddy Docking Station you may need to connect
both USB connectors. This is because when it has to power a disk
drive and its interface electronics, the Docking Station may consume
more power than is available from a single USB port.
Transferring les
Now your docking station is connected and your disk is recognized by
your operating system, you can edit directly from the drive or copy the
lestoyourownstorage.
Windows
OpenthediskinMyComputer>Selectallthelesorjusttheonesyou
wish to transfer, copy and paste them to your desired location.
(ctrl+c copy, ctrl+v paste).
Mac OS
YourNinjaVdiskwillshowinFinder.Selectthelesyouwishtotransfer,
dragthelestoyourdesiredlocationorusethecopyandpaste
commands. (COMMAND + C copy, COMMAND + V paste).
12. Connecting & Editing
Attach AtomX SSDmini or Master Caddy
Ensure disk is properly attached
* When using the AtomX USB-C 3.1 Docking Station II with older computers a USB 3.0 Male to Type C Female adaptor is required.
Connect to Laptop/
Workstation*
USB 2.0, 3.0 and
USB-C 3.1 compatible