20
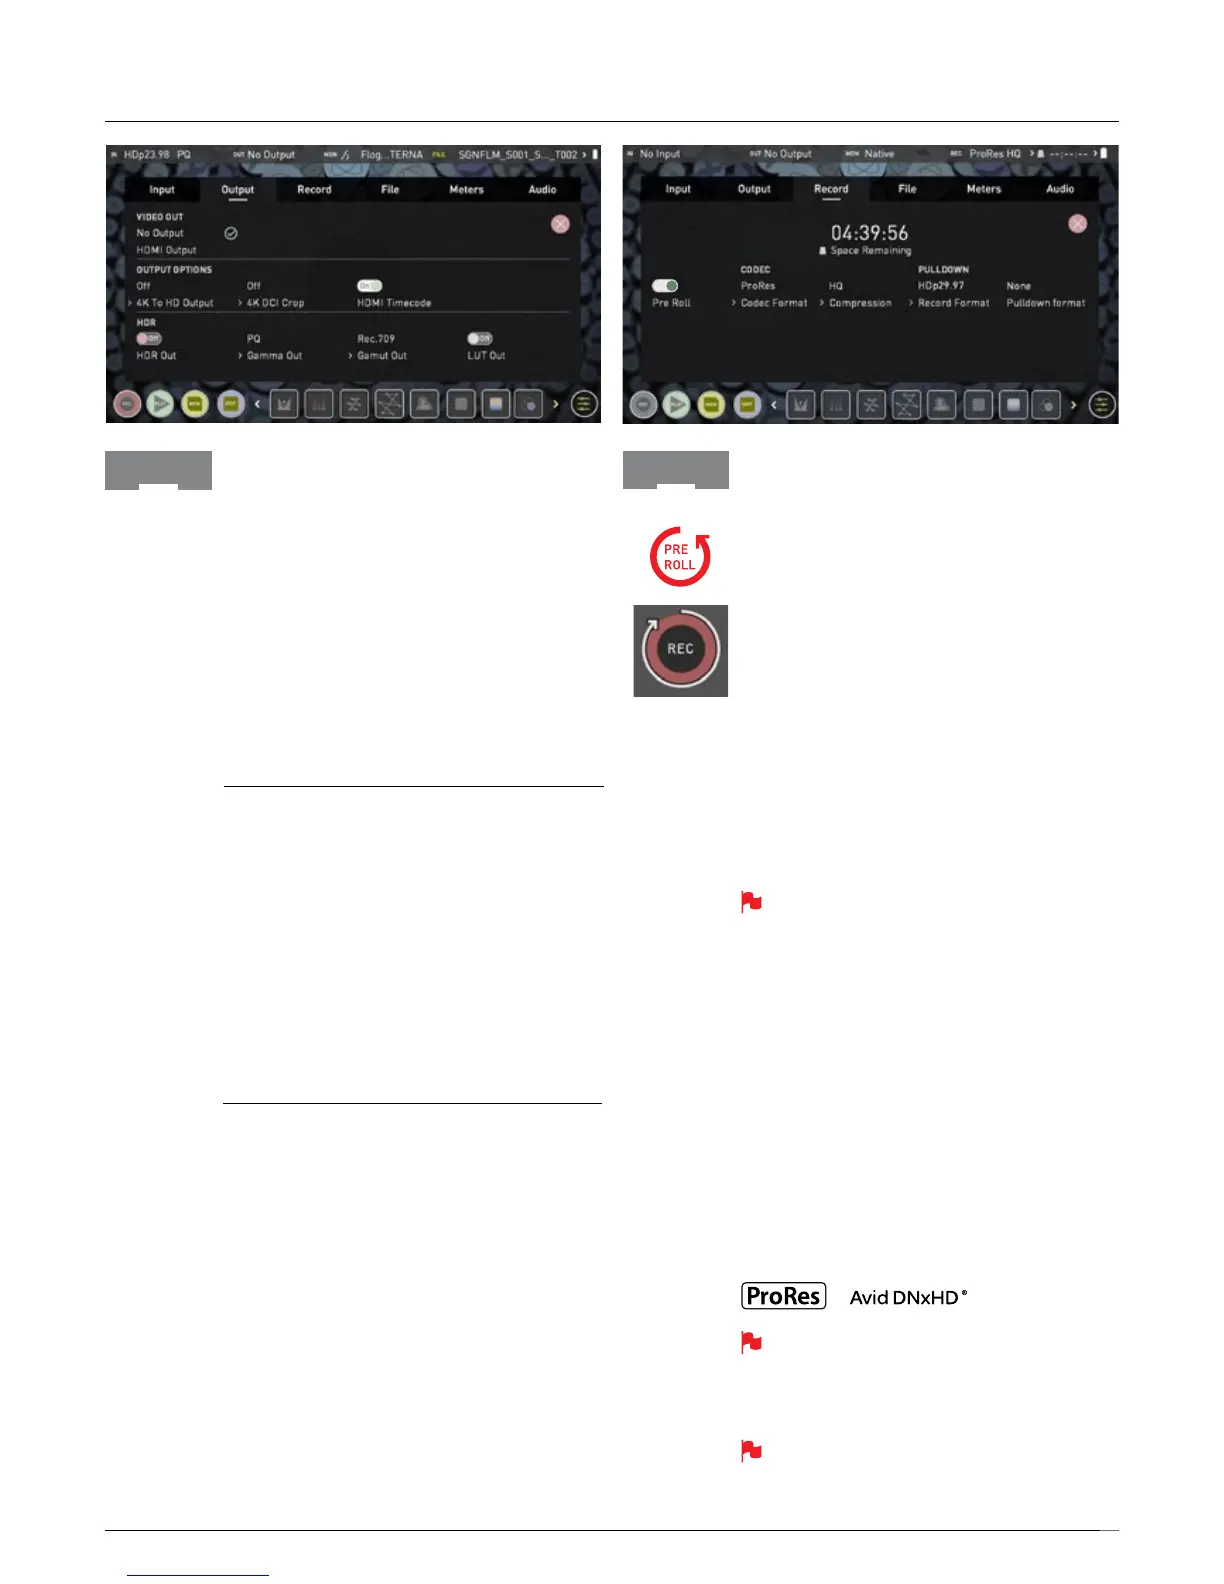
Output
This menu displays the active video format being output
from HDMI. A 4K to HD down conversion can be applied
to the output. This enables you to send a 4K input signal
to a HD device. When working in HDR a signal will be
outputwiththecorrectHDRagtoactivateacompatible
HDR display’s settings. This can be useful if you wish to
monitor log footage in the studio.
VIDEO OUT
this option will show the resolution of the Input. When
processing options are applied below it will be adjusted
accordingly.
OUTPUT OPTIONS
4KorUHDinputscanbescaledforoutputusingtherst
option. This will scale 4K to 2K and UHD will be scaled to
HD 1080p. The 4K DCI crop will trim the 17:9 DCI input
to 16:9 converting the signal to UHD or with the other
option selected down scale to HD.
HDMI timecode allows for the embedded time code or in
unit generated time code to be looped out. The option is
present to allow you to turn the time code of as this can
disrupt some consumer equipment that is not intended to
receive embedded timecode.
HDR
Here you are able to set a conversion from your LOG
input to a HDR display standard such as HLG or PQ.
Youcanalsodenetheoutputcolorgamutfromyour
camera’s gamut to a display standard for BT2020,
DCI-P3 or Rec709.
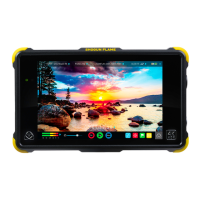
Record
Pre-Roll
With this option turned on you will see a red Pre-Roll icon
ashinthetoplefthandcornerandawhitecircular
arrow around the record button. Whilst enabled the input
is constantly been recorded with approximately the last 8
seconds in HD and 2-3 seconds in 4K being cached into
memory. The frame rate and codec selected will
determine the number of seconds being cached for
Pre-Roll. Using a lower bit rate codec setting and shooting
at lower frame rate will increase the length of Pre-Roll.
When the record button is pressed or trigger is sent, the
buffered Pre-Roll data in memory will be written out to
the start of the recording. This means if you are few
seconds slow hitting the record button when something
interesting happens you will still capture the shot.
With Pre-Roll mode activated the Recorder is
constantly caching frames internally to the unit and
as such any feature that can not be changed whilst
recording is disabled. This includes audio channel
select, 3D LUT record, codec, disk options etc.
CODEC (Recording Format)
To select a codec simply tap on the currently displayed
codec to toggle between ProRes
®
or Avid DNxHD
®
*. The
Quality menu allows you to toggle codec compression.
Apple ProRes offers 3 levels of compression (HQ, 422 &
LT), DNx offers 4 (220x, 220, 145, 36) and DNxHR is
available in HQX, HQ, SQ and LB. The expected record
time available from each codec selection is automatically
calculated from the available space on the media inserted.
*If Avid DNxHD / DNxHR is required, you must
activate it rst. This can be done at www.atomos.
com/support – DNxHD 220x/DNxHR HQX are 10bit,
all others are 8 bit, DNxHD36 is a proxy codec.
More information regarding Apple ProRes data
rates can be obtained online from Apple ProRes
whitepaper PDF document.
Record
Output
7. Using the Ninja V