Atomos Shogun 7 – User Manual Edition 1: November 2019 14
e. Firmware Updates (AtomOS)
From time to time we will issue software updates for your Shogun 7.
Toupdatethermware(that’sthesoftwarethatrunsinsideyourShogun7),
there is a simple procedure you have to follow.
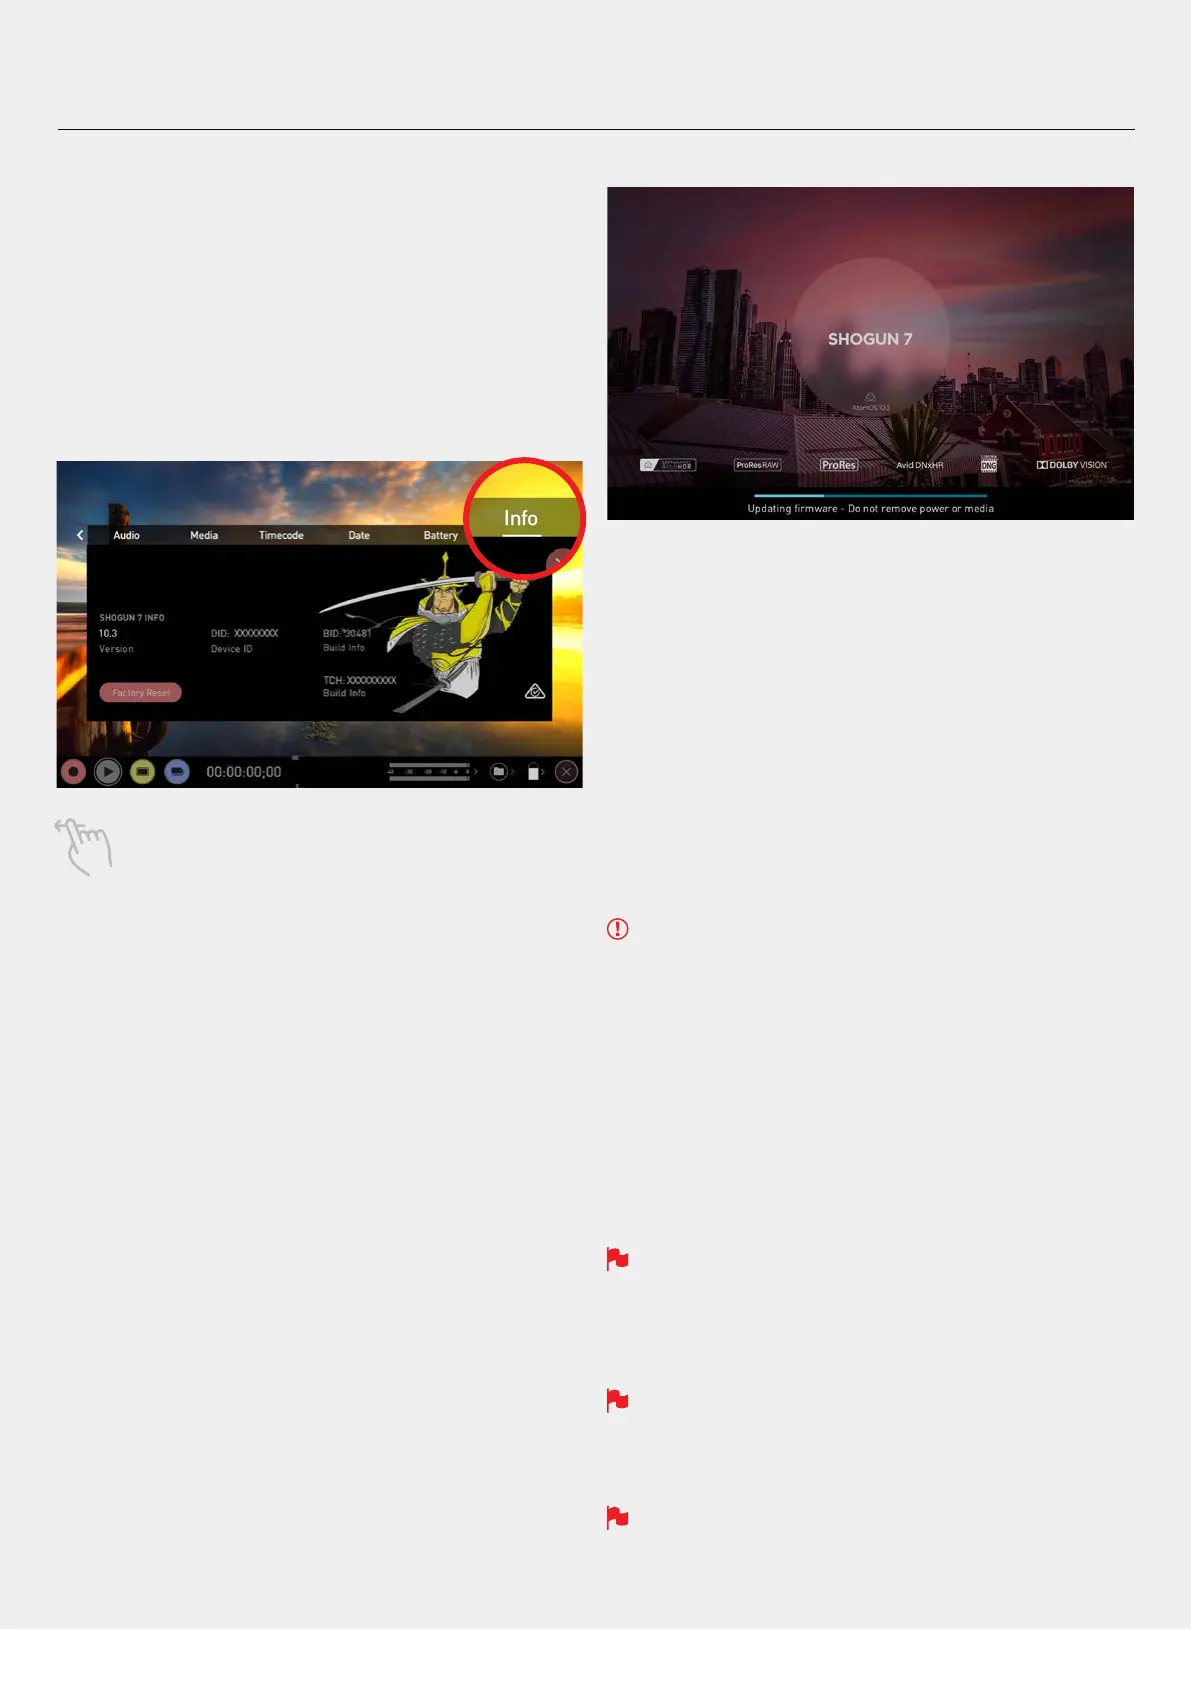
• Check your current Firmware version
Navigate to the Info tabbyrstpressingthesettingsbuttonorthe
timecode, battery, media and then navigating through the menu. If at
rstyoudonotseetheinfotab,swipethetabsbartothelefttoreveal
more menus and settings.
Swiping left to reveal more tabs, more icons, and more
settings is a new feature of AtomOS10. If you cannot nd the
menu you are looking for, swipe left or right.
Theinfoscreencontainsthermwareversionnumberandother
important information about your Shogun 7. To determine if you device is
up-to-dateorifarmwareupdateisrequired,dothefollowing:
• Go to www.atomos.com/support
• Follow links to FIRMWARE/PRODUCT MANUALS
• Select SHOGUN 7 from the dropdown menu.
• Locate and compare the latest version with the version currently
running on your Shogun 7. If you do not have the latest version
installed,downloadthermwareupgradeandfollowthesesteps:
1. ExtracttheleATOMSG7.FWfromthermwareziple.
2. Copy ATOMSG7.FW onto a AtomX SSDmini, or to a SSD in a
Master Caddy.
a. Atomos recommends you use a freshly formatted
compatible drive.
b.AlwaysformatyourdrivesintheShogun7rst.TheShogun7
formats the drive for optimal performance for video.
c.Ensurethatthermwareupdateleisontherootofthedrive,
and not in a folder on the drive.
3. Use a freshly charged battery on your Shogun 7 or connect to mains
power. It is very important that your Shogun 7 does not lose power
duringarmwareupgrade.
4. Power down your Shogun 7.
5. InserttheMasterCaddyorSSDminiwiththeATOMSG7.FWle.
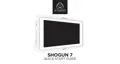
6. Power up your Shogun 7 with a short press of the Power Button.
7. Watchthescreen.TheShogun7'Updatingrmware'messagewill
appearandthermwareupgradewillstart.
8. Whilethermwareupgradeishappening,apgressbarwillbe
displayed.
9. Thermwareupgrademaytakeuptoafewminutes.
10.Whenthermwareupgradeisnished,theShogun7will:
a.AutomaticallydeleteATOMSG7.FWlefromyourdrive.
b. Power itself down.
11. Turn on your Shogun 7 again with a short press of the Power Button
located on the side.
12. When the Shogun 7 has booted, Press the Settings Button and then
select the Info tab and check that the version number is the version
expected.
IMPORTANT: Problems when installing AtomOS
Veryrarely,thermwareupdateprocesscangowrong.Thismightbe
because of an incomplete or corrupted download.
In the unlikely event of your Shogun 7 becoming unresponsive, there is a
built-in recovery mechanism.
All you have to do is press and hold the on/off button for 10 seconds. If
you do this your Shogun 7 will revert to its factory condition, and you will
beabletoretrythermwareupdatelater(takingdueprecautionsto
identify and remove possible reasons for the failure of the previous
attempt).
Please ensure your batteries have plenty of charge and that you do
not interrupt your Shogun 7 while its rmware is upgrading. You will
see a progress bar to the lower half of the screen. When it is nished,
the Shogun 7 will restart and you will be able to use the device as
normal. This process can take up to 5 minutes.
Please make sure that the rmware le is not renamed when you
computer unpacks the ZIP le. If you have other rmware in the same
folder, the le may become renamed to SHGN7.FW when unzipping
and the update will not work.
If you place the .FW le on the drive and insert this in to the Shogun
7 whilst it is turned on, the device will recognise the rmware update
and ask if you’d like to apply the update. If you select “ok” the device
will shut down and begin the update process.
7. Using the Shogun 7 - Best Practice