Atomos Shogun 7 – User Manual Edition 1: November 2019 24
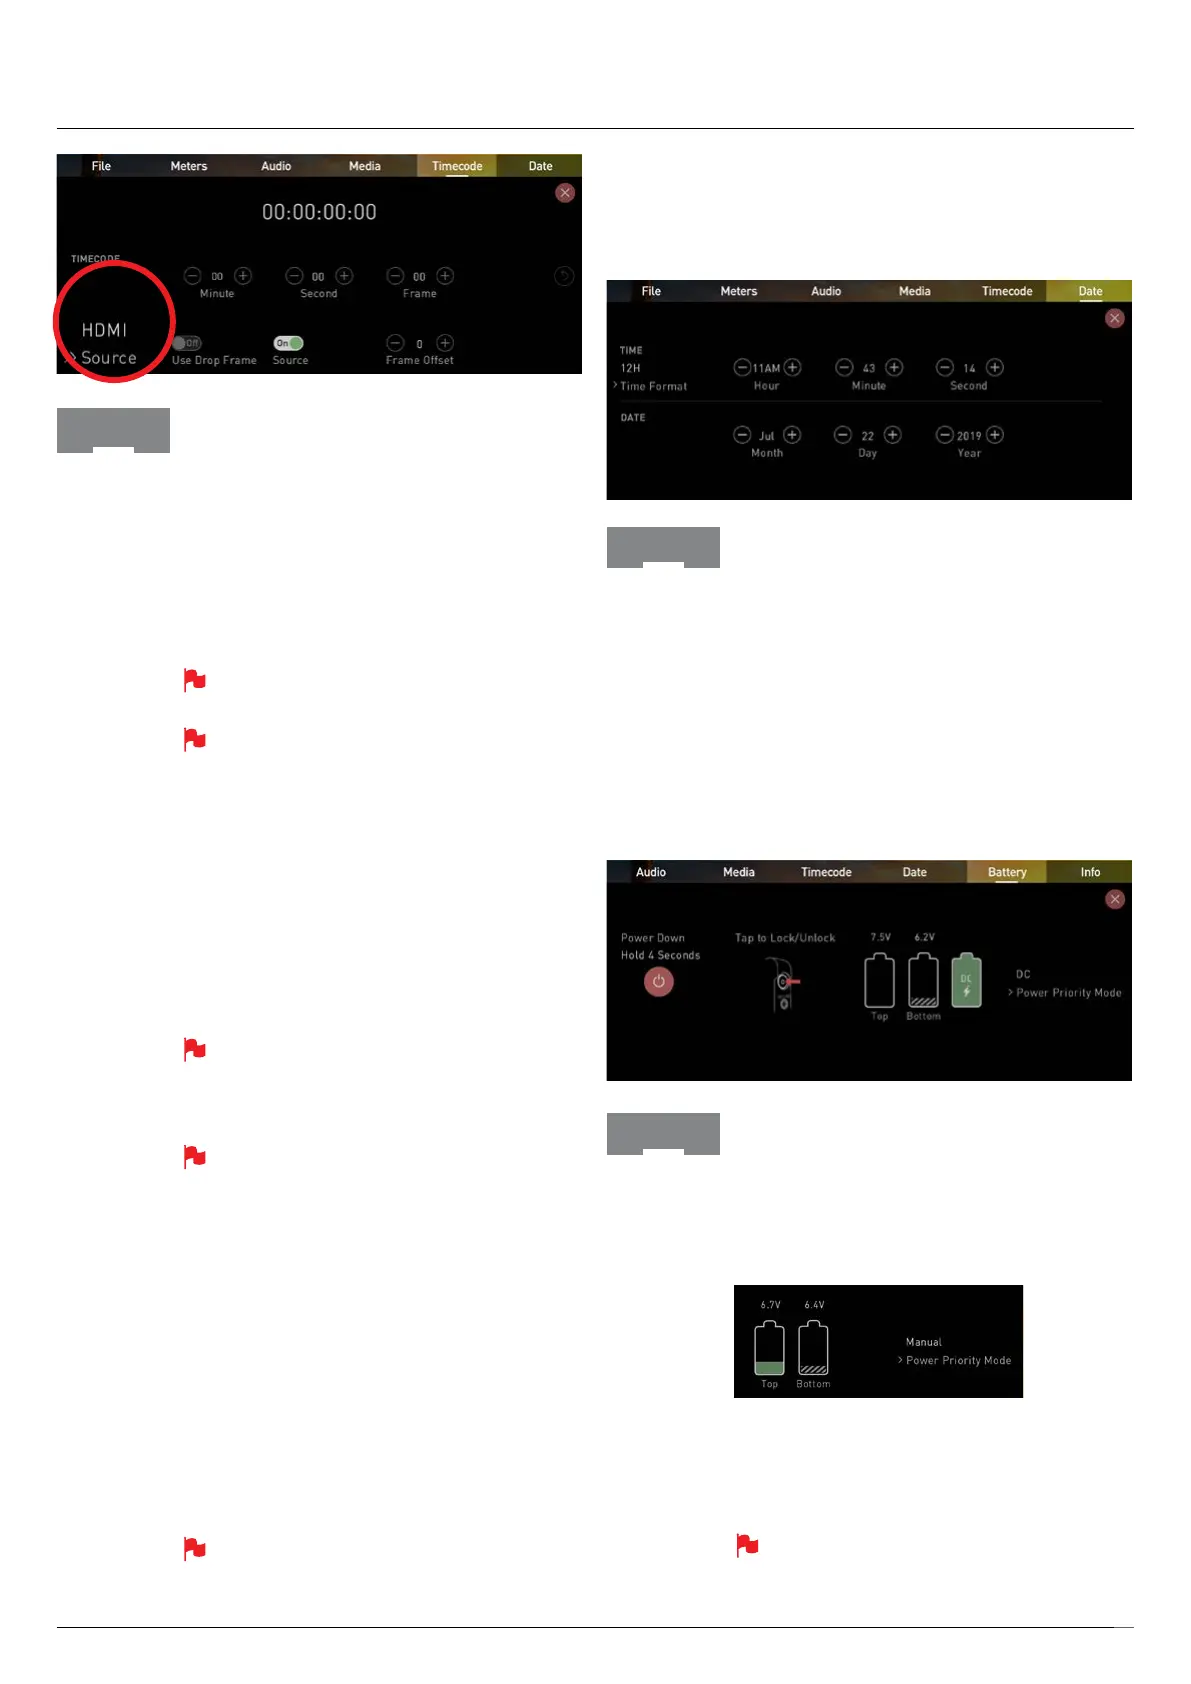
Trigger from HDMI Timecode
If HDMI timecode is selected and the camera is in REC
RUN mode, the user has the choice to start and stop
recording remotely from the source camera timecode.
To enable rolling Timecode Start/Stop functions, simply
set the HDMI Timecode switch to on. When enabled,
pressing the camera Record Stop/Start button will make
the Shogun 7 start and stop record simultaneously as
the timecode starts and stops.
When using the camera in Free Run timecode, the
rolling timecode trigger might not work as expected.
Note that whilst camera triggers are also looped out
on HDMI not all wireless systems carry the trigger
on to other devices so it’s worth testing your system
before a shoot if you pan to use it in this way to
record proxies.
Time of Day
With this setting, each new clip that is created will
contain embedded Timecode starting with the time of
day when the recording is started. Please check that
Shogun 7 clock has been set correctly.
This can be set in the DATE menu
If recording is stopped and then restarted while in
this mode, there will be a time gap between the last
clip and the next one, equal to the length of time the
Shogun 7 has been out of record.
In Time of Day mode, the controls on the Timecode
Setup Screen for adjusting the start-point of the
Shogun’s Timecode are not available, as the
Timecode is set by the Shogun’s internal clock.
Record Run
With this setting you set the starting Timecode for the
rstclip.Thefollowingclipswillstartattheframe
immediately after the out point of the preceding clip.
This will continue for all clips that follow. This is also
known as continuous Timecode.
Auto Restart
With this setting, the Timecode will be reset to the
Timecodeyouhavedenedwheneveryoupress
record. All your clips will start with this same Timecode.
To adjust the Timecode use the “+” and “-” above
and below the hour:minute:seconds sections
Timecode
LTC
With this setting, the Timecode will be reset to the
Timecodeyouhavedenedwheneveryoupress
record. All your clips will start with this same Timecode.
Date & Time
Allows you to adjust the date and time shown by the
clock in the Shogun 7. This will also change the time of
day Timecode. Touching the Date & Time takes you into
the Date and Time Screen.
Date formats (i.e. dd-mm-yyyy or mm-dd-yyyy) are
selectablebytappingthebluearrowon“SelectDate
Format” Menu. Simply keep tapping until the desired
format is shown. The Time, Month, Day and Year are
selectableandcanbemodiedbyclickingtheblue
plusandminusiconsnexttothedesiredelds.
Date
7. Using the Shogun 7
Battery
The Batteries screen indicator is made up of three
icons, two will display the batteries and the other for the
DC input. The active battery is shown in green and the
level of the battery is shaded in 1/4 increments with a
voltage level shown on top.
Manual Switching / DC / Battery
The Shogun 7 will automatically switch between
connected power sources when the source in use is
depleted. ie: DC > Battery auto switches.
When a battery is running low the battery icon in
the upper right corner of the screen will ash and
warning menus will appear at 25% and 10%.
Battery