EN25EN 24
C - INSTALLATION
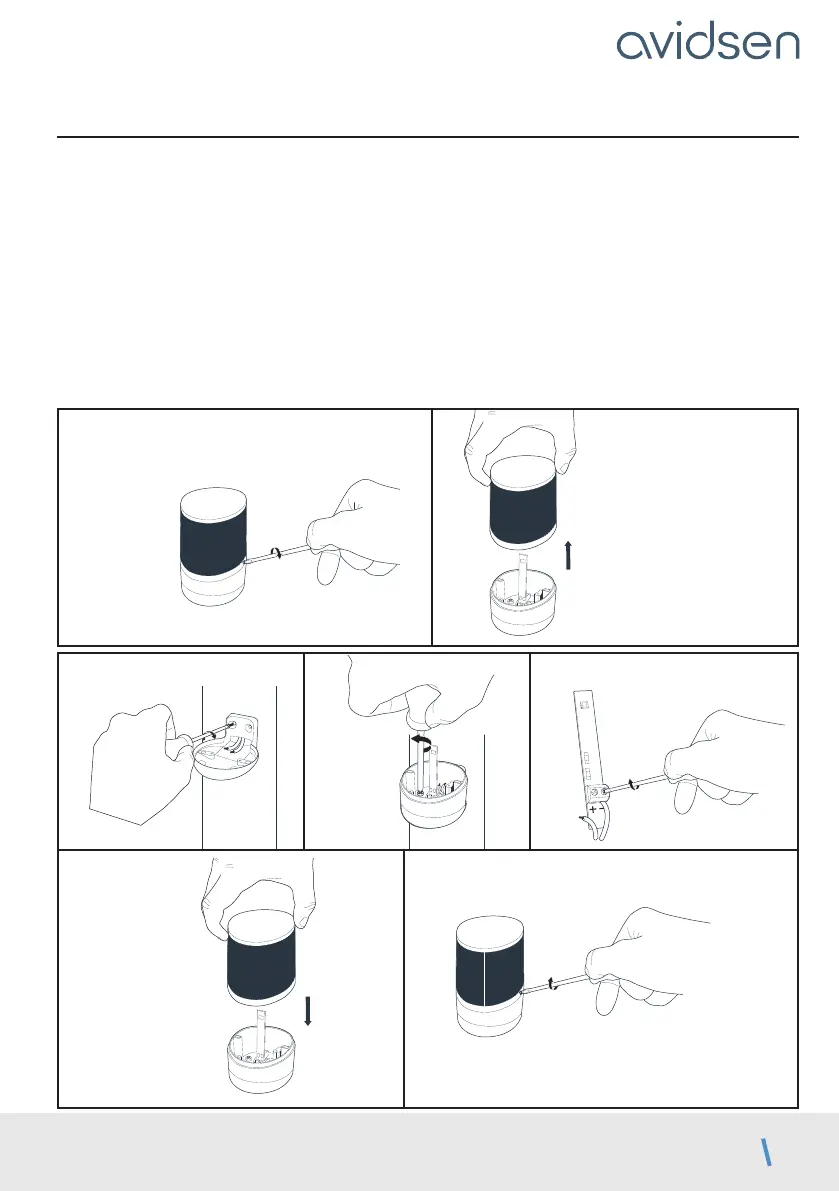
4. FLASHING LIGHT INSTALLATION
The flashing light must be fastened at the top of the post on which the switchgear is attached and must be
visible both inside and outside. Only use the light provided in the kit (24 V - 2 W).
The flashing light may be fastened on the wall with or without support.
• With a screwdriver, remove the transparent part of the flashing light by unscrewing the 2 screws that hold
the upper part of the flashing light.
• Continuing to use a screwdriver, remove the flashing light bracket by unscrewing the 2 screws inside the
light.
• Fasten the flashing light bracket to the wall (ignore this step if you are fastening the light directly to the wall).
• Run the wires into the flashing light and connect them to the LED lightbulb (maintaining the “+” and “ -”
polarity).
• Screw the flashing light to its bracket and screw in the transparent part