REMOTE OPERATION
20
Step3: In DESTINATION, choose where you want to save the data, in a USB flash drive (USB DEVICE) or
on FTP (FTP).
Step4: (Optional) When USB DEVICE is chosen, specify the directory in STORAGE if needed.
Step5: Choose BACKUP to start. The backup video will be in the AVI format.
Note: You can also go to MENU
→
EXPORT
→
BACKUP to check backup logs or click on the top to
enter the backup page.
Note: When the video compression format is H.265, please use the video player which supports H.265
to play the video footage.
5.5 System Logout
When different user accounts are created for system management, make sure you log out after your access in
case other people access the system with your account.
Choose MENU → POWER CONTROL, and choose
to log out the system.
Note: The default user name and password are both admin, which is the highest user level.
5.6 Hardware Reset
When you forget the access user name and / or password, this will show you how to reset your recorder to its
factory default values. Your recorder supports only either of the methods mention below depending on the model
you have.
Method 1: Reset button
Step 1: Power off your recorder.
Step 2: Open the top cover of the recorder to reveal the main board, and find a blue button on the board. It’s
the hardware reset button.
Step 3: Press and hold the blue button, and power on your recorder at the same time. Release the button when
you hear the second beep sound. You’ll see the reset message on the screen.
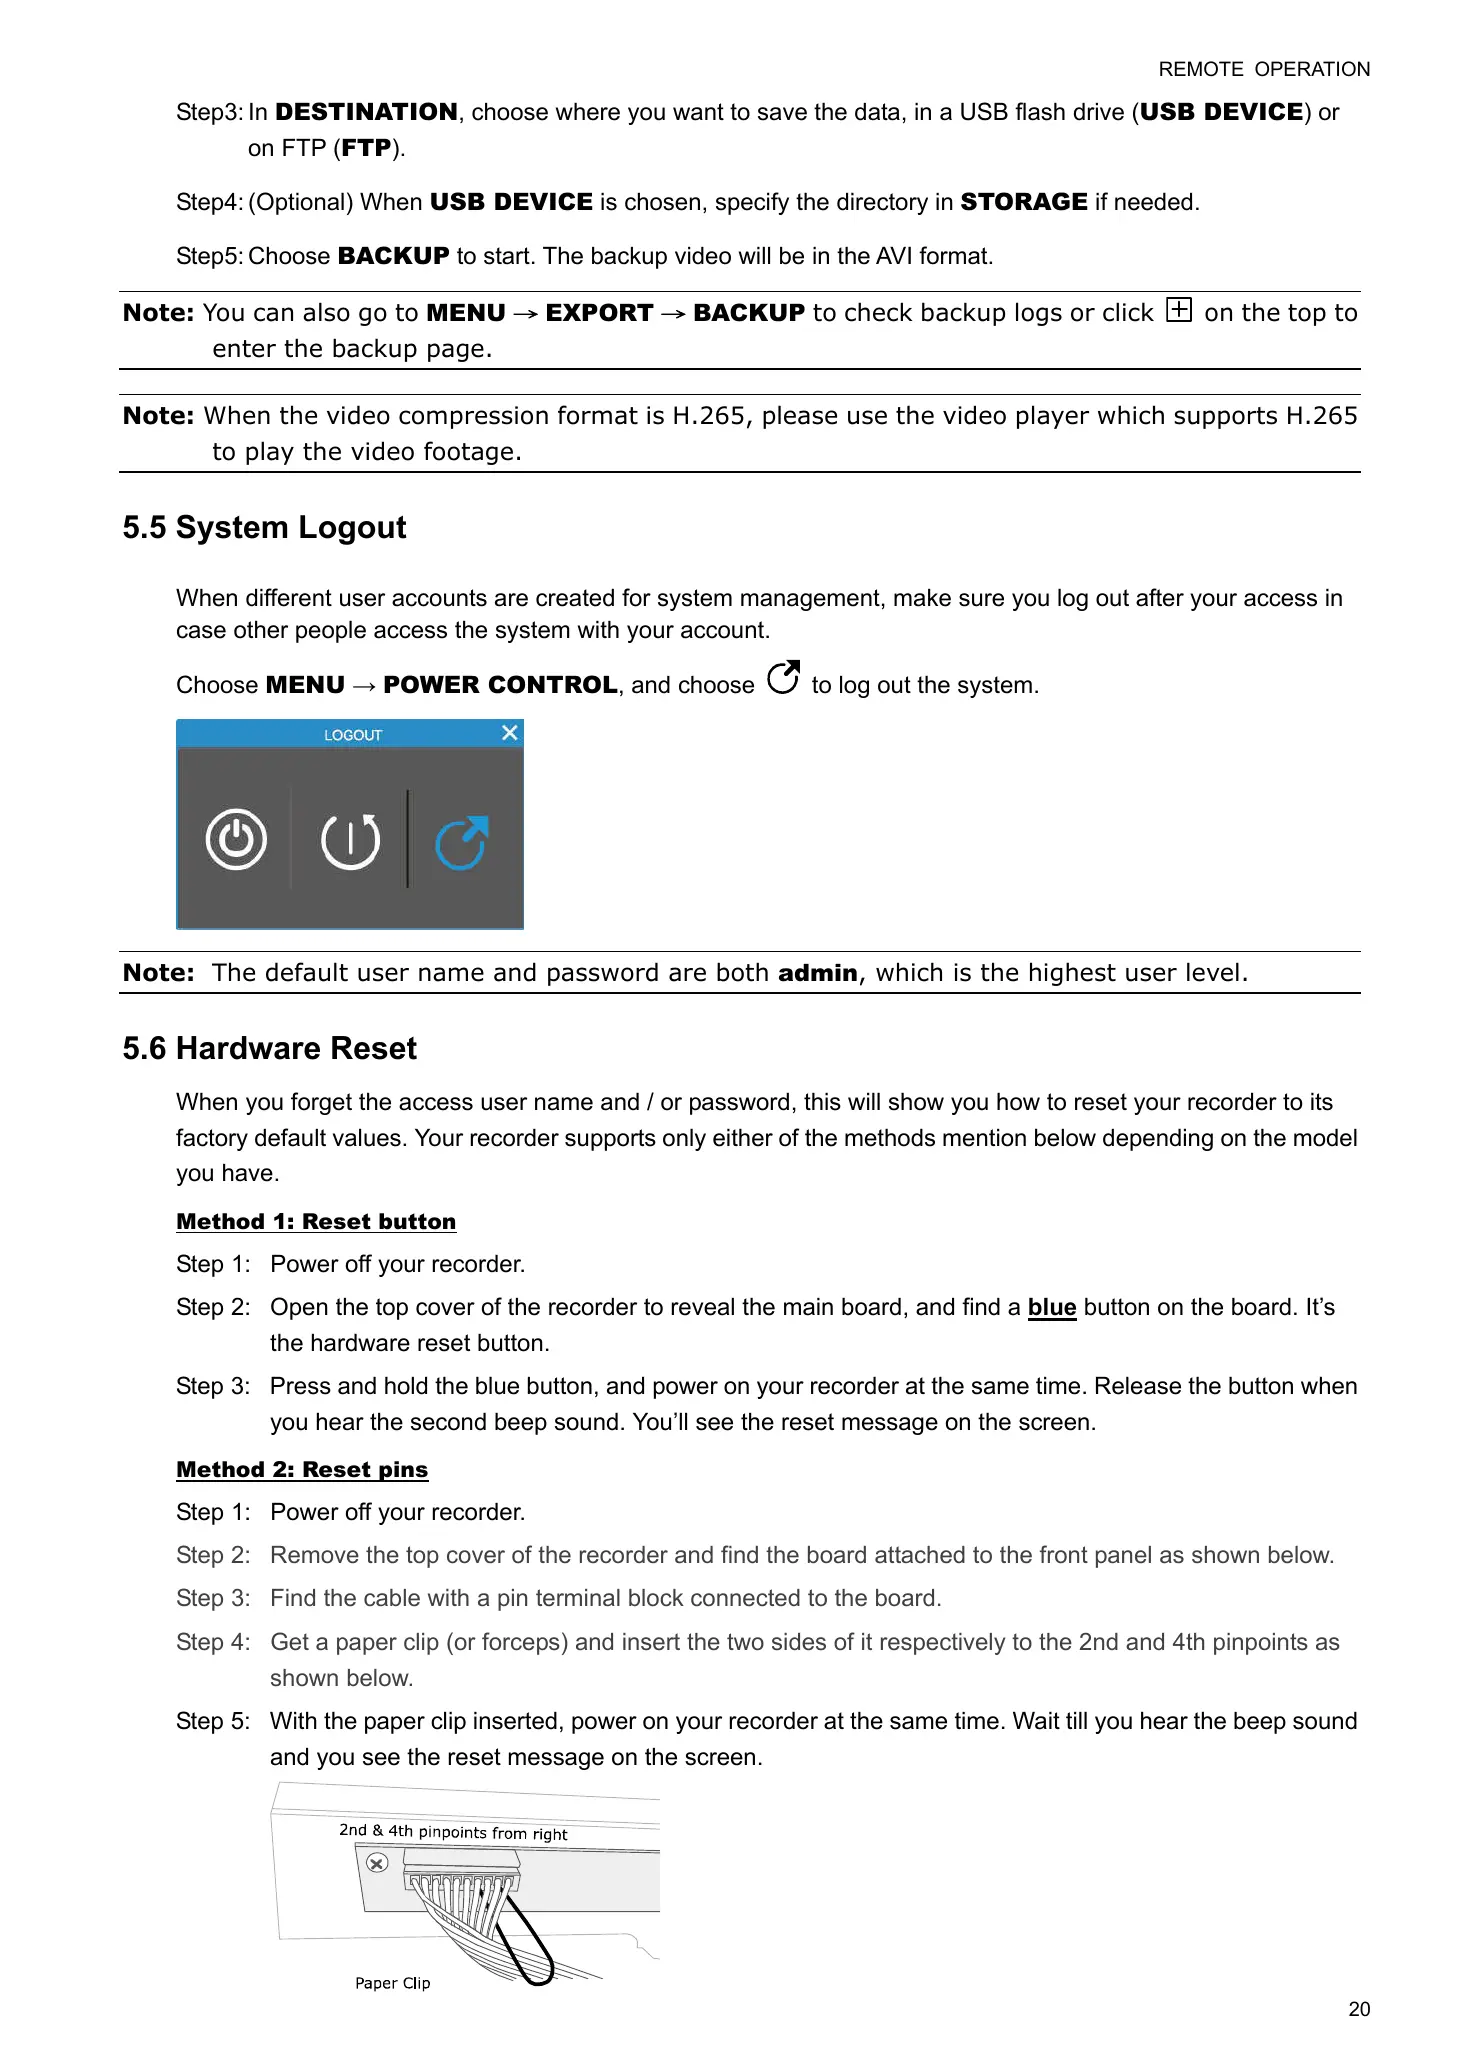
Method 2: Reset pins
Step 1: Power off your recorder.
Step 2: Remove the top cover of the recorder and find the board attached to the front panel as shown below.
Step 3: Find the cable with a pin terminal block connected to the board.
Step 4: Get a paper clip (or forceps) and insert the two sides of it respectively to the 2nd and 4th pinpoints as
shown below.
Step 5: With the paper clip inserted, power on your recorder at the same time. Wait till you hear the beep sound
and you see the reset message on the screen.
 Loading...