MAIN MENU
49
2) RESET DEFAULT
Click SUBMIT to reset all settings or partial settings to their factory default values, and select YES to
confirm or NO to cancel. The system will reboot after reset.
3) DEVICE TITLE
Enter a title for this device.
4) ENABLE AUTO PLUG AND PLAY
Switch to ON to allow the camera to be detected and configured automatically when it’s connected to this
device.
Note: This function is available only when the brand of the cameras connected is the same as this
device.
5) BIND MAC ADDRESS
This function is recommended to be used when your surveillance system is more than 256 cameras. It would
be helpful for the system to get the address of each connected camera quickly if the system accidentally
shuts down and needs to recover.
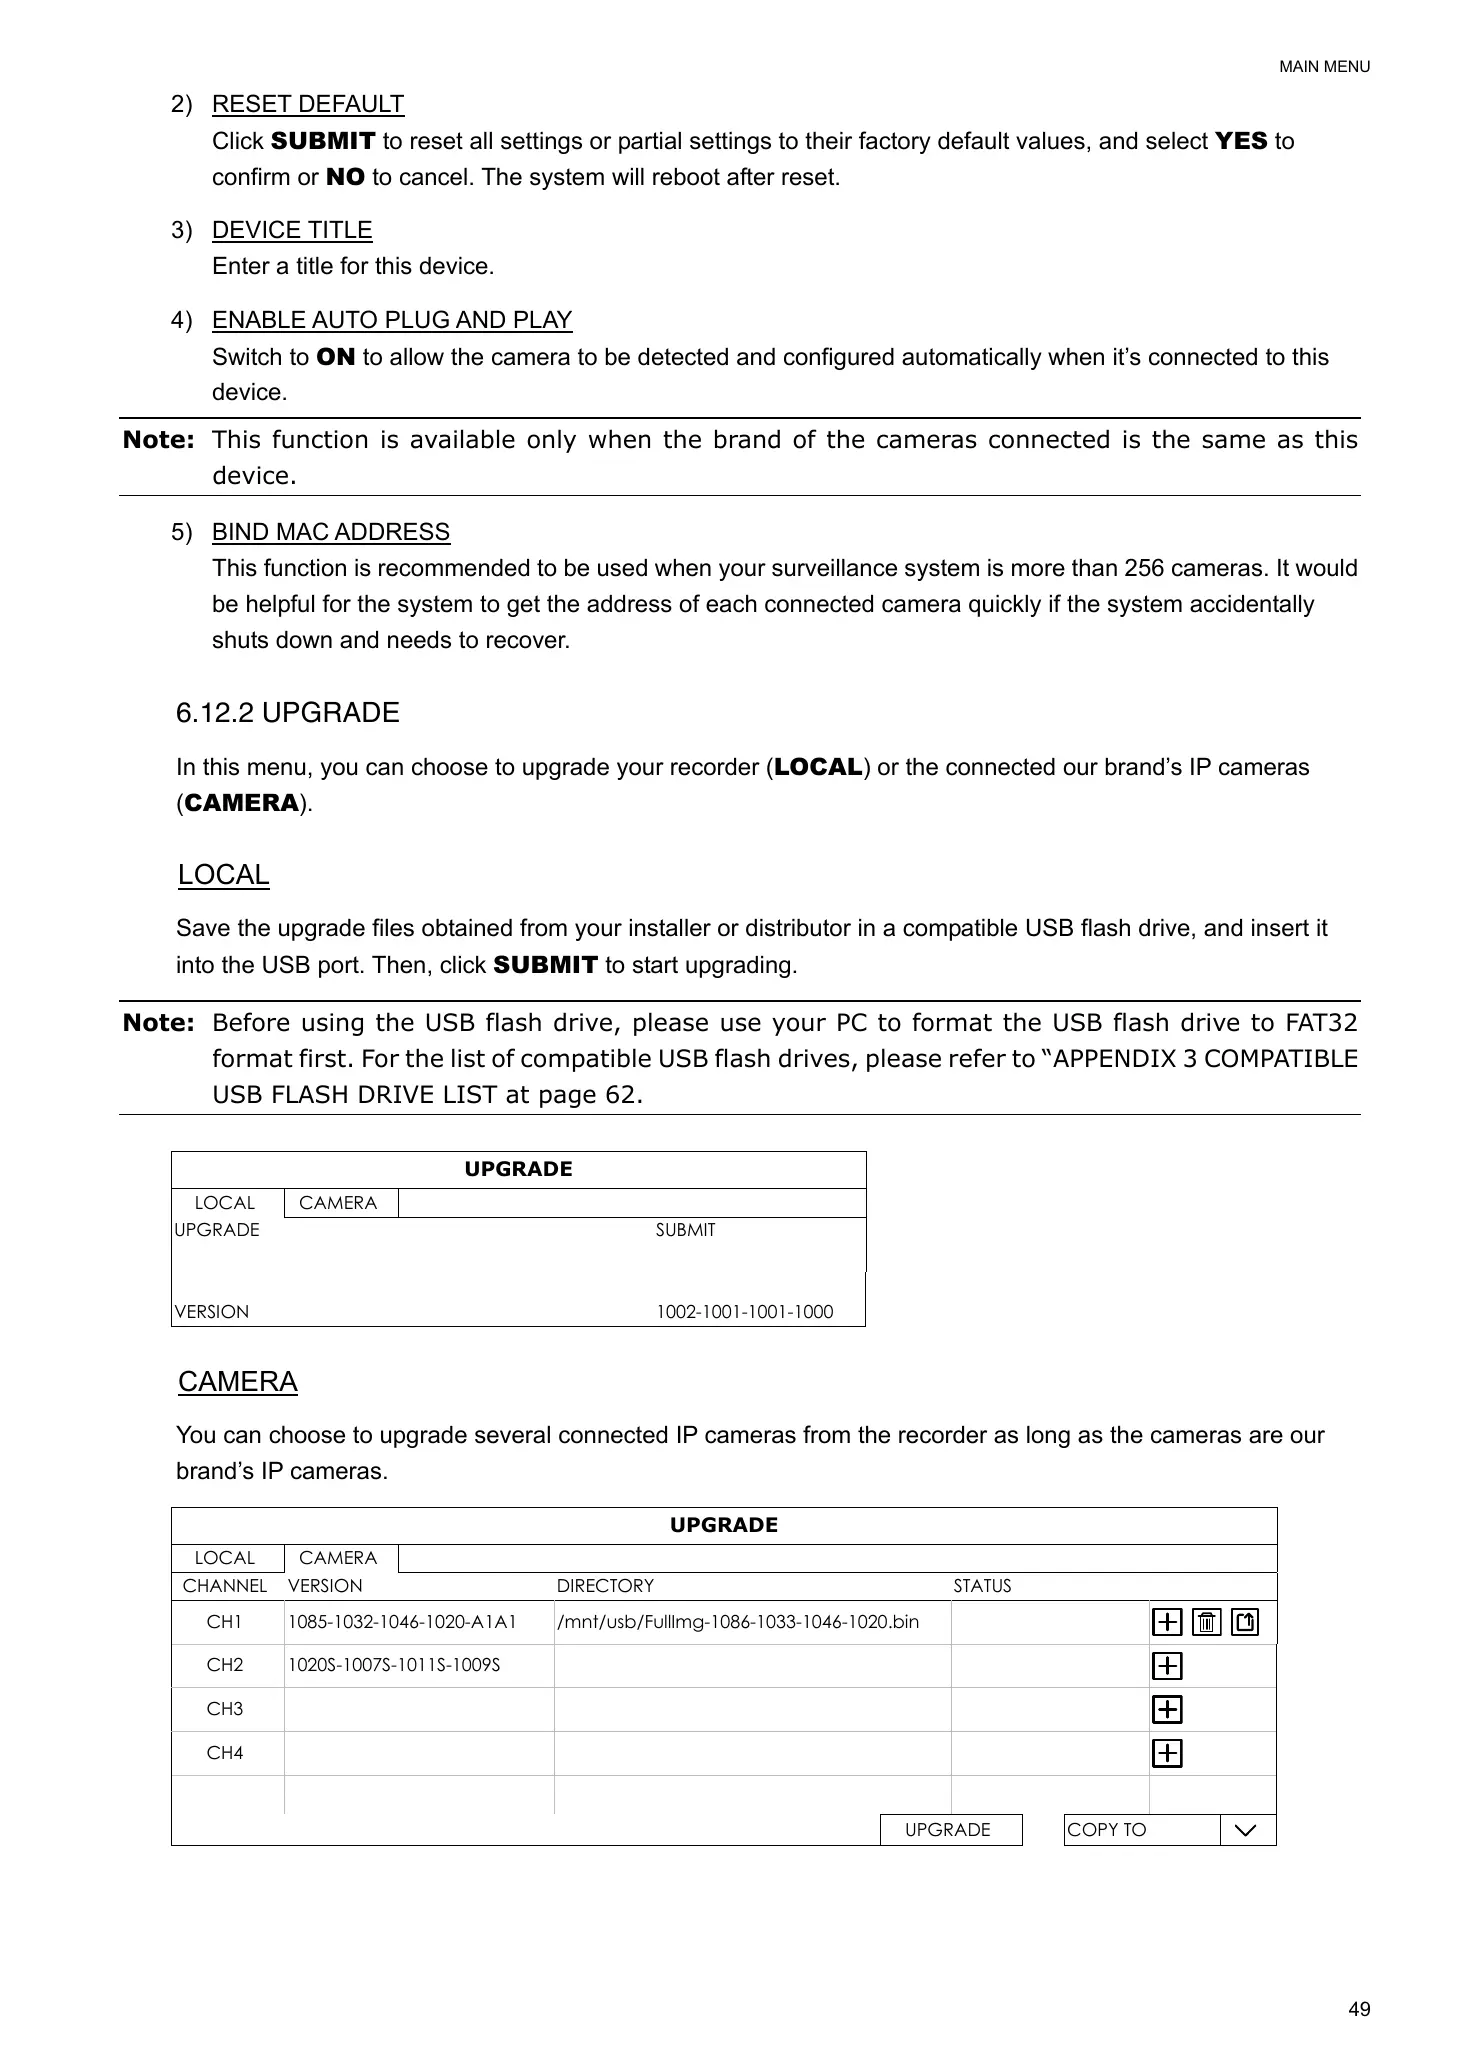
6.12.2 UPGRADE
In this menu, you can choose to upgrade your recorder (LOCAL) or the connected our brand’s IP cameras
(CAMERA).
LOCAL
Save the upgrade files obtained from your installer or distributor in a compatible USB flash drive, and insert it
into the USB port. Then, click SUBMIT to start upgrading.
Note: Before using the USB flash drive, please use your PC to format the USB flash drive to FAT32
format first. For the list of compatible USB flash drives, please refer to “APPENDIX 3 COMPATIBLE
USB FLASH DRIVE LIST at page 62.
UPGRADE
LOCAL CAMERA
UPGRADE SUBMIT
VERSION 1002-1001-1001-1000
CAMERA
You can choose to upgrade several connected IP cameras from the recorder as long as the cameras are our
brand’s IP cameras.
UPGRADE
LOCAL CAMERA
CHANNEL VERSION DIRECTORY STATUS
CH1 1085-1032-1046-1020-A1A1 /mnt/usb/FullImg-1086-1033-1046-1020.bin
CH2 1020S-1007S-1011S-1009S
CH3
CH4
UPGRADE COPY TO
 Loading...