APPENDIX 2 PUSH VIDEO CONFIGURATION
59
APPENDIX 2 PUSH VIDEO CONFIGURATION
Note: This function is for selected models only.
A2.1 Alarm Sensor Connection
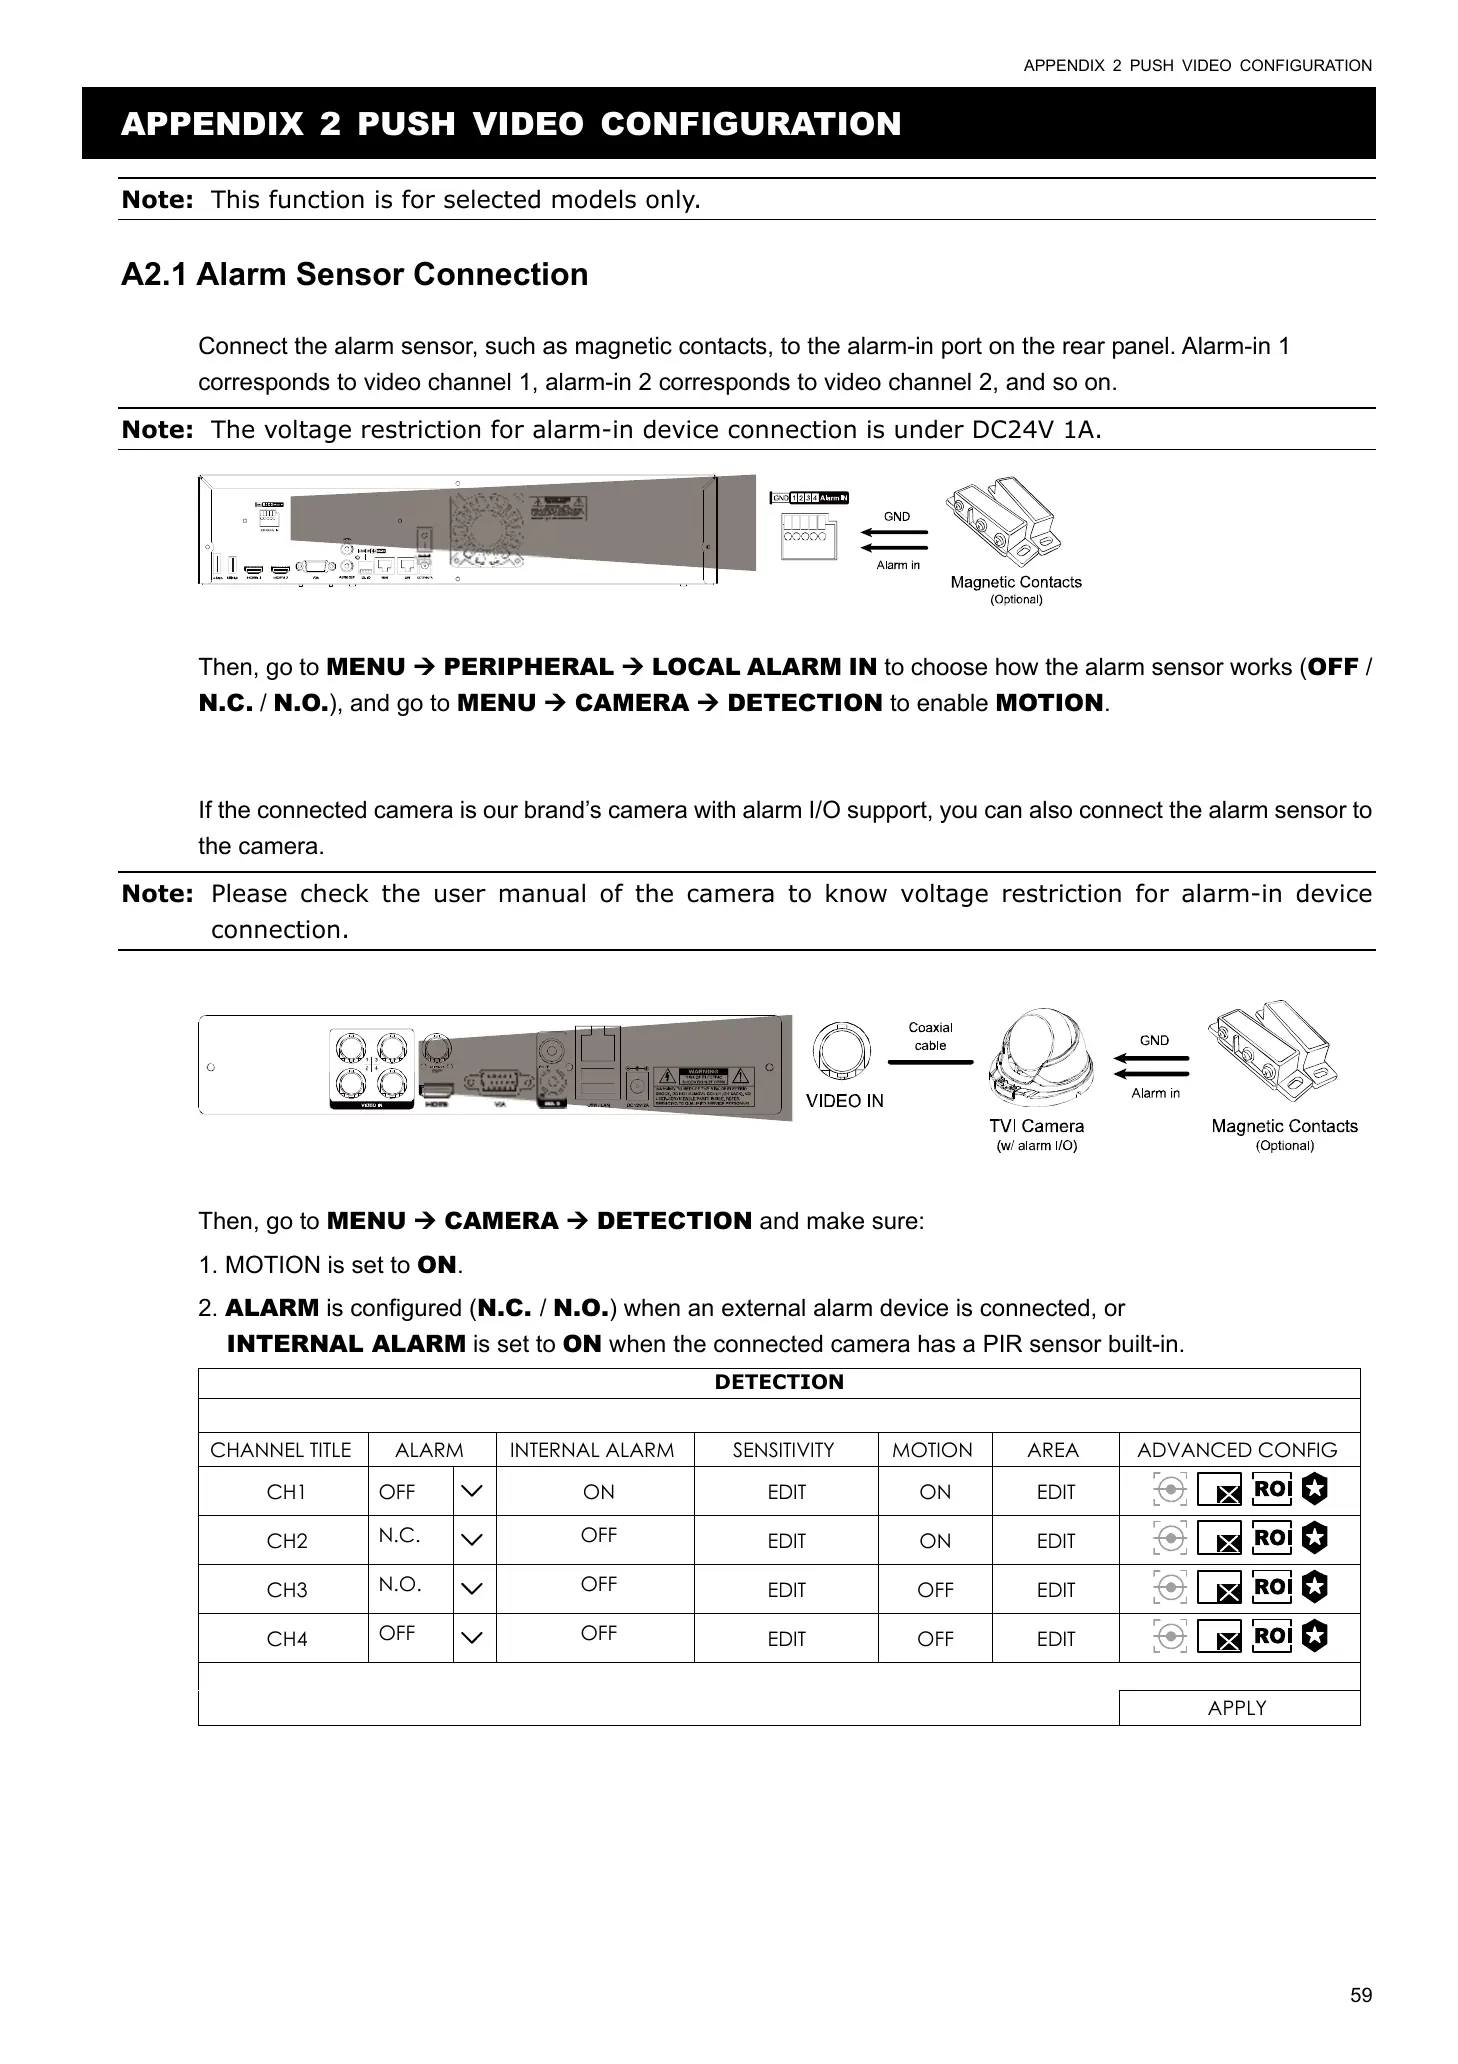
Connect the alarm sensor, such as magnetic contacts, to the alarm-in port on the rear panel. Alarm-in 1
corresponds to video channel 1, alarm-in 2 corresponds to video channel 2, and so on.
Note: The voltage restriction for alarm-in device connection is under DC24V 1A.
Then, go to MENU PERIPHERAL LOCAL ALARM IN to choose how the alarm sensor works (OFF /
N.C. / N.O.), and go to MENU CAMERA DETECTION to enable MOTION.
If the connected camera is our brand’s camera with alarm I/O support, you can also connect the alarm sensor to
the camera.
Note: Please check the user manual of the camera to know voltage restriction for alarm-in device
connection.
Then, go to MENU CAMERA DETECTION and make sure:
1. MOTION is set to ON.
2. ALARM is configured (N.C. / N.O.) when an external alarm device is connected, or
INTERNAL ALARM is set to ON when the connected camera has a PIR sensor built-in.
DETECTION
CHANNEL TITLE ALARM INTERNAL ALARM SENSITIVITY MOTION AREA ADVANCED CONFIG
CH1 OFF
ON EDIT ON EDIT
CH2
N.C.
OFF
EDIT ON EDIT
CH3
N.O.
OFF
EDIT OFF EDIT
CH4
OFF
OFF
EDIT OFF EDIT
APPLY
 Loading...