CONNECTION
3
2. CONNECTION
2.1 Hard Disk Installation
Note: The illustrations below are using a 4CH model as an example. The methods of how to install a hard
disk are the same for all models.
Note: It’s necessary to install a hard disk first before firmware upgrade to ensure the upgrade process
works properly.
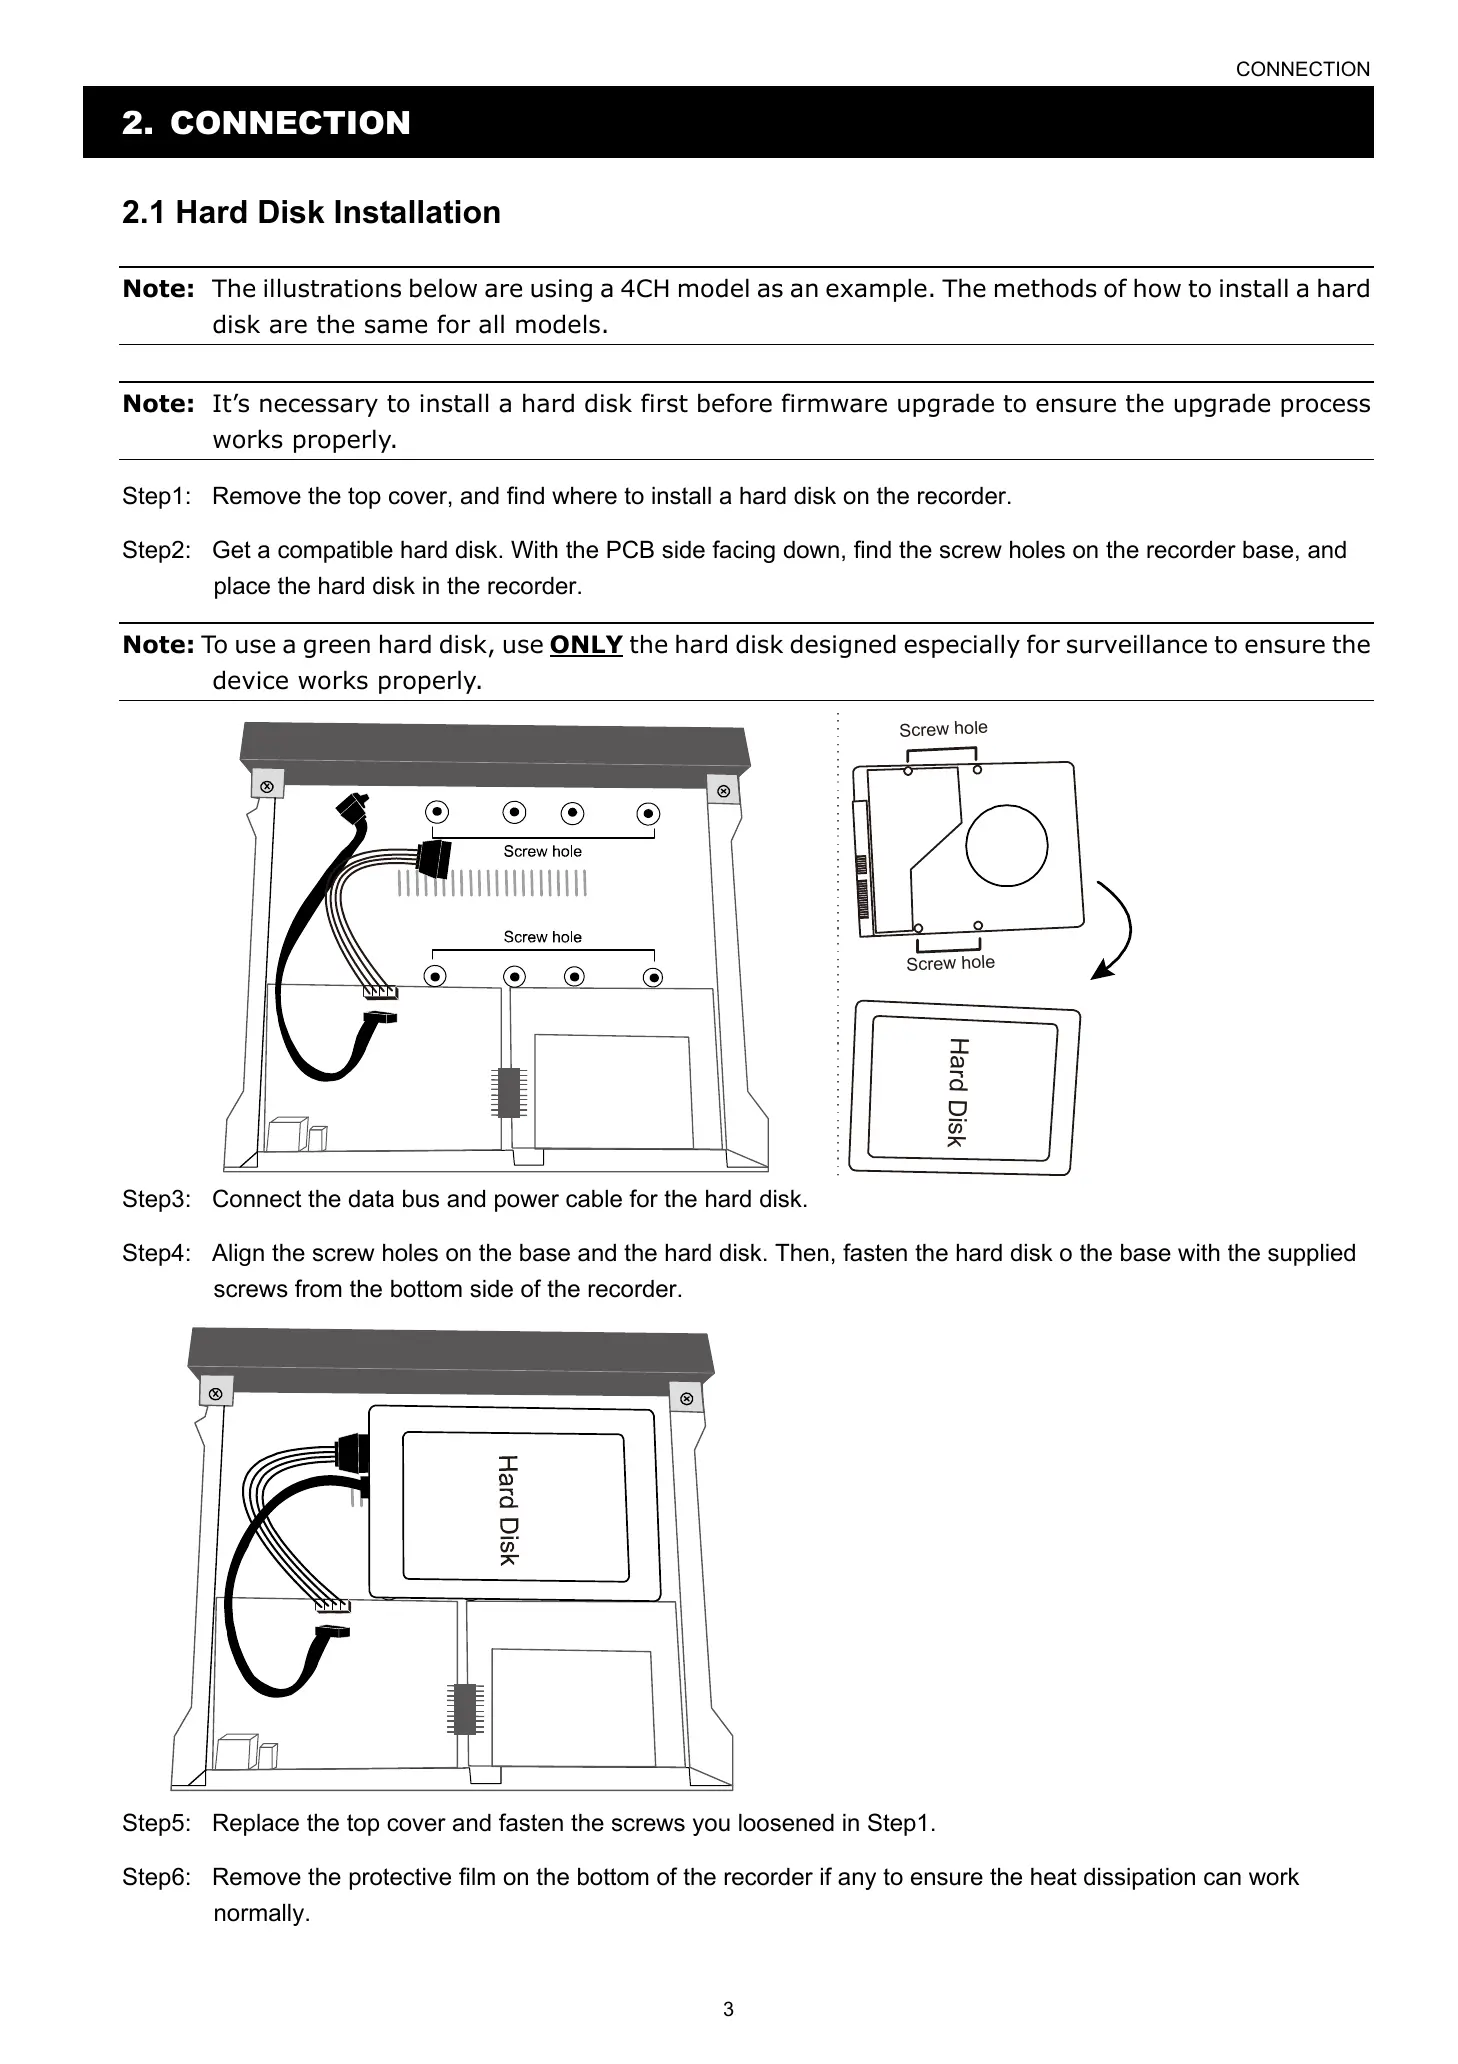
Step1: Remove the top cover, and find where to install a hard disk on the recorder.
Step2: Get a compatible hard disk. With the PCB side facing down, find the screw holes on the recorder base, and
place the hard disk in the recorder.
Note: To use a green hard disk, use ONLY the hard disk designed especially for surveillance to ensure the
device works properly.
H
a
r
d
D
i
s
k
S
c
r
e
w
h
o
l
e
S
c
r
e
w
h
o
l
e
Step3: Connect the data bus and power cable for the hard disk.
Step4: Align the screw holes on the base and the hard disk. Then, fasten the hard disk o the base with the supplied
screws from the bottom side of the recorder.
Step5: Replace the top cover and fasten the screws you loosened in Step1.
Step6: Remove the protective film on the bottom of the recorder if any to ensure the heat dissipation can work
normally.
 Loading...