3. Physical installation
3.3 Alignment of a table mount FLM projector
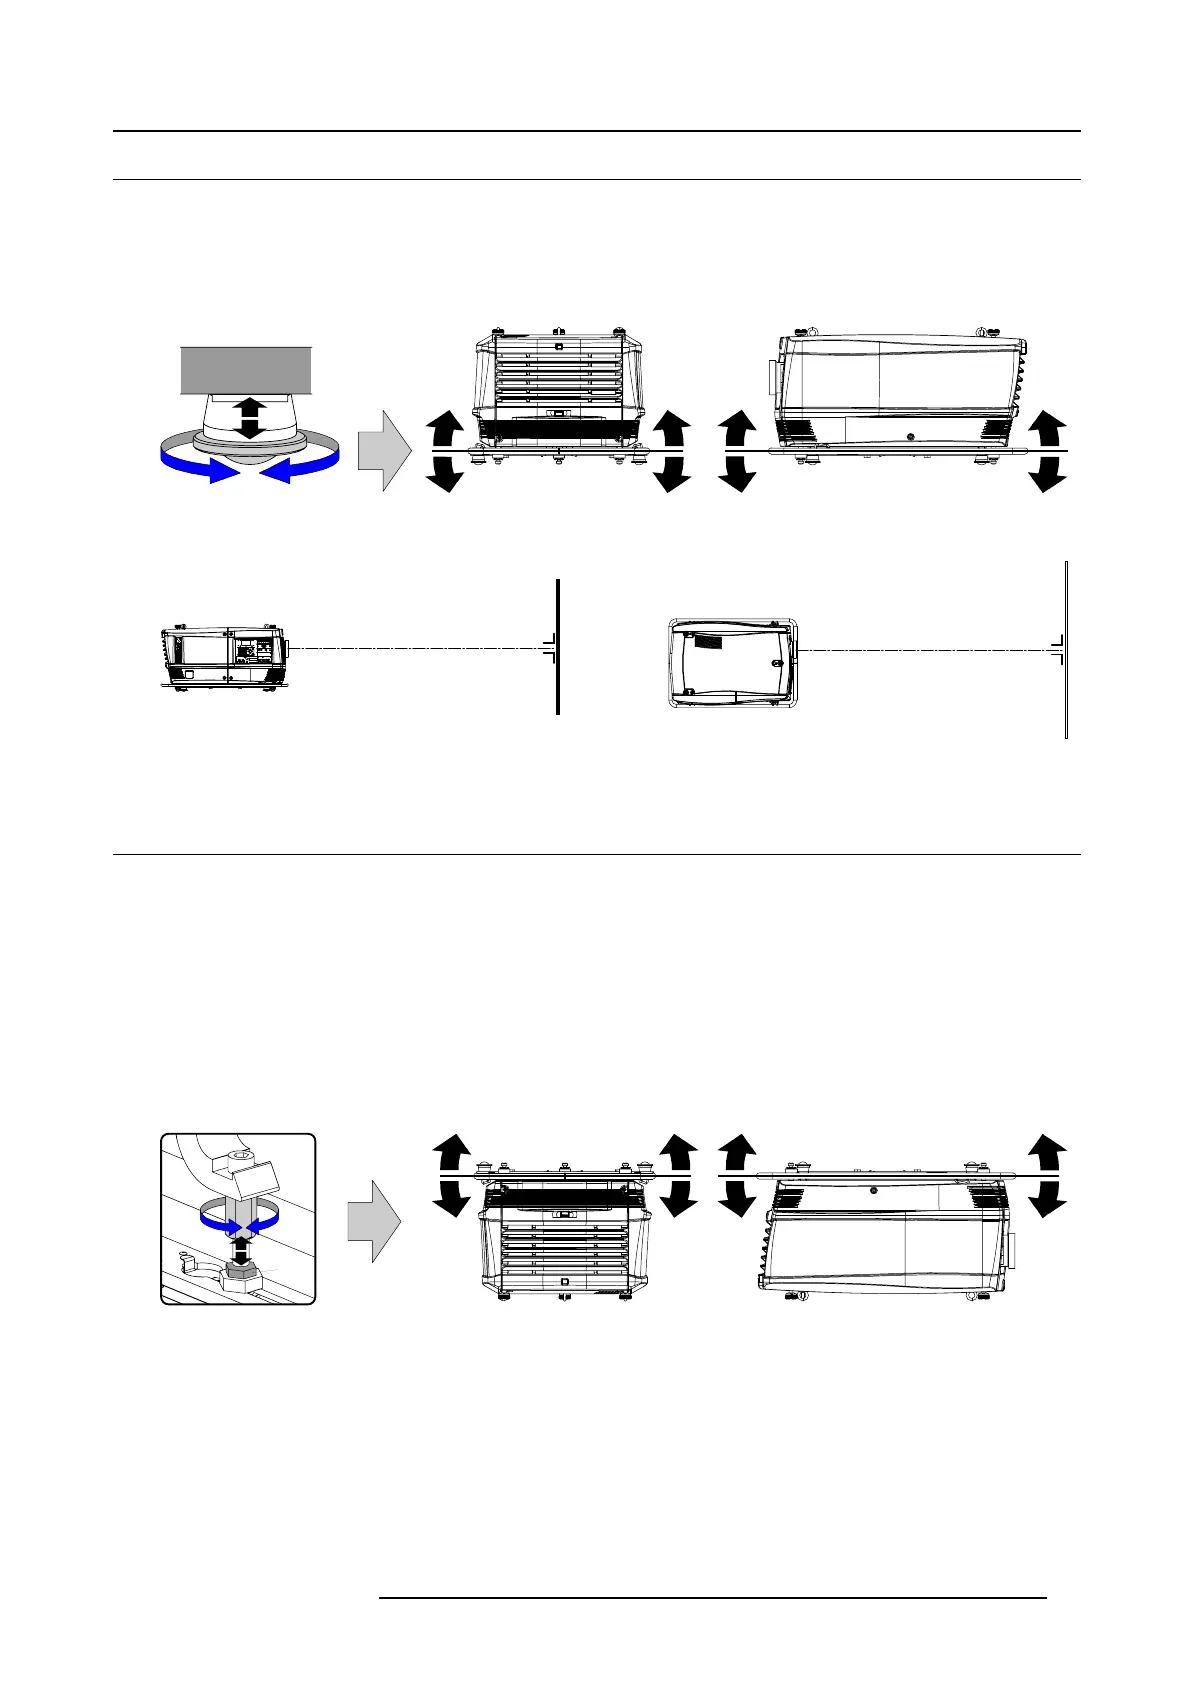
How to align a table mount FLM projector ?
1. Place the projector in the desired location. Take into account the zoom range of the used lens and the size of the screen.
2. Project one of the internal hatch patterns on the screen.
3. Turn the adjustable feet in or out until the projected hatch pattern is perfectly rectangle shaped and leveled.
Image 3-22
When this is achieved, the projector is set horizontal and vertical at right angles to the screen.
SCREEN
SCREEN
Image 3-23
3.4 Alignment of a ceiling mount FLM projector
Necessary tools
17 mm open ended spanner.
How to align a ceiling mount FLM projector ?
1. Install the projector in the desired location. See installation procedure "Suspension of the FLM projector with rigging clamps",
page 28. Take into account the zoom range of the used lens and the size of the screen.
2. Project one of the internal hatch patterns on the screen.
3. Release the lock nut (ref B image 3-24) of the rigging clamps.
4. Adjust the height of the rigging clamps with respect to the projector, until the projected hatch pattern is perfectly rectangle shaped
and leveled.
B
Image 3-24
R59770179 FLM R22+ 15/03/2010 27