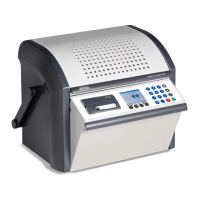
3. Set the electrode gap according to the selected standard.
Further information:
Chapter Setting an electrode gap (on page 28)
Chapter Overview of standards (on page 44)
4. Set the slew rate for the test voltage. Please use the arrow keys to make entries.
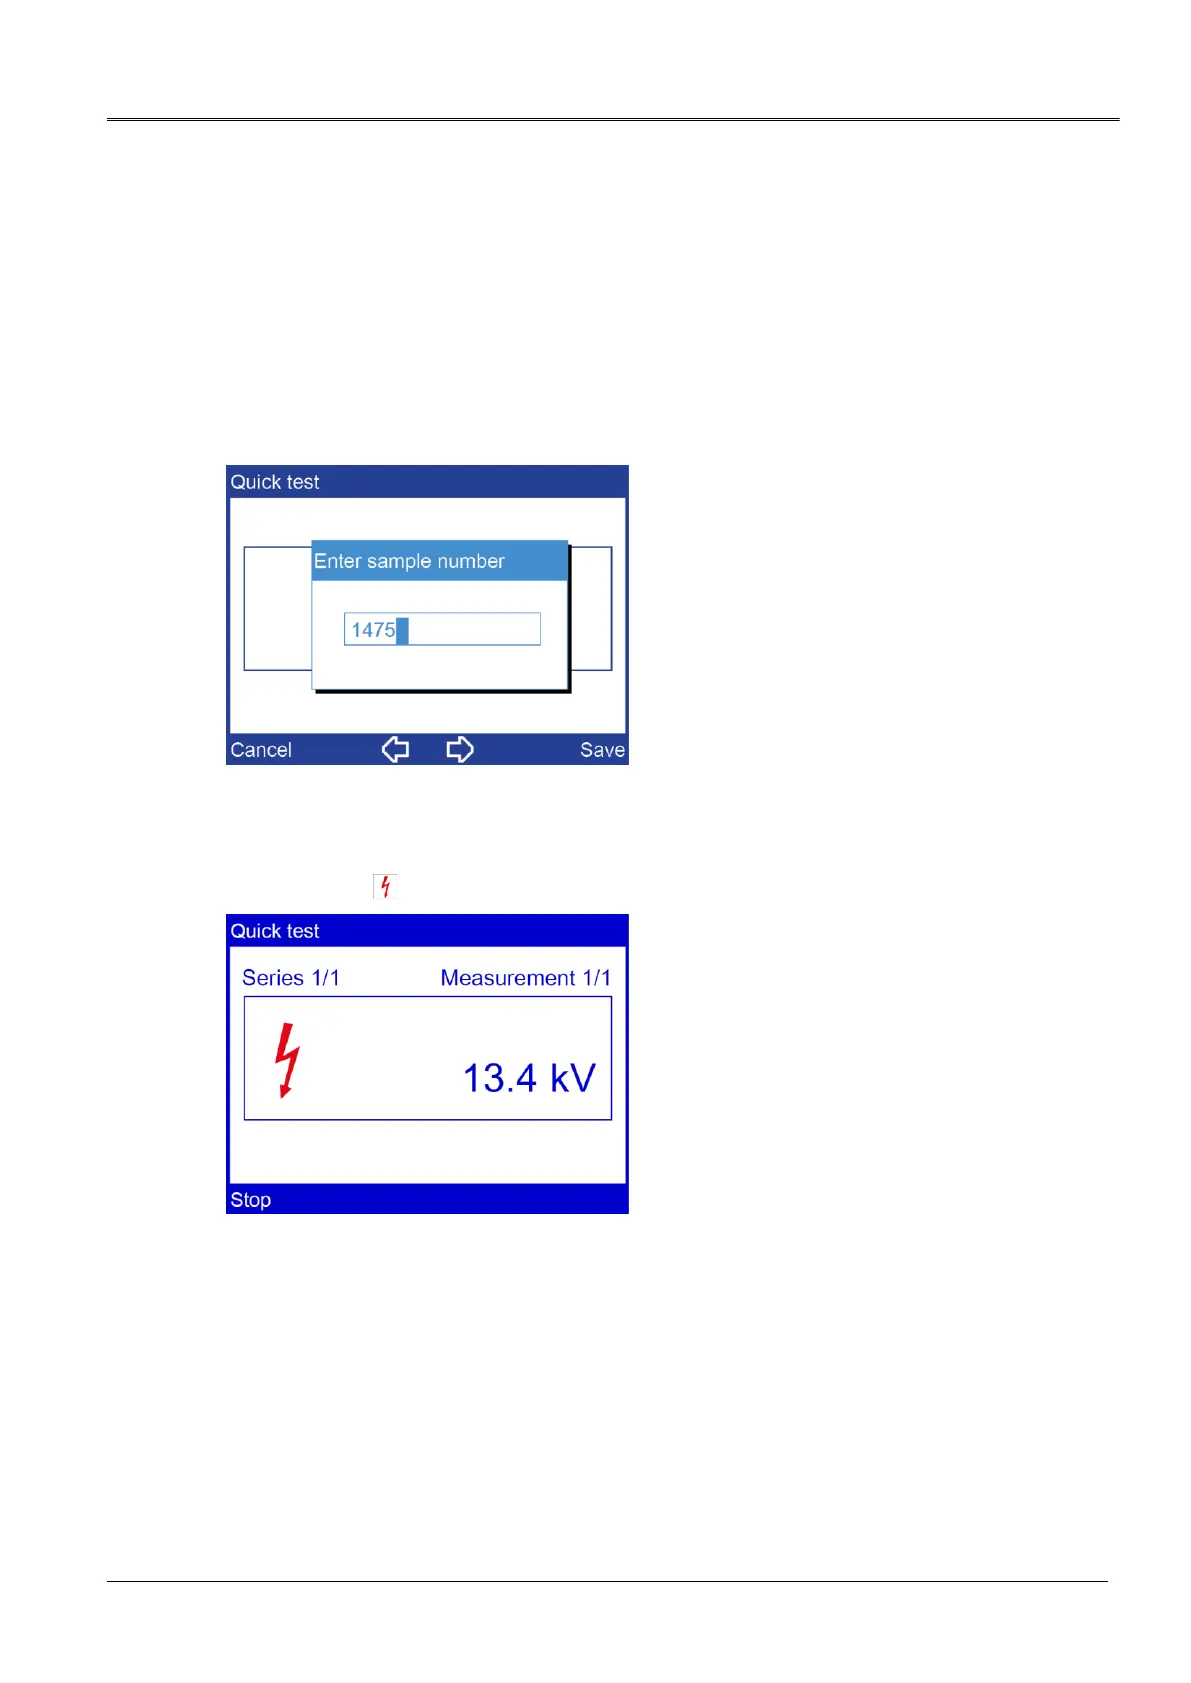
5. Select the menu item Start.
A prompt to enter a sample number appears on the display. The oil breakdown voltage
tester will suggest a sample number composed of the date and time in DDMMYYhhmm
format. This sample number can be extended as required.
6. If you want to amend the suggested sample number, do so or enter any sample number
with the number keys on the membrane keyboard.
7. Click Save to confirm the entry.
The measurement begins. A window displays the details of the measurement process.
The symbol indicates that there is high voltage at the electrodes.
When the oil breakdown voltage tester has completed the measurement, the
measurement log is shown on the display. If the printer is switched on, the measurement
log will automatically be printed first.
8. Select the menu item Details in the lower menu bar for a detailed view of the
measurement results.
 Loading...