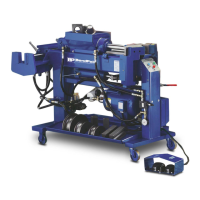
13 Bender Operation Manual
NOTE:
Practice the following bending steps without
tubing and initiate a few “dry runs” until you
understand the operating features.
USING THE REMOTE FOOT SWITCHES OR AUTO
BUTTON - When using a card system or bending a pipe,
you are not required to use the “Memory” function. Some
operators will use the memory function only when multiple
pipes are to be bent. The most popular method will be
manual or semi-automatic. When KEYPAD is lighted, the
machine will operate manually using the remote foot
switches or JOG/FWD button or semi-automatically,
performing one bend at a time using the AUTO button.
The actual depth-of-bend degrees will continuously appear
in the DIE ANGLE window any time the machine is
running. To manually operate the bender, depress the
right foot switch to advance the radius die and the left one
to retract it. The foot switches will always override the
automatic controls. When using the foot switches, the
radius die will NOT stop at the SET ANGLE.
To bend one bend at a time using the AUTO button,
follow these step-by-step instructions.
1. Turn the bender on and depress the SELCT button
to illuminate the KEYPAD light.
2. Find out what degree of bend is required and enter it
by depressing the appropriate number keys.
This number will then appear in the SET ANGLE
window. If you make a mistake and improperly
enter the wrong number, simply clear the SET
ANGLE by depressing the CLEAR button then
re-enter the proper information.
3. With the KEYPAD light illuminated, disregard any
numbers that may appear in the STATION window.
4. After installing a matched die set, position the tubing
so that you can begin bending.
5. Check your “circle-of-swing” for allowable clearance.
6. Depress the AUTO button to initiate the semi-
automatic cycle.
7. At this time the radius die will begin to move forward
until it reaches the designated depth-of-bend dis-
played in the SET ANGLE window. The retract
sequence will then automatically initiate, reversing
the radius die until it is fully retracted.
8. For the remaining bends, move the pipe over until
the next bend position or “center mark” is centered
between the back shoes. Repeat steps 5-7.
9. After all bends are completed, cut off the tubing end
to match the existing pipe or master.
PROGRAMMING THE DIGITAL BOARD- Follow these
step-by-step instructions to properly utilize the MEMORY
feature. The PROGRAM DATA CONTROL board stores
bend depths only. All data will be cleared once power is
turned off. The memory feature can be used when bend-
ing multiple or individual pipes The following instructions
illustrate how to properly enter the data which is shown
on the program cards.
1. Press the SELCT button to illuminate the KEYPAD
light.
2. Press the RESET button to return the STATION
window to number one.
3. Using your program card, enter the first degree of
bend shown in the BEND-DEPTH column. Press the
appropriate number keys to display the recommended
bend depth in the SET ANGLE window. Now press
the ENTER key. You have just entered the first bend
depth in station number one.
4. Press the STEP button to change the station to display
the number “2”.
5. Using your program card, enter the second depth of
bend by pressing the appropriate number keys. The
number should appear in the SET ANGLE window. If
the information is correct press the ENTER key. You
have now entered the second bend depth in station
number two.
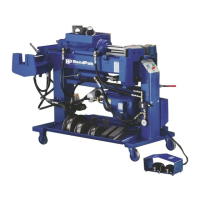
Bender Operation Manual 13
WARNING!
1. Either foot switch will act as an EMERGENCY
stop.
2. NEVER operate the remote electric foot switches
in or around water or damp areas.
3. If the foot switch cords become frayed or
damaged
in any way, discontinue use until they are properly
repaired.
4. ALWAYS disconnect power cord before making
any electrical repairs.
CAUTION!
KEEP HANDS CLEAR while dies are in motion.
Familiarize yourself with the EMERGENCY STOP
button and its operation. NEVER place hands near
bending area or any pinch points when motor is
running. ONLY TRAINED PERSONNEL should be
near machine when it is in operation.
CAUTION!
If operating controls are malfunctioning,
discontinue use immediately. DO NOT attempt to
operate machinery until controls have
been repaired.