22 Bender Operation Manual
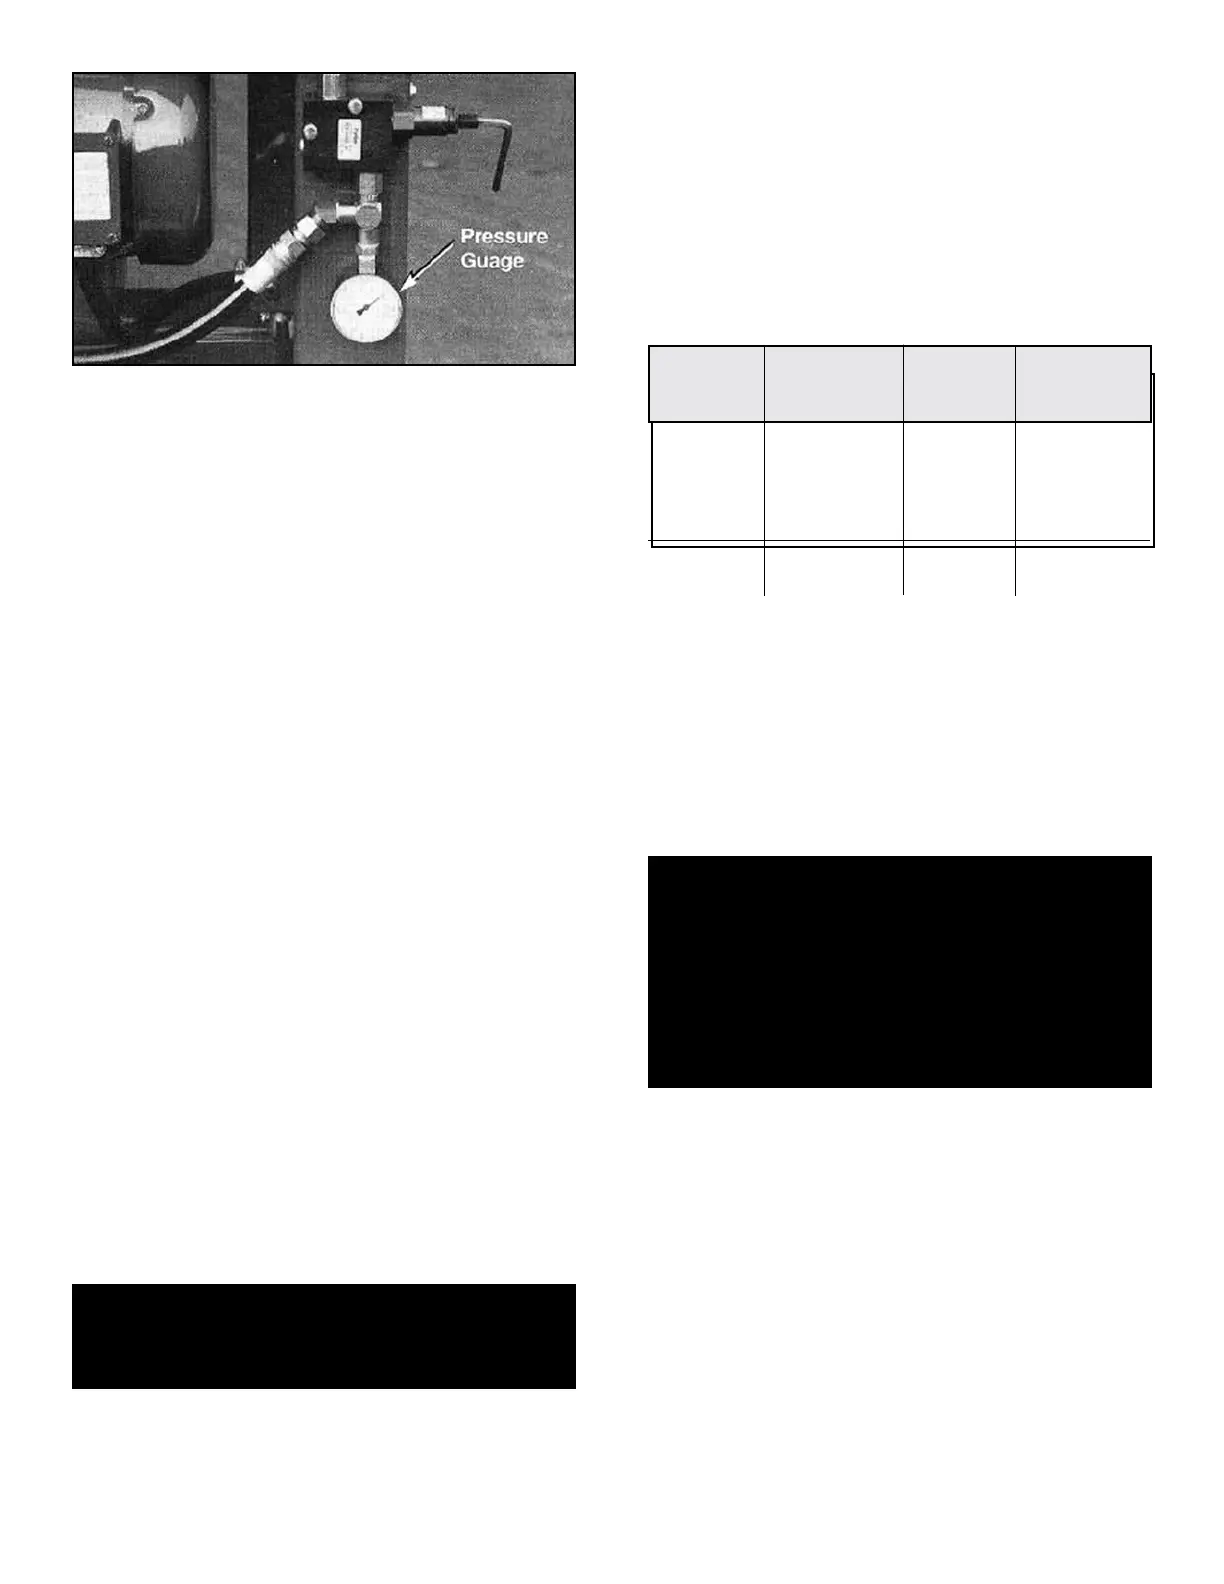
1. Tubing is not required for steps 1-3. Advance the
radius die and check the sequence valve pressure.
Sequence valve pressure is shown on the pressure
gauge attached to the valve itself. The correct pressure
will be shown only as the radius die travels forward
through the bending gates while the radius die is in
motion. Normal operating pressure should be 1600
P.S.I. The correct return pressure will be set at 300-
350 P.S.I. For bending three inch tubing, the initial
sequence valve pressure should be raised to 2000
P.S.I. for each bender (See page 33 for pressure
adjusting procedure.)
2. To raise the sequence valve pressure, turn the Allen
wrench clockwise until 2000 P.S.I. is maintained as
the radius die moves forward through the bending
gates. The return pressure will remain unchanged.
3. After proper pressures have been set, the dies
should be heavily greased.
NOTE:
Bending dies MUST be cleaned and
polished smooth for best results.
4. Position the tubing in the bender and advance the
radius die forward to begin the bending process.
Remember to USE MANUAL CONTROLS ONLY.
5. At a bend depth between 30 degrees and 40 degrees
the bender may start to “bog” down. At this time start
turning the Allen wrench counter-clockwise to reduce
the sequence valve pressure. Do not adjust below
400 P.S.I. This will allow the radius die to advance
further. Continue bending until the desired bend
depth is reached. Return the pressure to 2000 P.S.I.
for the next bend.
6. If further bends are required, repeat this procedure
for each bend. ALWAYS return the sequence valve
pressure back to 1600 P.S.l. when finished. (See
page 33 for pressure adjusting procedure.)
BENDING STAINLESS
TUBING
In order to get good results when bending stainless tubing, it
is necessary to increase the back shoe pressure by adjusting
the sequence valve similar to the procedure previously
described. The recommended pressures are shown below.
When using large diameter or light gauge tubing, more back
shoe pressure is required. Always remember to reset the
bender to 1600 P.S.I. when you are finished.
Stainless tubing comes in many grades. The grades
shown above are the best for bending.
NOTE:
It is very important to clean and lubricate the bending
dies during all bending procedures.
END FINISHING
OPERATIONS
USING THE INTERNAL EXPANDER
The internal expander uses segmented expander dies or
“segment sets” in conjunction with an expansion arbor.
When the arbor is pulled through the center of the seg-
ment set it spreads the “fingers” which in turn expands
the tubing to an exact inside diameter. The segment sets
are designed to work on one size arbor only. An adjust-
able Buttress Canister attached to the internal expander
cylinder is used to control the expansion range.
NOTE:
The arbor must be snug to cylinder shaft
before operation begins to avoid damaging
threads.
Recommended Tubing Proper
Tubing Size Tubing Grade Thickness Backshoe
Pressure
16 Gauge
304 or 409 only for 304
1”-2” O.D. Stainless 16 or 14 2200-2500 PSI
Tubing Gauge
For 409
2”-2-1/2” 409 Stainless
14 Gauge 2400-2700 PSI
O.D. Tubing
CAUTION!
DO NOT turn the adjustment screw beyond the end
threads of the screw,
CAUTION!
Before any attempt is made to use the end finishing
components on this machine, it is important that you
have read and fully understand all operating instruc-
tions. KEEP HANDS CLEAR of all pinch points. ONLY
TRAINED PERSONNEL should be near machine
when it is in operation. NEVER stand in front of arbor
when operating internal expander. ALWAYS wear
safety glasses when operating this machine.
Figure 3-B