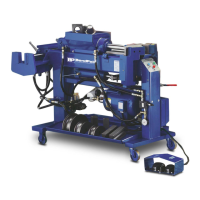
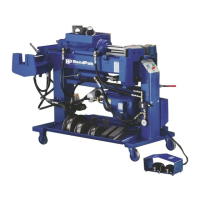
44 Bender Operation Manual
TO CHECK FOR
PROPER ROTATION
On initial start up of a three phase motor, check for prop-
er rotation. It should rotate counterclockwise. To check
motor/pump rotation, proceed as follows:
1. Plug in bender.
2. Turn bender on.
3. Depress the swager control handle. If the swager
cylinder extends, then the rotation is correct. If the
swager cylinder does not extend, then the rotation is
wrong.
4. If the rotation is wrong, unplug the bender.
5. Disassemble the plug and reverse any two power
wires.
6. Test again.
7. If the swager cylinder still does not activate, check
the motor lead wiring as shown on the previous
page.
ELECTRIC FOOT SWITCH
On a regular basis, inspect the electric foot switch
assembly for wear or damage. Inspect the entire length
of the connecting cord for wear or deterioration. DO NOT
OPERATE the foot switch if any of the above is
observed.
MANUAL ELECTRIC
STARTER
The electric starter box on your bender uses movable
contacts activated by a push button mechanism. This
style of electric starter is equipped with “Heaters” to
prevent damage to the starter switch or motor in the
event of an over-current situation. Single phase
machines use one (1) #B-36 heater while three phase
machines use three (3) #B-25 heaters. Continued
over-current through the thermal unit will raise its tem-
perature and melt the alloy allowing the ratchet wheel
to rotate. This releases the pawl assembly, allowing
the toggle spring to retract the contacts. Before reset-
ting the relay, allow one to two minutes for the alloy to
solidify. DO NOT disassemble the overload relay block
because motor protection could be disabled and cause
possible damage to motor and/or other components.
Thermal units must be installed and the device reset
before the starter contacts will operate. Install thermal
units so that the type face can be read and the pawl is
positioned just above the ratchet wheel.
LOCK OFF MECHANISM - The starter can be locked only
in the OFF position by lifting the metal tab labeled “LOCK”
on the contact actuator and placing a padlock through the
center of the hole in the tab.
HYDRAULIC CYLINDERS
As with all hydraulic cylinders, age and wear will reduce
the effectiveness of the cylinder seals. Proper mainte-
nance and care will result in a prolonged service life.
RECOMMENDED
MAINTENANCE
t Use a small file to remove any small nicks or scratches
on the chrome cylinder rods.
t ALWAYS keep the chrome cylinder rods clean.
t ALWAYS remove expander tooling from the swager
area on 1302 models before using the internal
expander to prevent damaging the cylinder rod.
t NEVER “bang” the adapter collars on the cylinder
shaft to release them from the tubing.
t Be sure to change the hydraulic fluid after every1500
hours of operation or yearly, whichever comes first.
t Keep the ST-1 and Arbor tight at all times.
NOTE:
Under normal operating conditions all of the
cylinders will seep oil around the area of the
wiper seal. This is a normal condition.
CAUTION!
All “BA” and “BAS” models wired for more than
220 volts are factory equipped with a transformer to
reduce the incoming voltage to the circuit board down
to 220 volts AC.
380 VoIt 50HZ Three Phase
Incoming Power Motor Leads
Line 1 1 and 7
Line 2 2 and 8
Line 3 3 and 9
Twist together 10, 11,12
Twist together 4, 5, 6
To reverse rotation, interchange any two line leads
440 Volt 50 HZ Three Phase
Incoming Power Motor Leads
Line 1 1 and 12
Line 2 2 and 10
Line 3 3 and 11
Twist together 4 and 5
Twist together 5 and 8
Twist together 6 and 9
To reverse rotation, interchange any two line leads