15 Bender Operation Manual
To use the three-button automatic controls, follow these
simple instructions.
1. Position the “Auto-Stop” pointer at the desired depth
of bend.
2. Position the tubing at the appropriate bend mark.
3. Check your “circle-of-swing” and prepare to begin
bending.
4. Press the GREEN control button.
5. At this time the radius die will advance until the
desired depth-of-bend is reached, then, retract to the
original starting position.
6. Be prepared to support the tubing as it is released
from the dies.
USING THE REMOTE FOOT SWITCHES - The remote
foot switches are used for manual bending functions.
When using the foot switches for manual operation it is
best that you position the “Auto-Stop” pointer out of the
way or at 180 degrees so that it does not interfere. If you
want to use the foot pedals in conjunction with the “Auto-
Stop” pointer, position the pointer at the desired bend
depth and proceed by pressing the RIGHT foot switch
until the radius die stops at the pre-set bend angle.
Press the LEFT foot switch to retract the radius die.
Always be prepared to support the pipe as it is released
from the dies.
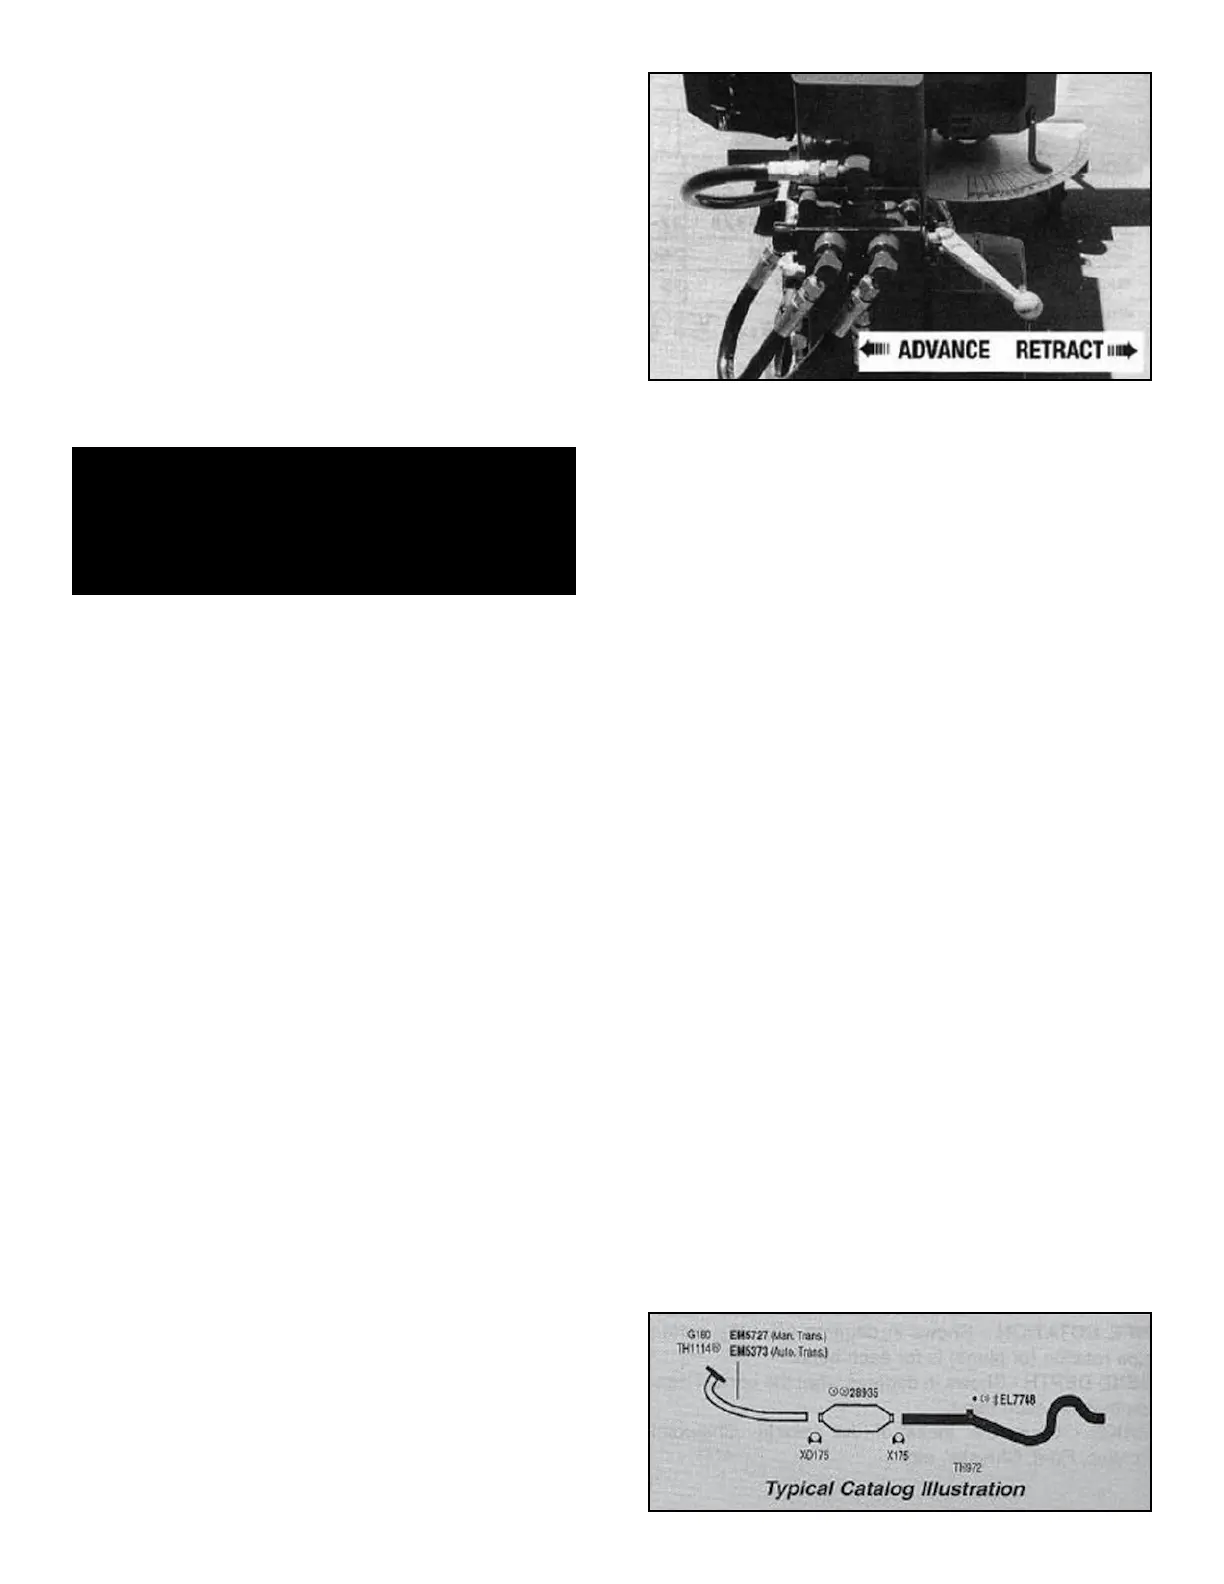
OPERATING THE MANUAL
KNEE CONTROL.
“BL” / BULLET MODELS
Read the following section completely before attempting
any operation of this unit. All “BL” models are equipped
with a hydraulic control valve mounted at knee height
that allows the user to operate the machine manually
with their leg. A degree plate with pointer is mounted
near the front of the machine that gives the user accu-
rate bend depths. “BL” models are not equipped with any
automatic features.
To operate the manual control valve, move the handle to
the left or the plunger down to advance the radius die.
The handle must be fully engaged to properly control
radius die movement.
To retract the radius die, move the handle to the right (or
plunger up) to return to the original starting position.
Always be prepared to support the pipe as it is released
from the dies.
OPERATION NOTE / BL MODELS:
If the operating control handle is pressed half way or par-
tially down during the bending operation, the radius die
may slow down or even retract slightly. To keep the
bending die at a controlled speed you must fully depress
the valve handle. If you wish to advance the radius die a
few degrees only, instead of easing the handle down, try
“tapping” the handle.
BENDING OPERATIONS
There are basically two styles of bending that can be per-
formed on your new bender. The first is PROGRAM CARD
BENDING which requires the use of PROGRAM CARDS
that contain instructional data for specific applications.
The second is PATTERN BENDING which is the most
popular method and duplicates pipes by using an existing
pipe or wire pattern as a master.
USING THE PROGRAM CARDS - The Program Card
System contains bending data for specific applications.
The following instructions define each section of the card.
It is important that you read the entire card carefully before
attempting to bend. Due to the many cards and applica-
tions covered, there may be some inaccuracies. No
responsibility is assumed by the manufacturer for any
consequences arising from inaccuracies found on the pro-
gram cards.
Look up the card number in the appropriate reference
catalog. Exhaust pipes numbers start with the letter “E”
and tail pipes numbers start with the letter “T”.
Bender Operation Manual 15
CAUTION!
Be alert at all times. NEVER place hands near
bending area or other pinch points
when motor is running.