27
Deco 330
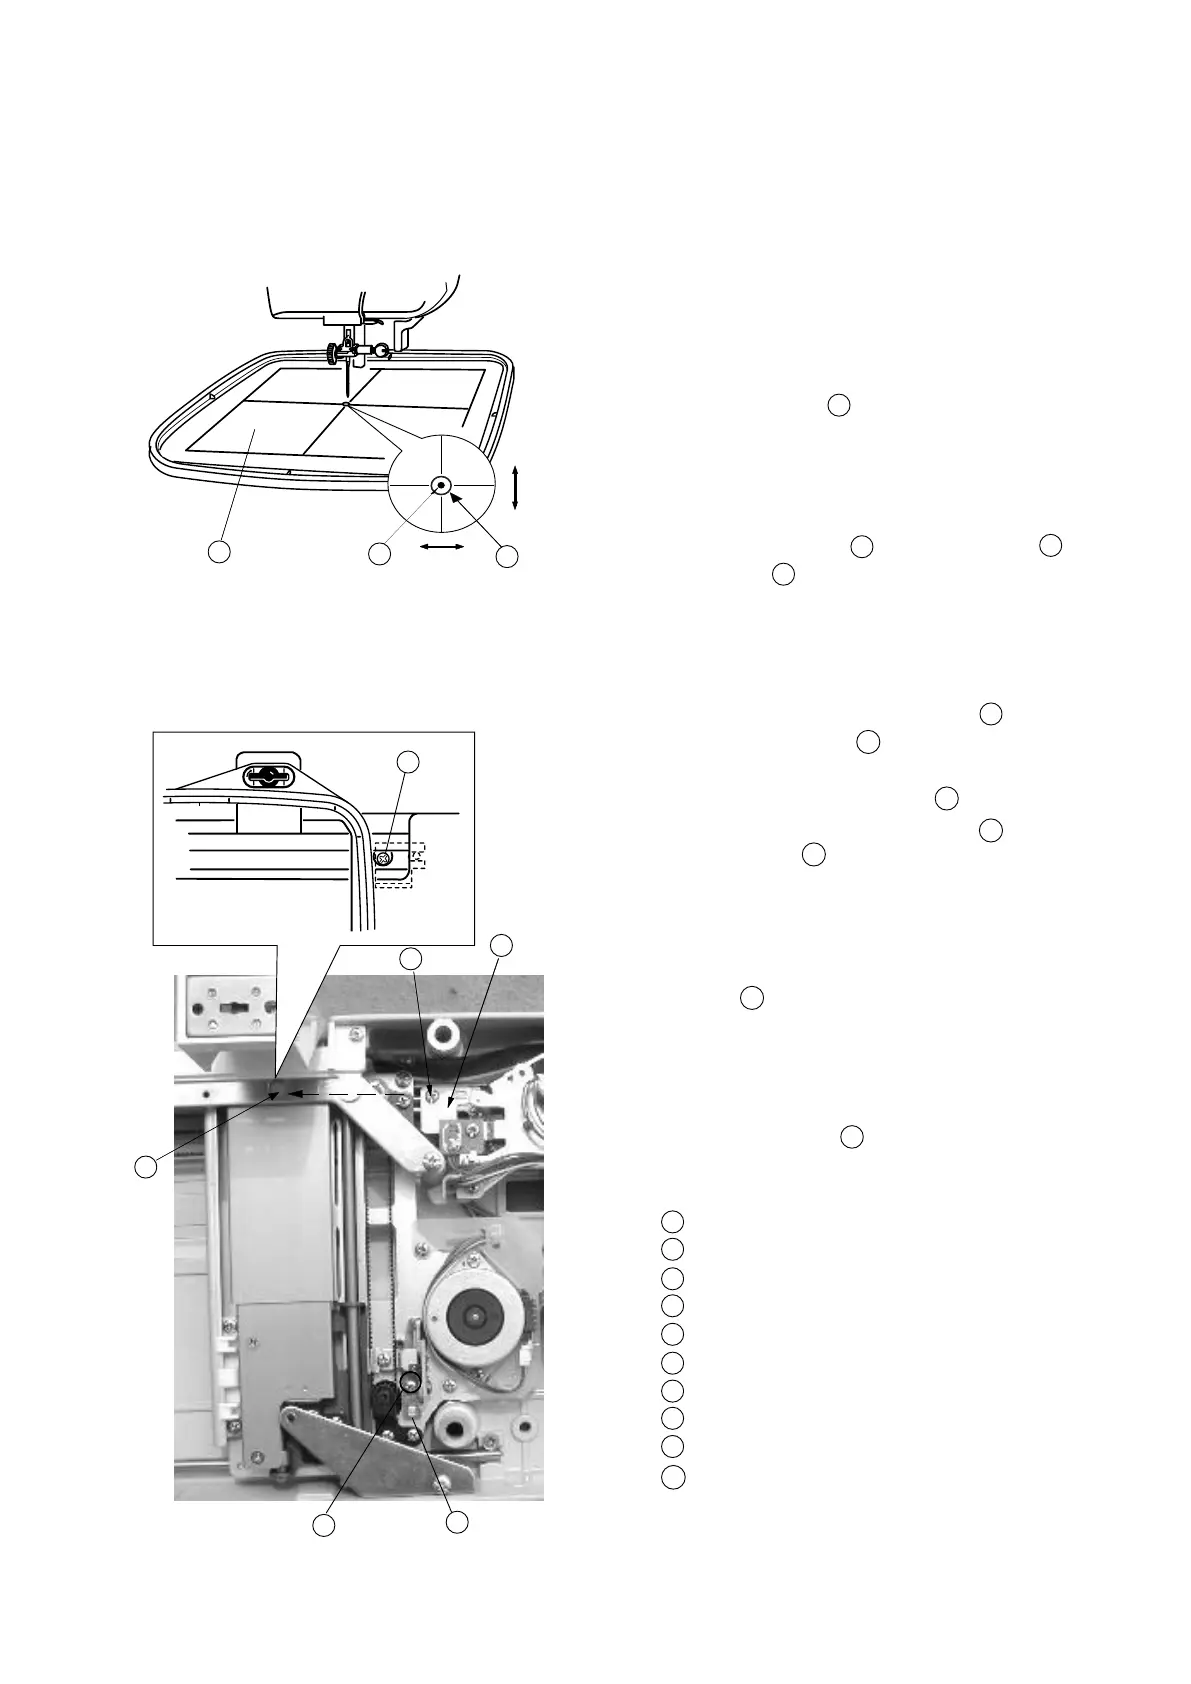
Adjusting X and Y Sensors(SimpleAdjustment)
To adjust X and Y sensor (without removing the base unit):
1Removethebasecover.
2Removethepresserfoot holder and place the fabric
on the Embroideryhoop(A).
Attach the Embroideryhoop(A)onthecarriage.
(Place the Template
2
on the Embroideryhoopas
shown.)
3 Turn the power switch “ON” and select the pattern No.1
on the touch panel.
4CheckthattheNeedle
3
goes into the Hole 4 in
the Template
2
.
5 Turnthepower switch “OFF”.
6Iftheneedledroppositionisslightlyoutofposition
in the Y-direction, loosen the screw(A)
1
and move
the Y-sensor xing plate 8 to adjust.
If the needle drop position is slightly out of position in
the X direction, loosen Screw(B)
5
through the
hole of the Sheet coverfixing plate hole,and move
the X shield plate to adjust.
7 Turnthepower switch “ON”.
Select the pattern No.1 on the touch panel, then check
if the needle goes into the center of the hole in the
Template
4
.
8Returnthecarriage to the stored position, then turn
the power switch “OFF”.
9 RemovetheTemplate 2 and Embroideryhoopthen
install the base cover.
Screw(A)
Template
Needle
Hole in the template
Screw(B)
X-shield plate
Hole of the sheet cover xing plate
Y-Sensor xing plate
Y-direction
X-direction
8
7
5
6
2
3
4
5
1
7
6
X
Y
1
2
3
4
5
6
7
8
9
10
 Loading...