73
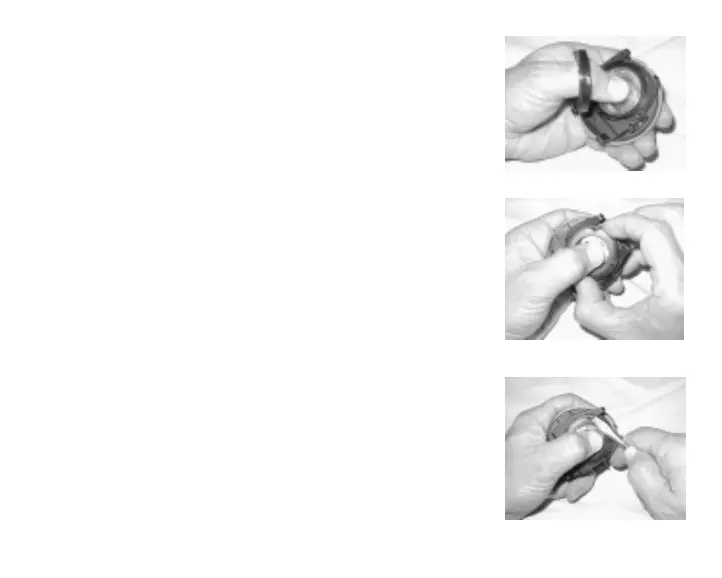
• Slide the Hatch Ring, top portion first (small opening), onto
your thumb (Fig. 80).
• Carefully place the Battery Hatch (with O-ring) into position on
the rim of the Battery Compartment, then press it evenly and
completely down into place with your same thumb.
• Maintain the Battery Hatch securely in place and, using your
other hand, slide the Hatch Ring down off your thumb and into
position around the Battery Compartment (Fig. 81). The tabs on
the Ring fit down into the slots located at the 2 and 9 o'clock
positions.
• Using your fingers, turn the Ring counter clockwise 5 degrees
until the tabs engage, then tighten it 5 more degrees by turning
it counter clockwise with the aide of the Battery Hatch tool, or a
small blade screwdriver, pressing against the upper/left arm of
the Ring (Fig. 82).
• An adjustable face spanner tool or pair of pointed pliers can be
used by placing the tips in the small holes of the Ring.
Inspection
• Activate the unit and watch carefully as it performs Diagnostic
and Altitude/Battery Status checks, and enters Surface Mode.
Observe the LCD display to ensure it is consistently clear and
sharp in contrast throughout the screen.
Fig. 80 -HATCH INSTALLATION
Fig. 81 -RING ORIENTATION
Fig. 82 -INSTALLING RING
 Loading...