8
Installation
Oven Assembly
OVEN STACKING
1. Place the upper oven on top of the lower oven.
2. Bolt the two ovens together from behind using the
stacking brackets.
UTILITY CONNECTIONS
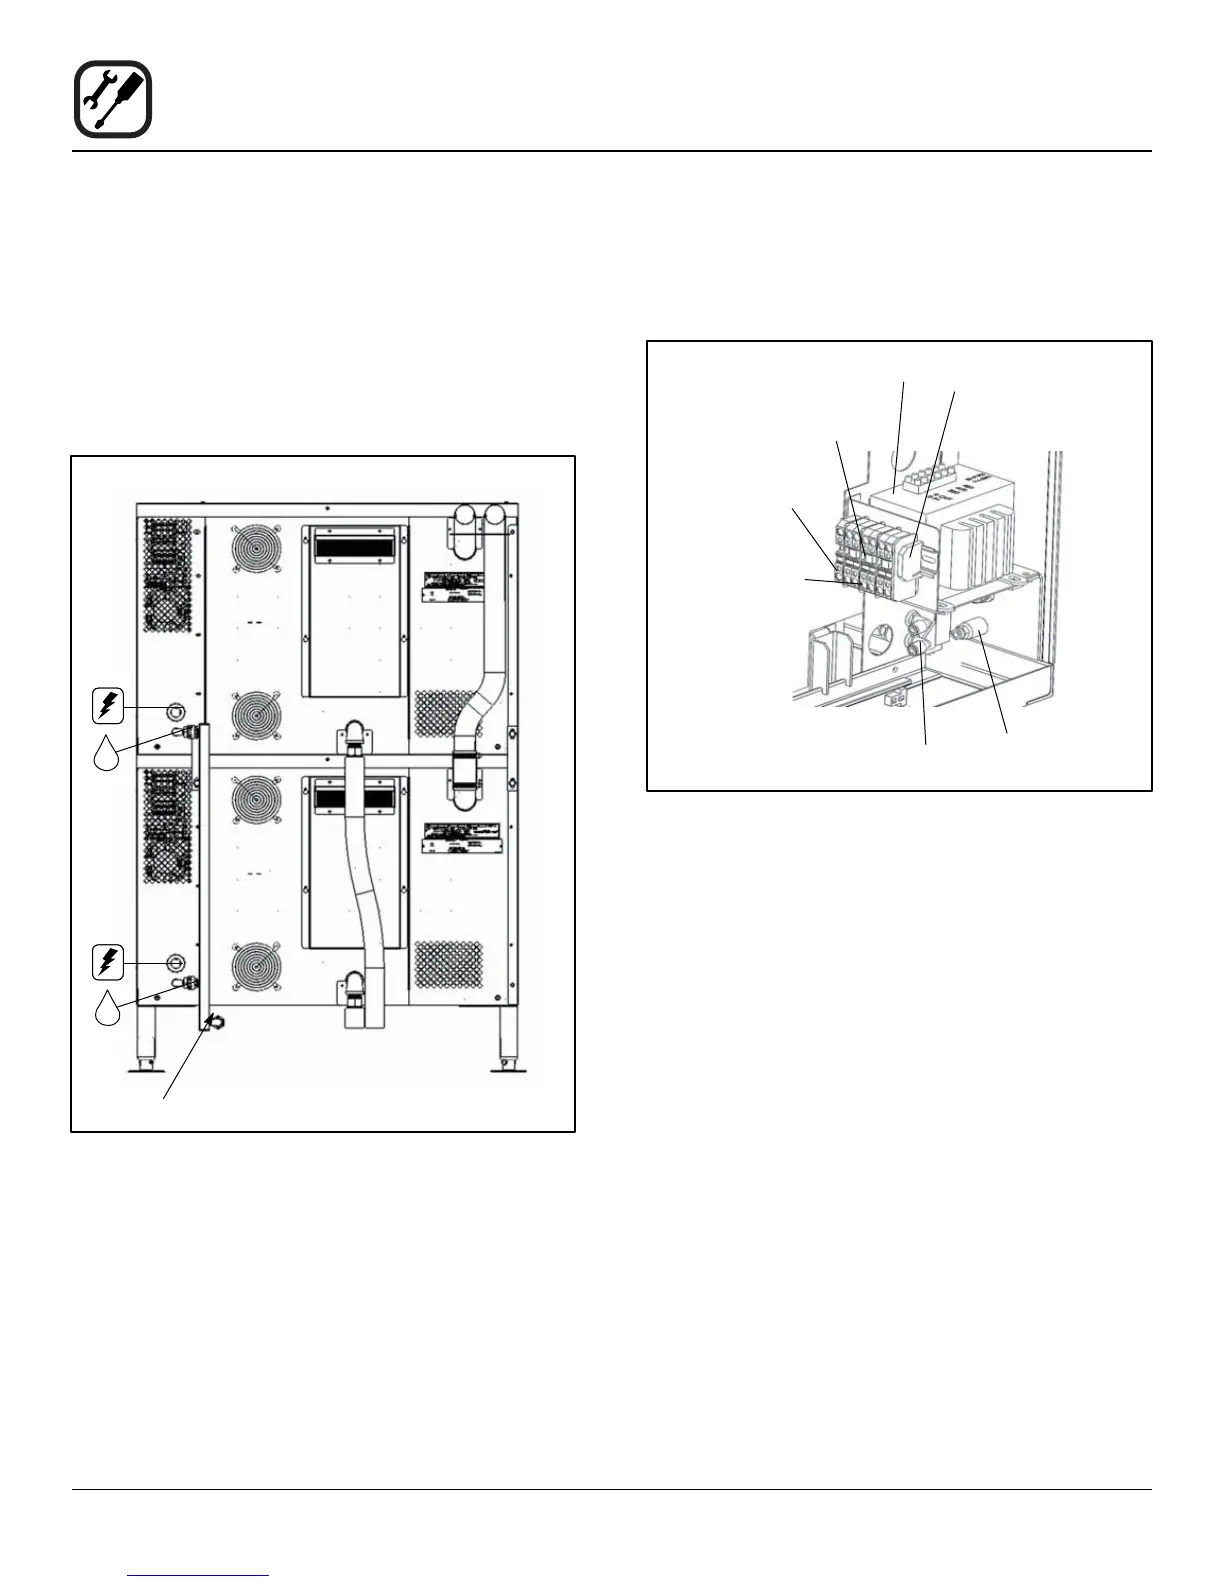
NOTE: Refer to Figure 6 for location of utility connection
on the back of the ovens.
Cavity Vents
Water Manifold
Drains
Figure 6
Electrical
1. Remove the two screws from above and below the
control panel. Slide the panel out to access the termi-
nal blocks. Refer to page 7.
End Stop
Transformer
Shorting
Jumper
Ground Lug
Terminal
Terminal
Block
1/4 Swivel
Elbow
1/4 Straight
Fitting
Figure 7
2. Connect the power cord to the top unit. Run the cord
down the back of the oven, using the provided strain
relief.
3. Then route the cord under the oven, supporting it on
the retainer bracket on the rear right leg. Connect to
the top right receptacle on the utility box at the front
of the oven. See Figure 8.
4. Connect the power cord to the bottom unit.
5. Run the cord down the back of the oven, using the
provided strain relief.
6. Then route the cord under the oven, supporting it on
the retainer bracket on the rear right leg. Connect to
the bottom right receptacle on the utility box at the
front of the oven. See Figure 8.
 Loading...