CALIBRATION AND ADJUSTMENT
3-8
INTELLITOUCH CONTROL
NOTE: For error code display information see
page 4-3 of the Troubleshooting section.
To access 2nd level programming
1. Turn the oven off.
2. Locate the 3 pin header on the bottom right
side of the control. Move the jumper from the
middle and bottom pins to the middle and top
pins exposing the bottom pin.
3. Turn the oven on. The program LED (1) lights.
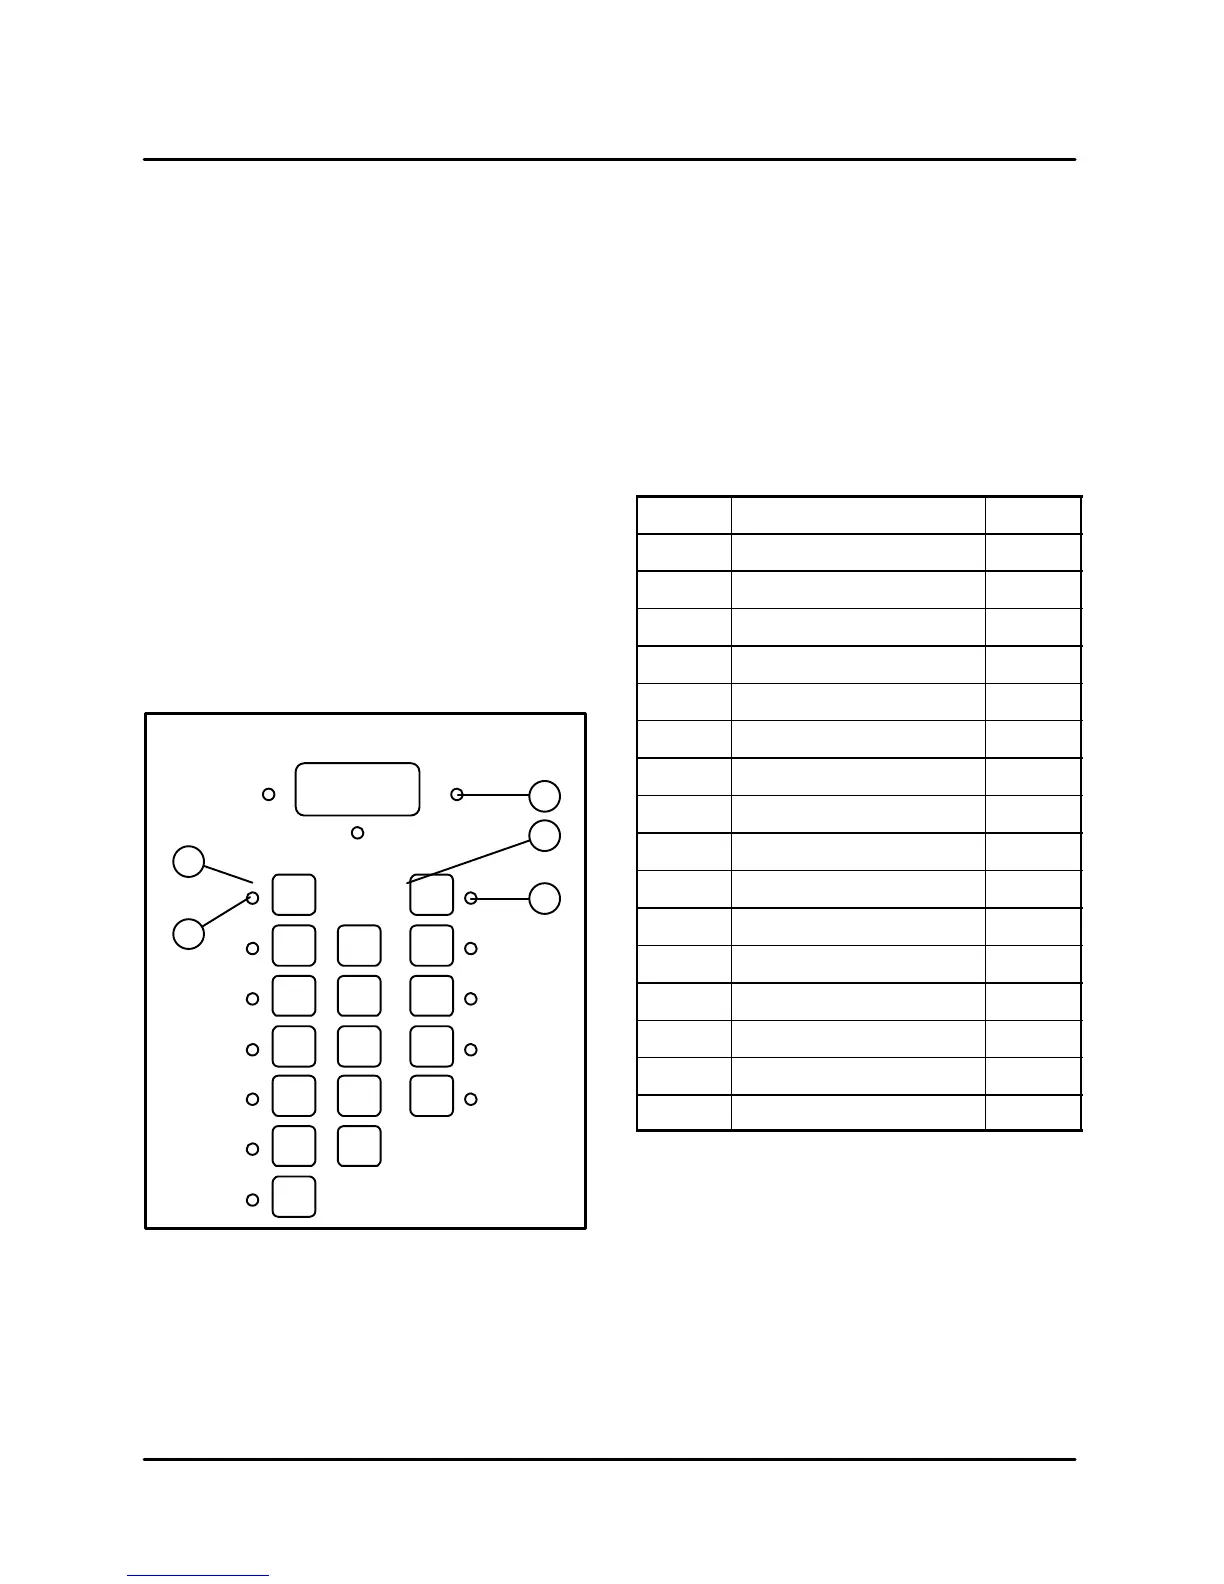
Programming the 2nd level parameters
1. The #1 LED illuminates.
NOTE: The LED's (3) are located next to the
product and load keys. The LED identiĆ
fication numbers (2) are located to the
left of the product and load keys. See
FIGURE 10.
DISPLAY
PROD
1
HEAT PROGRAM
INTELLITOUCH
READY
1
PROD
2
2
PROD
3
3
PROD
4
4
PROD
5
5
PROD
6
6
PROD
7
7
ENTER
TEMP
CNCL
R
TEMP
R
TIME
LOAD
1
8
LOAD
2
9
LOAD
3
0
LOAD
4
LOAD
5
1
3
2
2
3
FIGURE 10
2. Use the product and load keys to enter numeriĆ
cal data. See TABLE 1 for correct parameter
settings.
NOTE: Use product keys 1Ć7 for numerals 1Ć7.
Use load keys 1Ć3 for numerals 8,9 and
0 respectively.
3. Press the enter key to save the parameter setĆ
ting.
4. The #2 LED illuminates
5. Repeat steps 1Ć3 for each parameter. When
the final parameter setting is entered and
saved the #1 LED illuminates.
LED(s) Parameter Setting
1 Offset 0
2 Hrs/Min timer 0F
1,2 Fahrenheit (0=_F, <1=_C) 0F
3 Proportional 0F
1,3 Integration 1F
2,3 Dead band 3F
1,2,3 Cycle time 12F
4 Minimum on time 3F
1,4 Hi temp alarm 550F
2,4 Ready temp differential 15F
1,2,4 Minimum setpoint 150F
3,4 Maximum setpoint cook 500F
1,3,4 Minimum setpoint hold 0F
2,3,4 Maximum setpoint hold 0F
1,2,3,4 Fan 2 speed 0F
5 Fan rev. 0F
TABLE 1
To exit the 2nd level programming
1. Turn the oven off.
2. Move the jumper from the middle and top pins
to the middle and bottom pins exposing the
top pin.
3. Turn the oven on.