PARTS REPLACEMENT
5-2
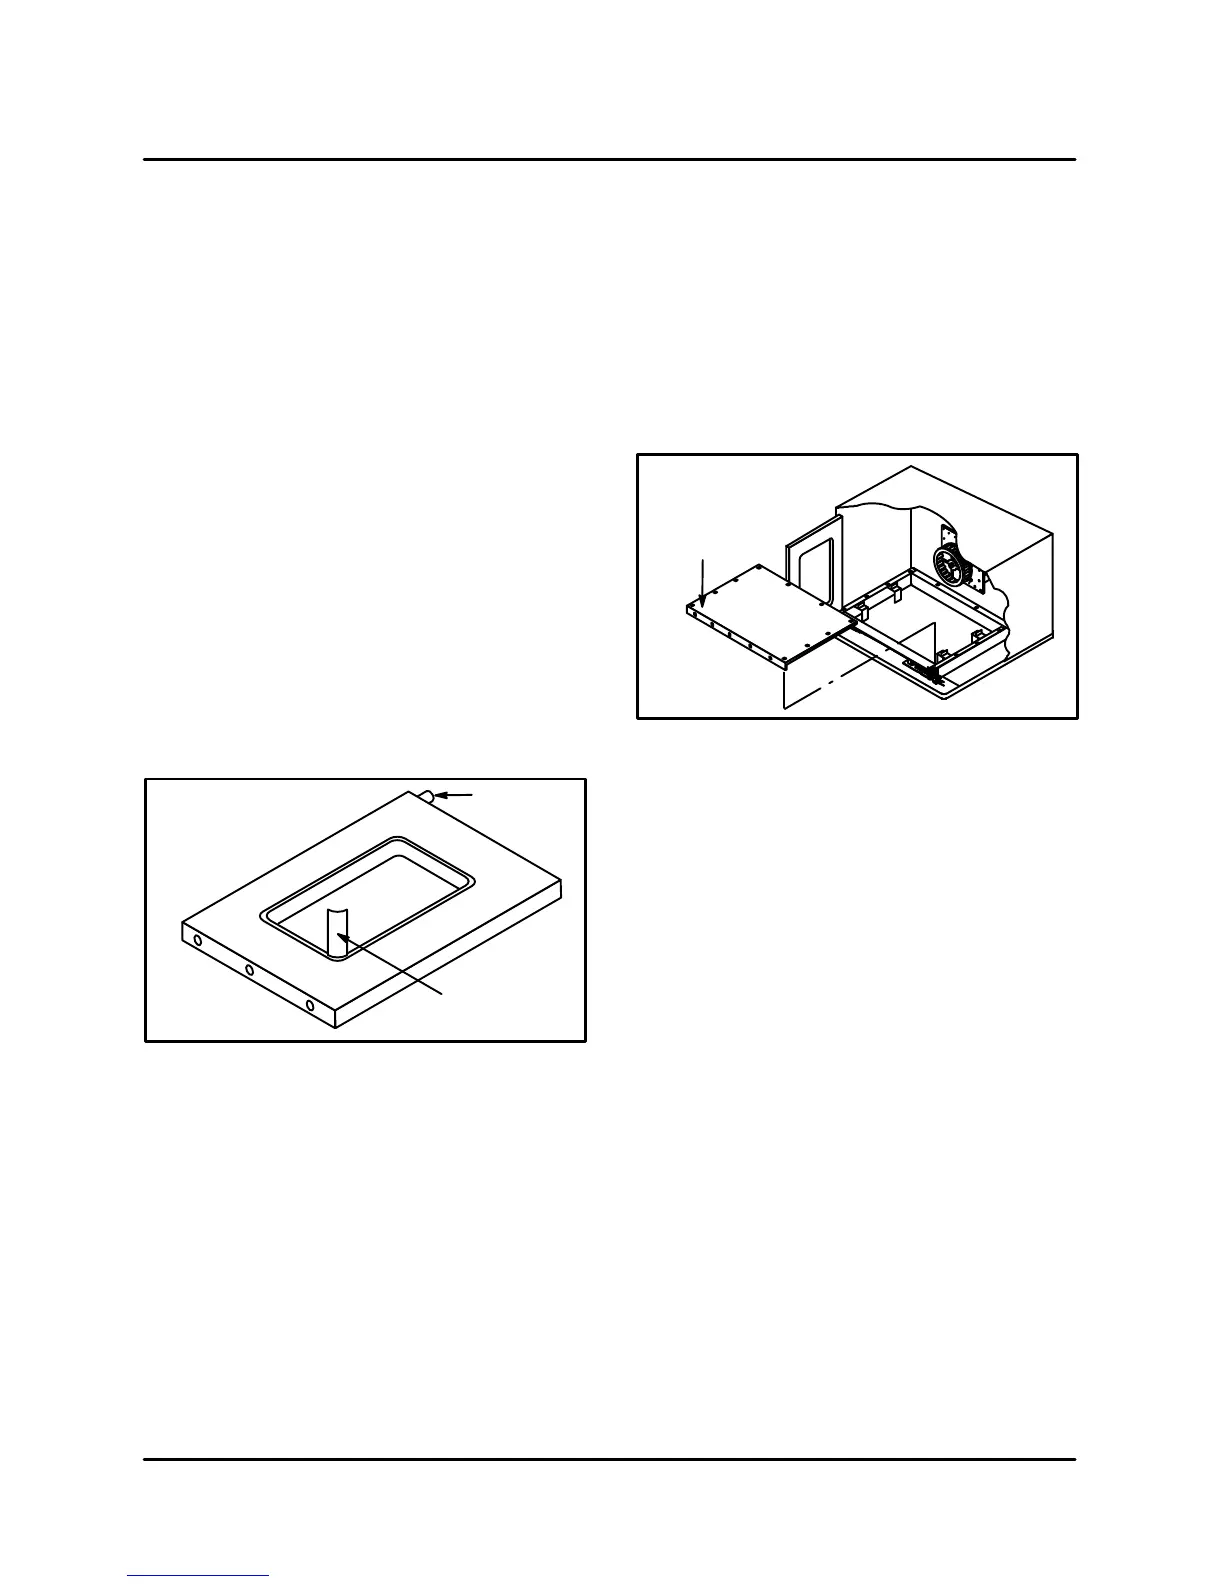
WINDOW ASSEMBLY
1. Remove the door as described. Place the door
on a flat surface with the front facing up.
2. Remove the outer door skin. Turn the door
onto its back.
3. Use the window insertion tool to pry up the corĆ
ners of the window assembly in the following
order:
A.) Bottom right (farthest from the hinge pin)
B.) Bottom left
C.) Top right
D.) Top left (closest to the hinge pin)
NOTE: The window insertion tool is provided
with the window assembly.
4. Use the window insertion tool to pry up the corĆ
ners of the window assembly.
5. Reverse steps 1-4 to replace.
NOTE: To install the door front start at the corĆ
ner closest to the hinge pin.
Window
Insertion Tool
Hinge Pin
FIGURE 1
COMPARTMENT LINER BOTTOM
1. Remove the racks, rack supports and blower
wheel cover.
2. Remove the bottom perimeter door gasket.
3. Remove the screws securing the front, back
and sides of the liner bottom.
4. Pull the compartment liner bottom forward.
5. Reverse steps 1-4 to replace.
Compartment
Liner Bottom
FIGURE 2